5. Physical installation top cooler
Image 5-18
2. Remove the cooler units again.
3. Take both removed screws during the start of the assembling procedure and reuse them as fixation screws for the cooler units.
4. S lide in the cooler units again and fixate with both removed screws.
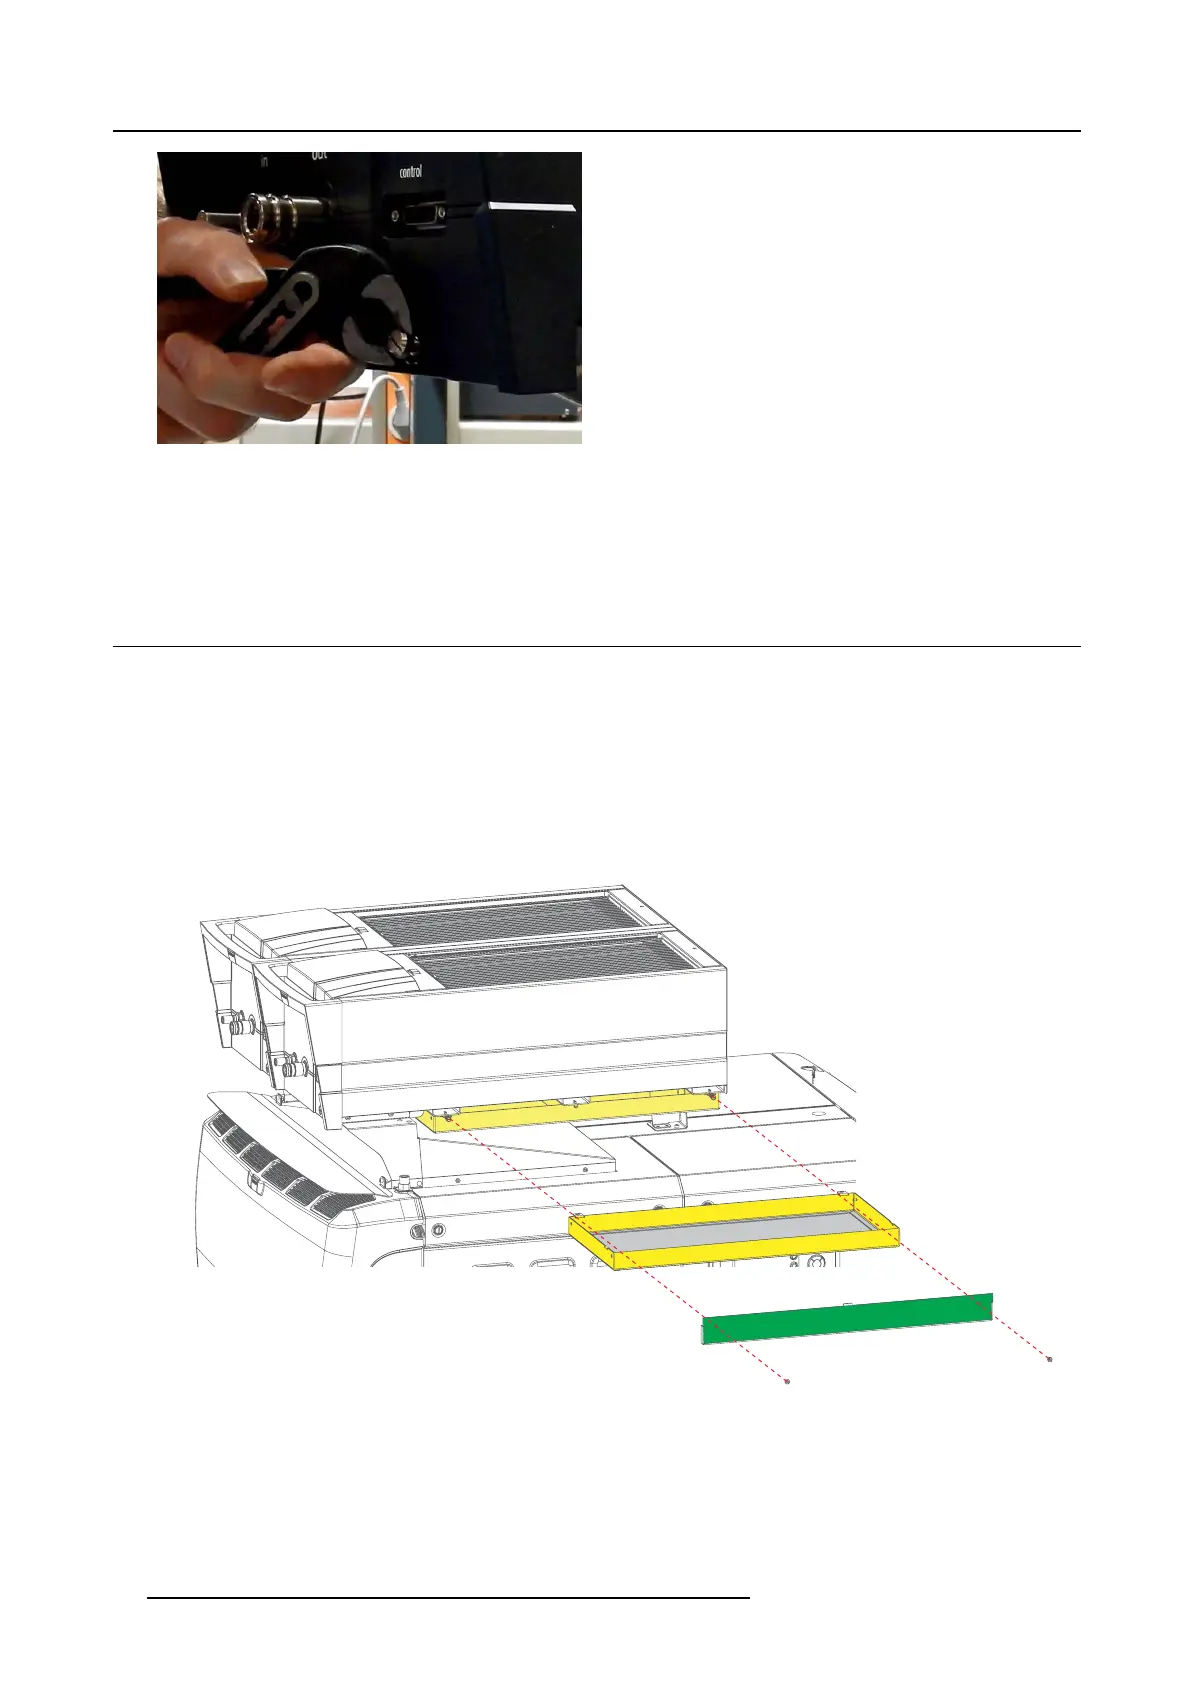
5.6 Mount the filters
Necessary tools
Flat screw driver (if screws are too difficult to loosen by hand)
Necessary parts
2xfilters
How to insert
1. Turn out both screws and remove the cover plate.
Image 5-19
2. S lide in a filter.
Look to the airflow sticker for the correct orientation. Airflow is up.
48
R5906753 DPXK BLP SERIES 20/11/2017