4. Physical installation projector
4. PHYSICAL INSTALLATION PROJECTOR
About this chapter
This chapter des cribes how the set up of the projector has to be don e.
Overview
• Positioning the DPxK B LP se ries projector at port window
• Access to the power connection
• Power input setup of the D PxK -36BLP
• Connecting the DPxK-17/23BLP with the power net
• Connecting the DPxK-36B LP with the power n et
• Power loop through to the projector electronics
• Connecting a UP S to the projector electronics
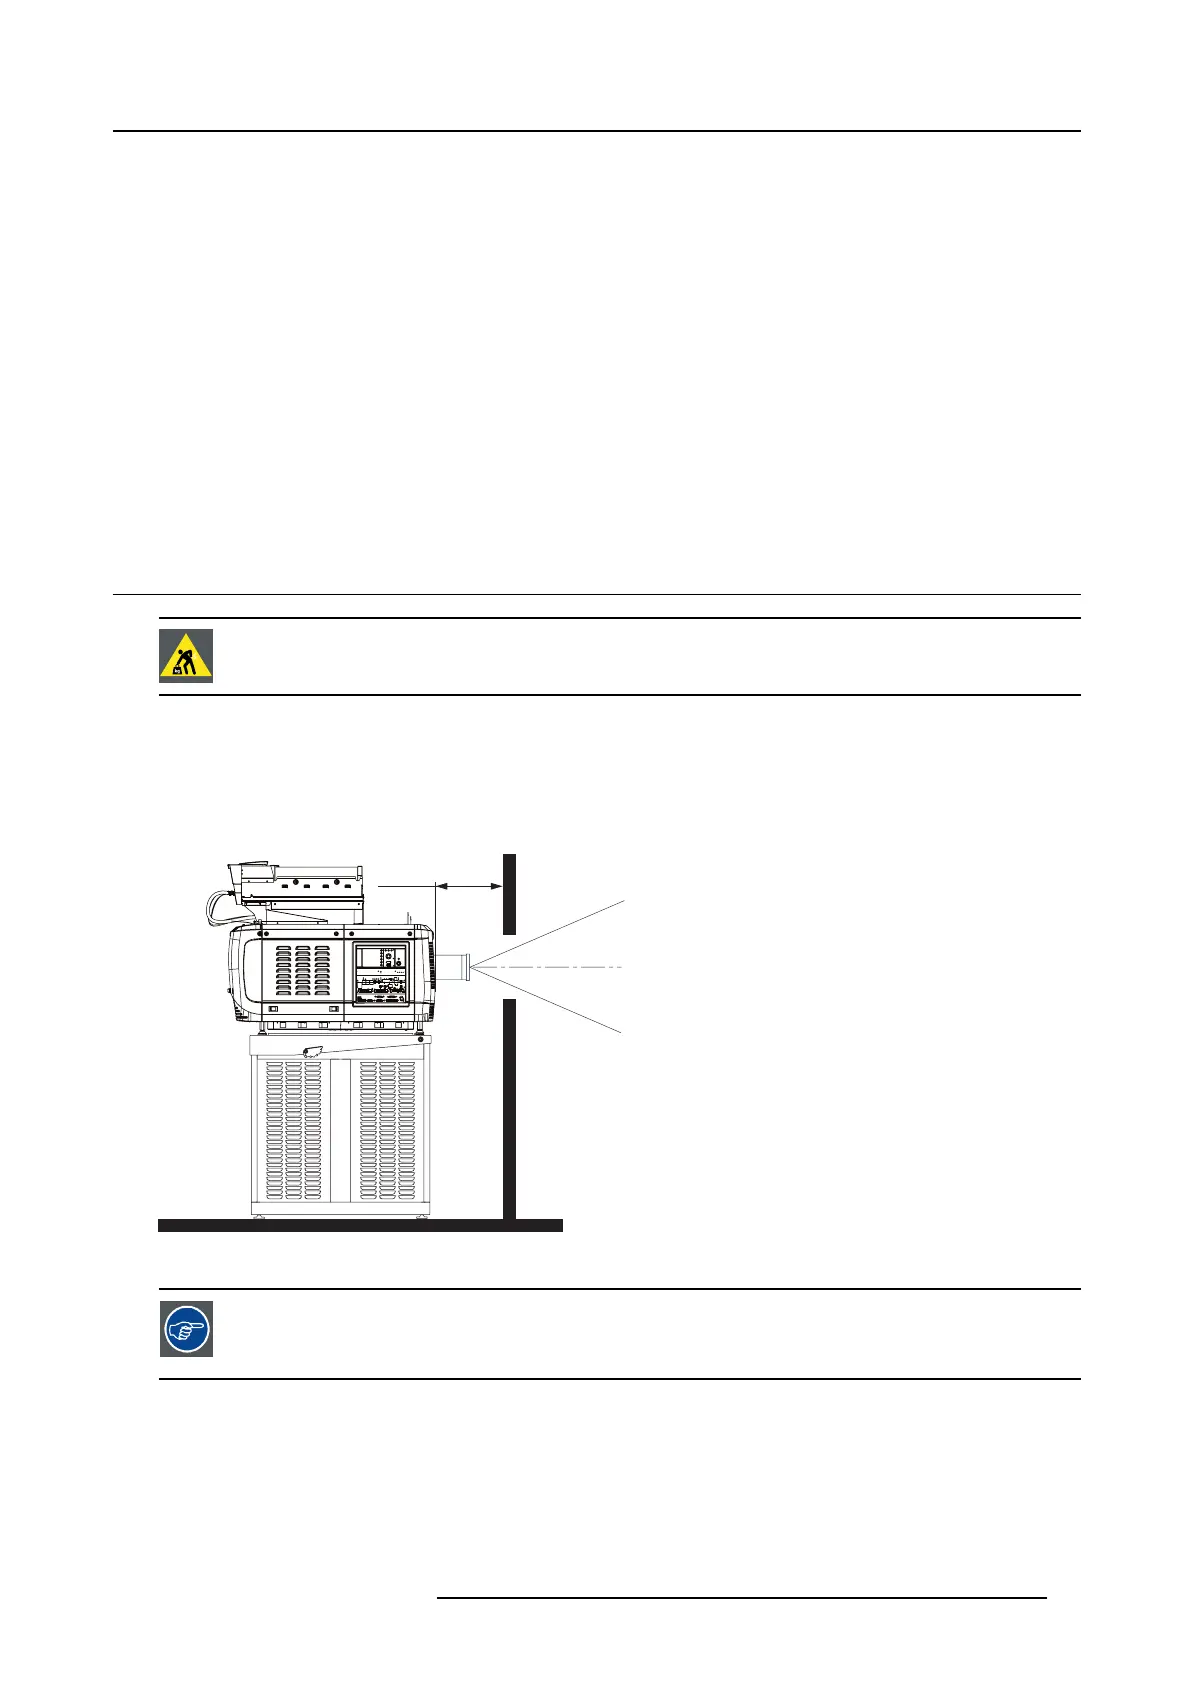
4.1 Positioning the DPxK BLP series projecto r at port window
WARNING: Th e installation of the DPxK BLP series projector req uires at least 4 persons.
General guide lines
• Use a solid pedestal to put the DPxK B LP series projector on. Ensure that the pedestal can handle the weight of the projector
and that all feet of the projector are captured.
• The pedes tal should be placed in front of the port window wall in a manner that t
he projector front cover is at a minim um distance
of 20 centimeters from the port window.
20 cm
Image 4-1
Positioning at port window
Barco o ffers a ped estal for the DPxK BL
P-series p rojector. This u niversal pedestal allows a solid and easy
setup of the projector. The universal p edestal has a separate compartment to install the UPS unit (if available)
for the DPxK BLP- series projector. Futhermore, the u niversal pedestal contains a standard 19” rack to build
in the projector peripherals like
alternative co ntent switchers.
Necessary tools
• 14 mm wrench
• 17 mm wrench
Projector centering
1. If the projector is standalone in front of the port window, center the projector with the theatre screen (see ref A image 4-2).
R5906753 DPXK BLP SERIES 20/11/2017
27