9. ICMP
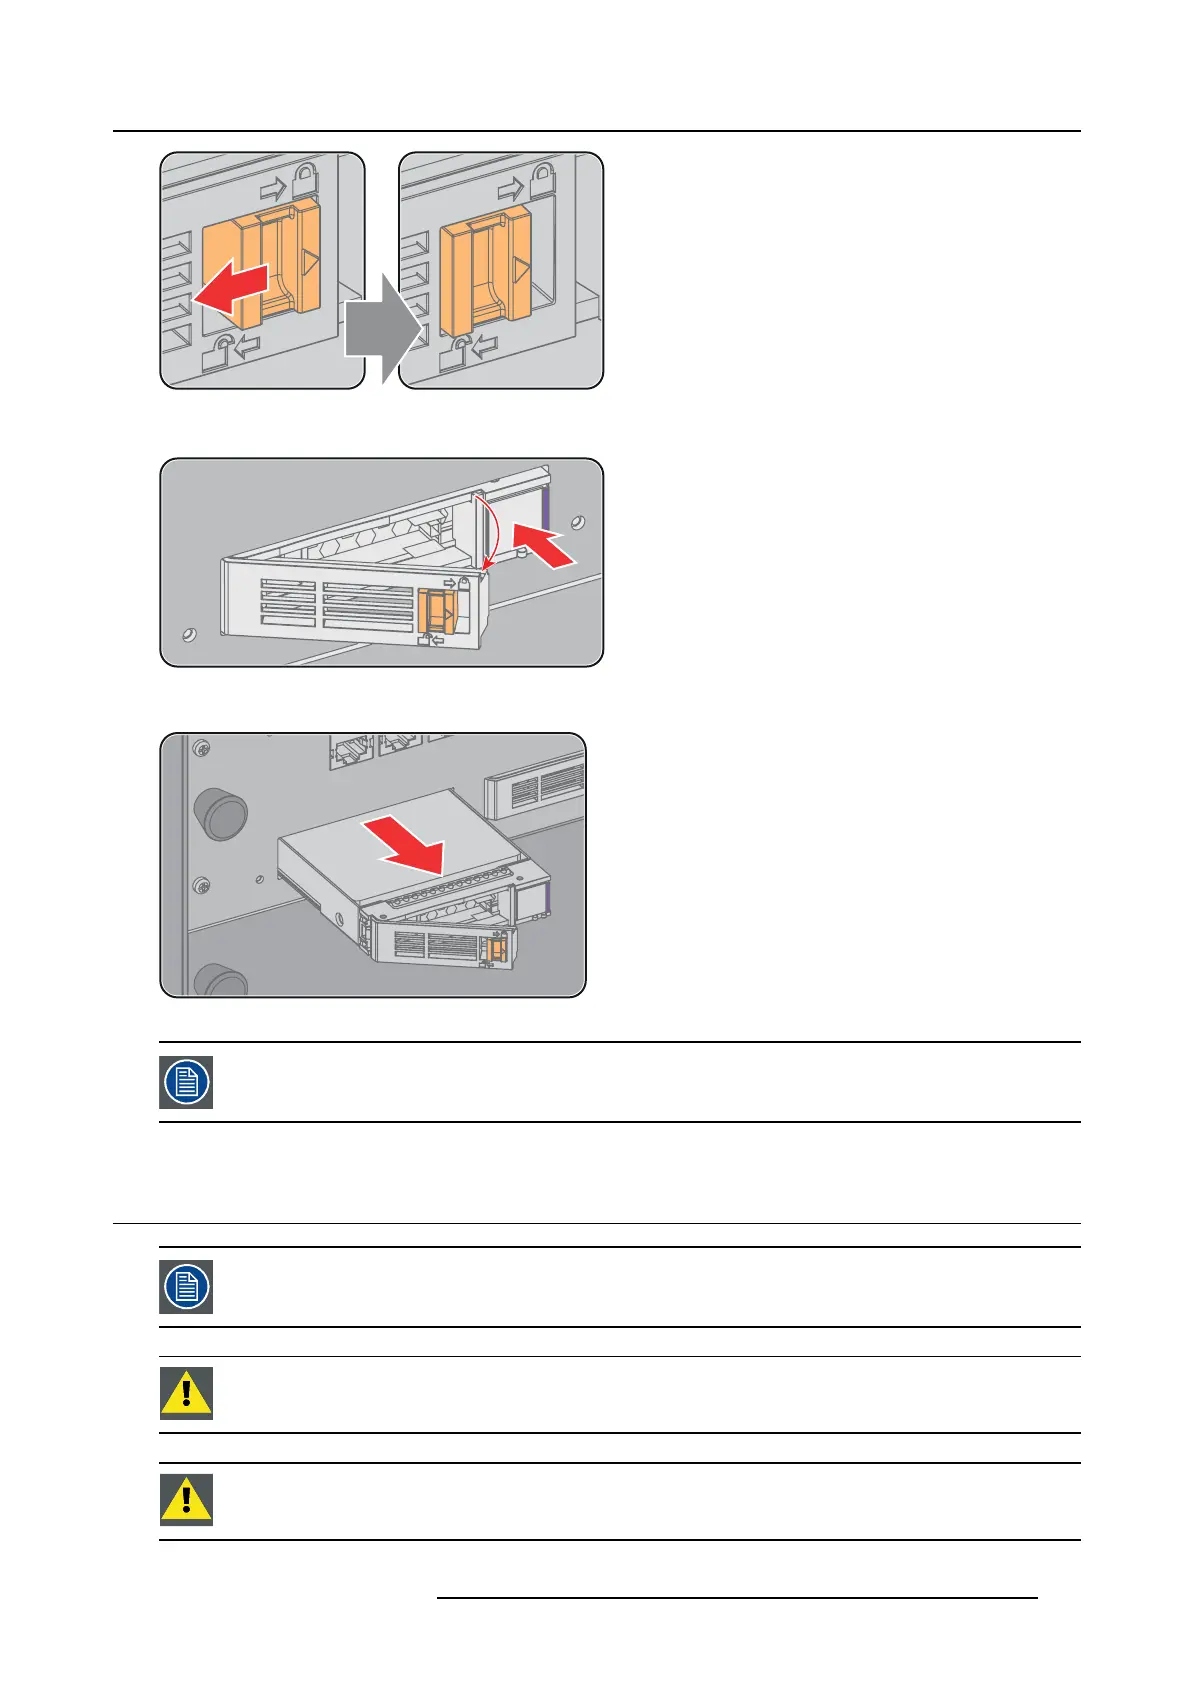
Image 9-12
3. P ush the unlock b utton to open the handle.
Image 9-13
4. P ull the HDD out of its slot.
Image 9-14
To install the HDD see p rocedure "Installing a HDD into the ICMP", page 111.
9.14 Installing a HDD into the ICMP
This procedure assumes t hat the HDD slot of the ICMP is em pty. If not, s ee procedure "Remo ving a HDD from
the ICMP", pag e 110.
CAUTION: Always use a new empty spare part HDD approved by Barco to replace a m alfunction HDD. Do not
use a HDD from another ICMP HDD set.
CAUTION: Always make sure that all HDDs in the ICMP HDD set have the same storage capacity. S ee label
on top of the HDD to know the storage cap acity.
R5906753 DPXK BLP SERIES 20/11/2017 111