6. Physical installation stand alone cooler
Wall mounting
To install the standalone cooler in wall mounting mode follow this procedure:
1. P lace the stand alone frame against the wall (side indicated with 1) and m ark the drilling h ole. A ny hole in the frame can b e used
as fixation point but mak e sure to divide the fixation point over the complete frame.
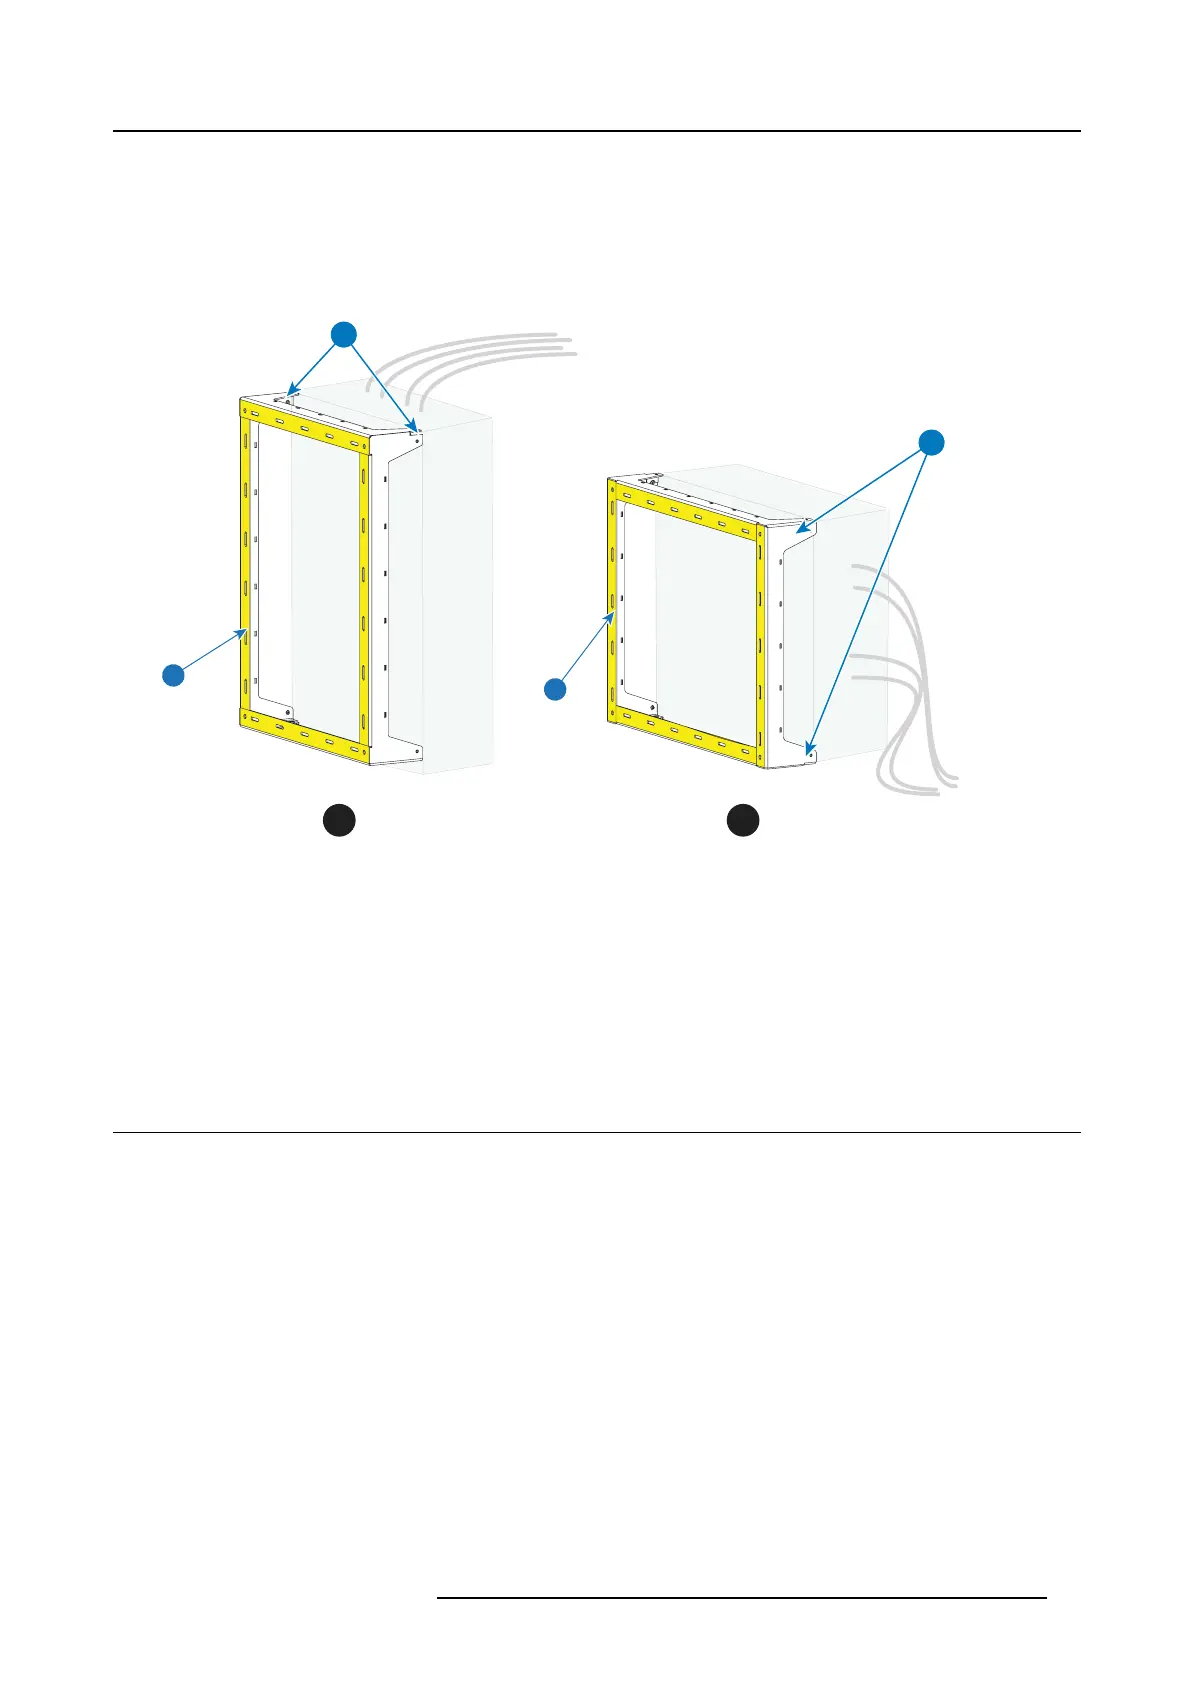
It can be mounted in portrait mode (A) or in landscape mode (B).
Note: In po rtrait mode the coolers must be m ounted with the c ooling tubes up. In landscape mode the cooler mus t be mounted
with the cooling tubes to the left.
U
1
1
U
Image 6-9
1 Wall side
U U b ra ckets location
A Portrait mode
B Landscape mode
When mounting the cooler asse mbly, the U
brackets which will be mounted on the housing must be fixed to the indicated position
(U) on the frame.
- For portrait mode the U brackets must be mounted on top (cooling tubes will be facing upwards) .
- For landscape mode the U brackets are mounted o n the left side (cooling tubes will be facing to the left).
Continue with "Installing the brack ets on the cooler housing", page 55.
6.5 Installing the brackets on the cooler housing
Necessary parts
• 2 front brackets (U-brackets)
• 2 equ al rear brackets
• 4HexScrewsM5x8
• 4 Hex Screws M5x12
How to install the brackets
1. F ixate the U- bracket (on both sides) to the side of the cooler housing with 2 screws (M5x12).
R5906753 DPXK BLP SERIES 20/11/2017
55