7. Lenses & lens holder
3
F
Image 7-35
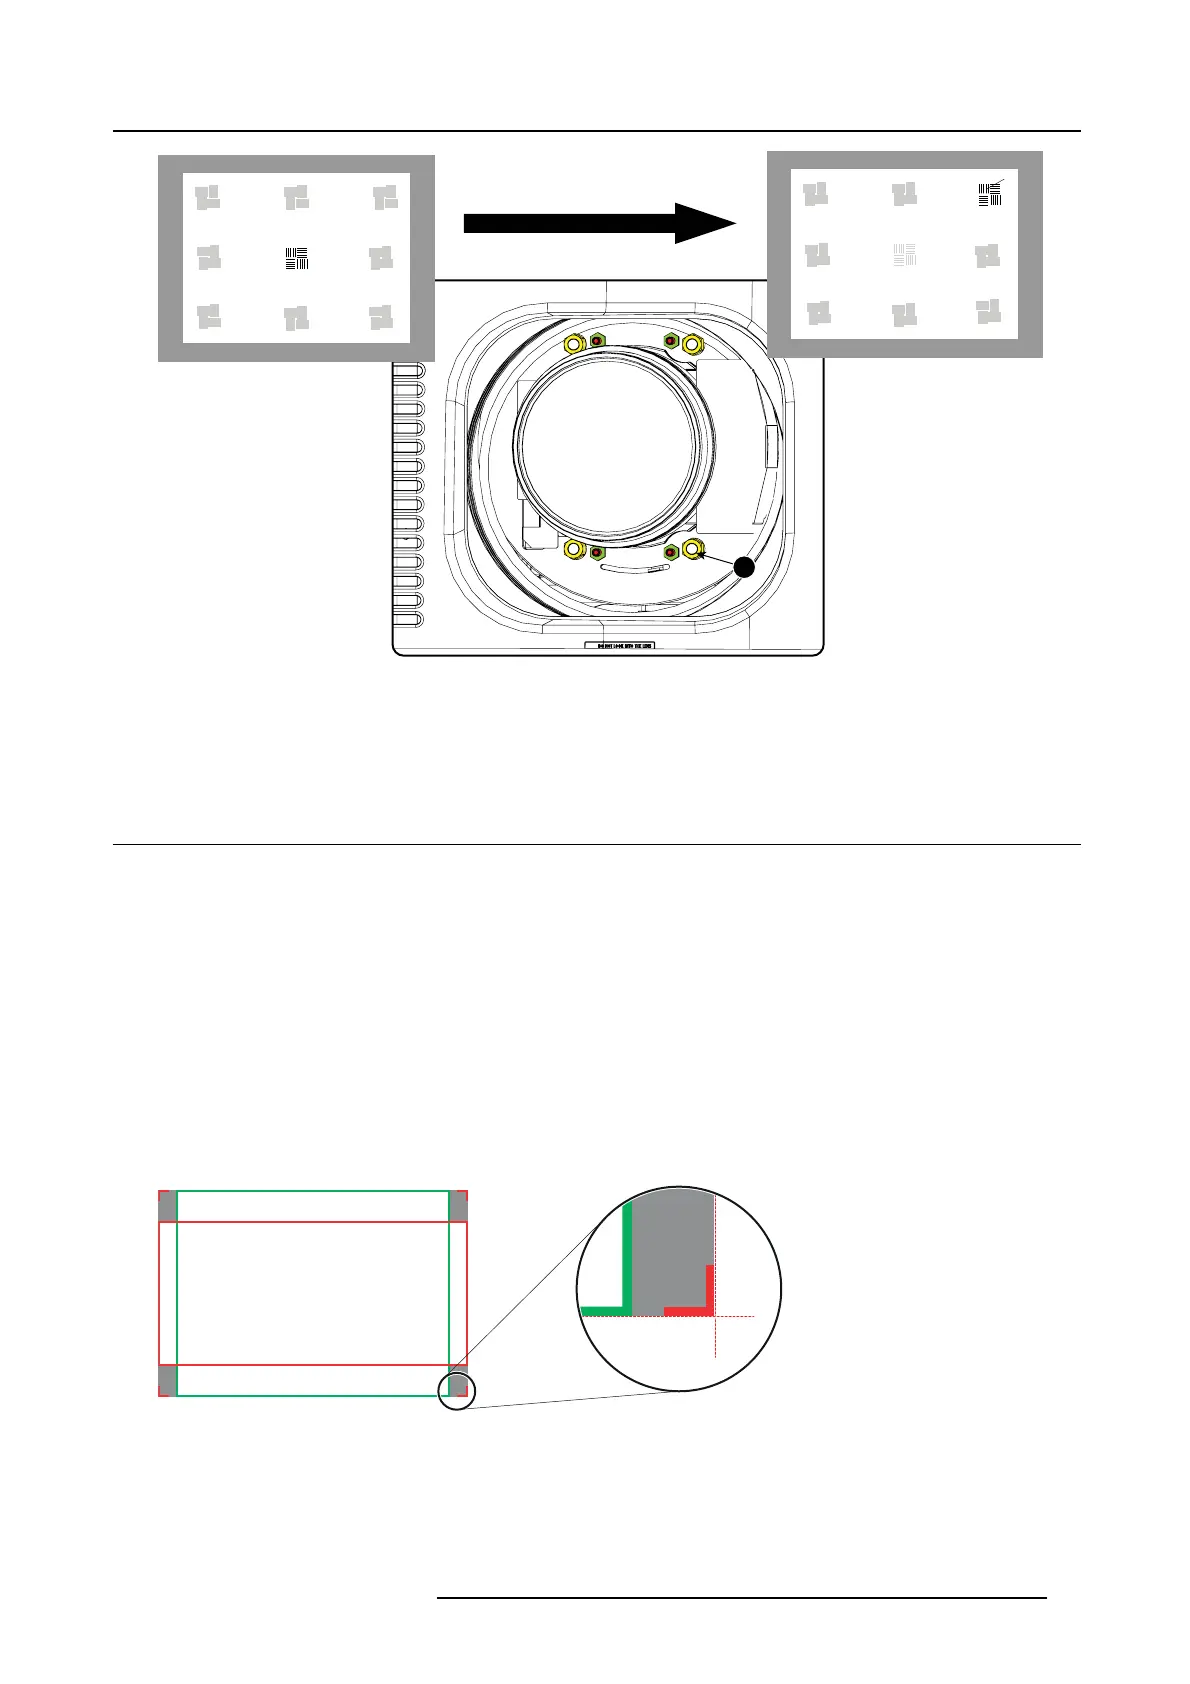
Corner focusing
9. Repeat from s tep 6 until the projected focus pattern is as sharp as possible in the center, left, right, top and bottom of the screen.
10.C ontinue with the Fixation of the lens holder front plate procedure.
7.8 Fixation of the Len s Holder front plate
When fixing the Lens Holder front plate
After performing the procedure for S cheim pflug adjustment or B ack Focal Length adjustment the Lens Holder front plate must be
secured in such a way that it doesn’t disturb the result of the adjustment.
Necessary tools
• 10mm nut driver.
• 3mm Allen wrench.
• 13mm nut driver.
How to fix the Lens Holder front plate
Start the fixation as follows (steps mu st be followed strictly) :
1. P roject the framing test pattern for FLAT & SCOPE .
2. Z oom the projected im age until the edges of the projected test pattern matches with the edges of the projec tion screen.
FLAT
SCOPE
Image 7-36
3. Turn in the three set sc rews indicated with r eference 11 image 7-37 without disturbing the projected image. Tighten lightly . Do
not turn in the set screw at the lower left of the Lens Holder!
Note: Ensure that the edges of the projected test pattern r emain in p lace on the screen. Any movem ent of the image will affect
the Scheim pflug adjustment.
4. F asten the lock nut (reference 21 image 7 -37) of the three set screws. Use a 10mm nut driver. Ensure the image does n’t move.
R5906753 DPXK BLP SERIES 20/11/2017
77