CALREC Putting Sound in the Picture 107
Setting Up autofaders for use
There are 256 autofaders in the Apollo
system. GPIs are assigned to control
one or more of these autofaders when
they receive the required trigger signal.
The autofaders can then be assigned to
control one or more faders on the surface.
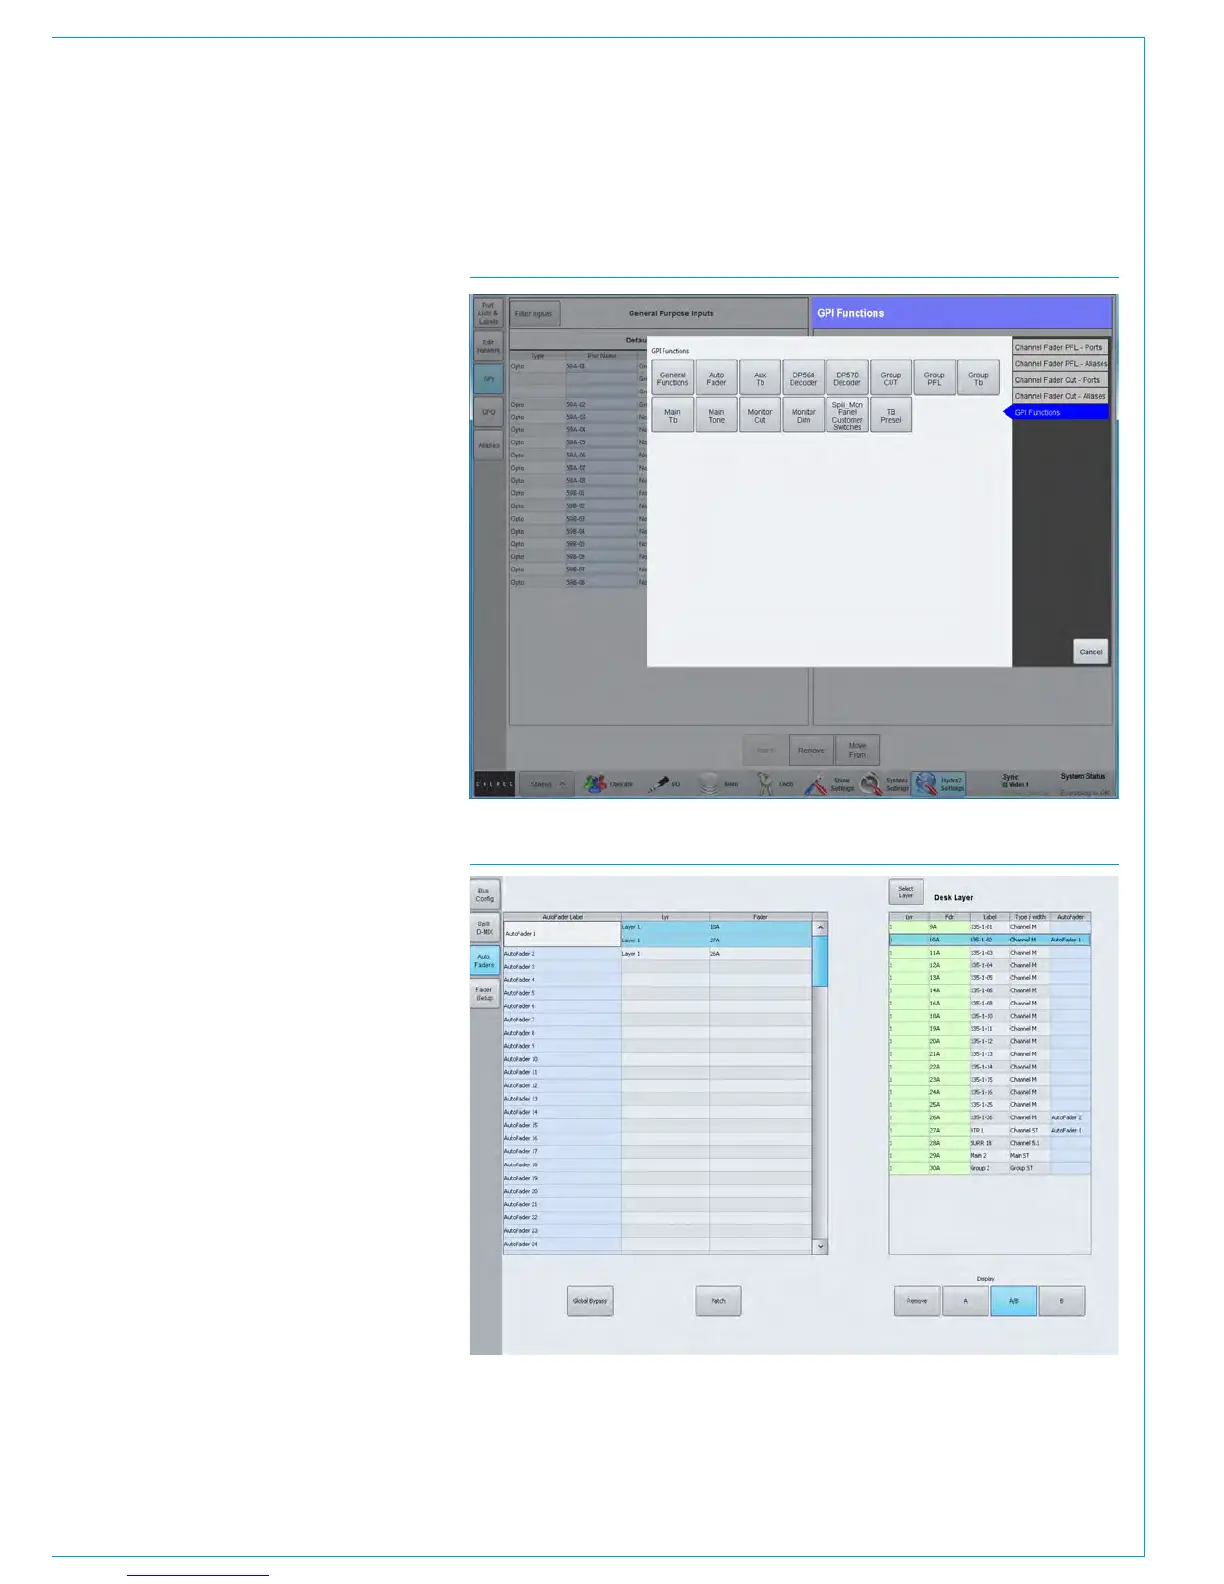
Assigning GPI’s to autofaders
GPIs are assigned to autofaders in the
>Hydra2 Settings>GPI section of the
main application as shown in Fig 2.
The ‘Filter Inputs’ button will bring up a
popup which lists all available Hydra2 I/O
boxes that have the GPIO module fitted.
Selecting one will populate the left hand
side of the screen with the opto-inputs
available in that box.
The ‘Filter Functions’ button brings up a
popup with groups of available functions
that can be controlled by the GPIs. Select
‘AutoFader’ to populate the right hand
side of the screen with the available
autofaders.
A single GPI may control any number of
autofaders, so assignments can be made
one to one or one to many. Select the
required GPI from the list on the left and
any number of autofaders from the right.
Now touch the ‘Patch’ button.
To remove a connection, select the
connected autofader from the GPI list on
the left and touch remove.
Assigning autofaders to faders
Once the relevant GPIs have been
assigned to autofaders, the autofaders
can be assigned to control faders
on the surface. This is done in the
>Operate>AutoFaders screen in the main
application, as shown in Fig 3.
The Autofaders are listed at the left side
of the screen, and the surface faders are
listed at the right.
FIG 2 - PATCHING GPIS TO AUTOFADERS
FIG 3 - ASSIGNING AUTOFADERS TO FADERS