Control Panel Modes
46 APOLLO
Digital Broadcast Production Console
WILDS MODE
WILDS mode allows the user to
configure custom wild controls within
the Assign and single Fader panels.
It requires another panel in that
User section to use as the selection
source.
Setting Up Wilds mode
To access Wilds mode across both the
Assign and single Fader panels, select the
SET UP WILDS key on the modes row
whilst in WILDS mode. If WILDS mode
is not selected, then the SET UP WILDS
key is shown as SET UP FADER WILDS
and solely acts on the single Fader panel
see “Setting Up Fader Wilds” on page
48 for details.
Dual fader panels will only show the
SET UP WILDS key if WILDS mode is
engaged, as Fader Wilds are not available.
To show a panel is in SET UP WILDS
mode , the fader display toggles between
normal and ‘Setting Up Wilds’ .
To leave Set Up Wilds mode, press the
BACK TO MODES touch key in the
modes row.
Selecting Wilds
Any combination of Wildable path controls
can be assigned to the rotary controls and
buttons in the Wild assignment areas in
Fig 1.
In SET UP WILDS mode, press the rotary
control or button of the assignable wild to
be set which will flash red to indicate that
selection for change. Note that only one
rotary control or button can be selected at
the same time in the same column.
A range of controls can be selected by
pressing and holding two similar wild
controls on the same row at the same
time.
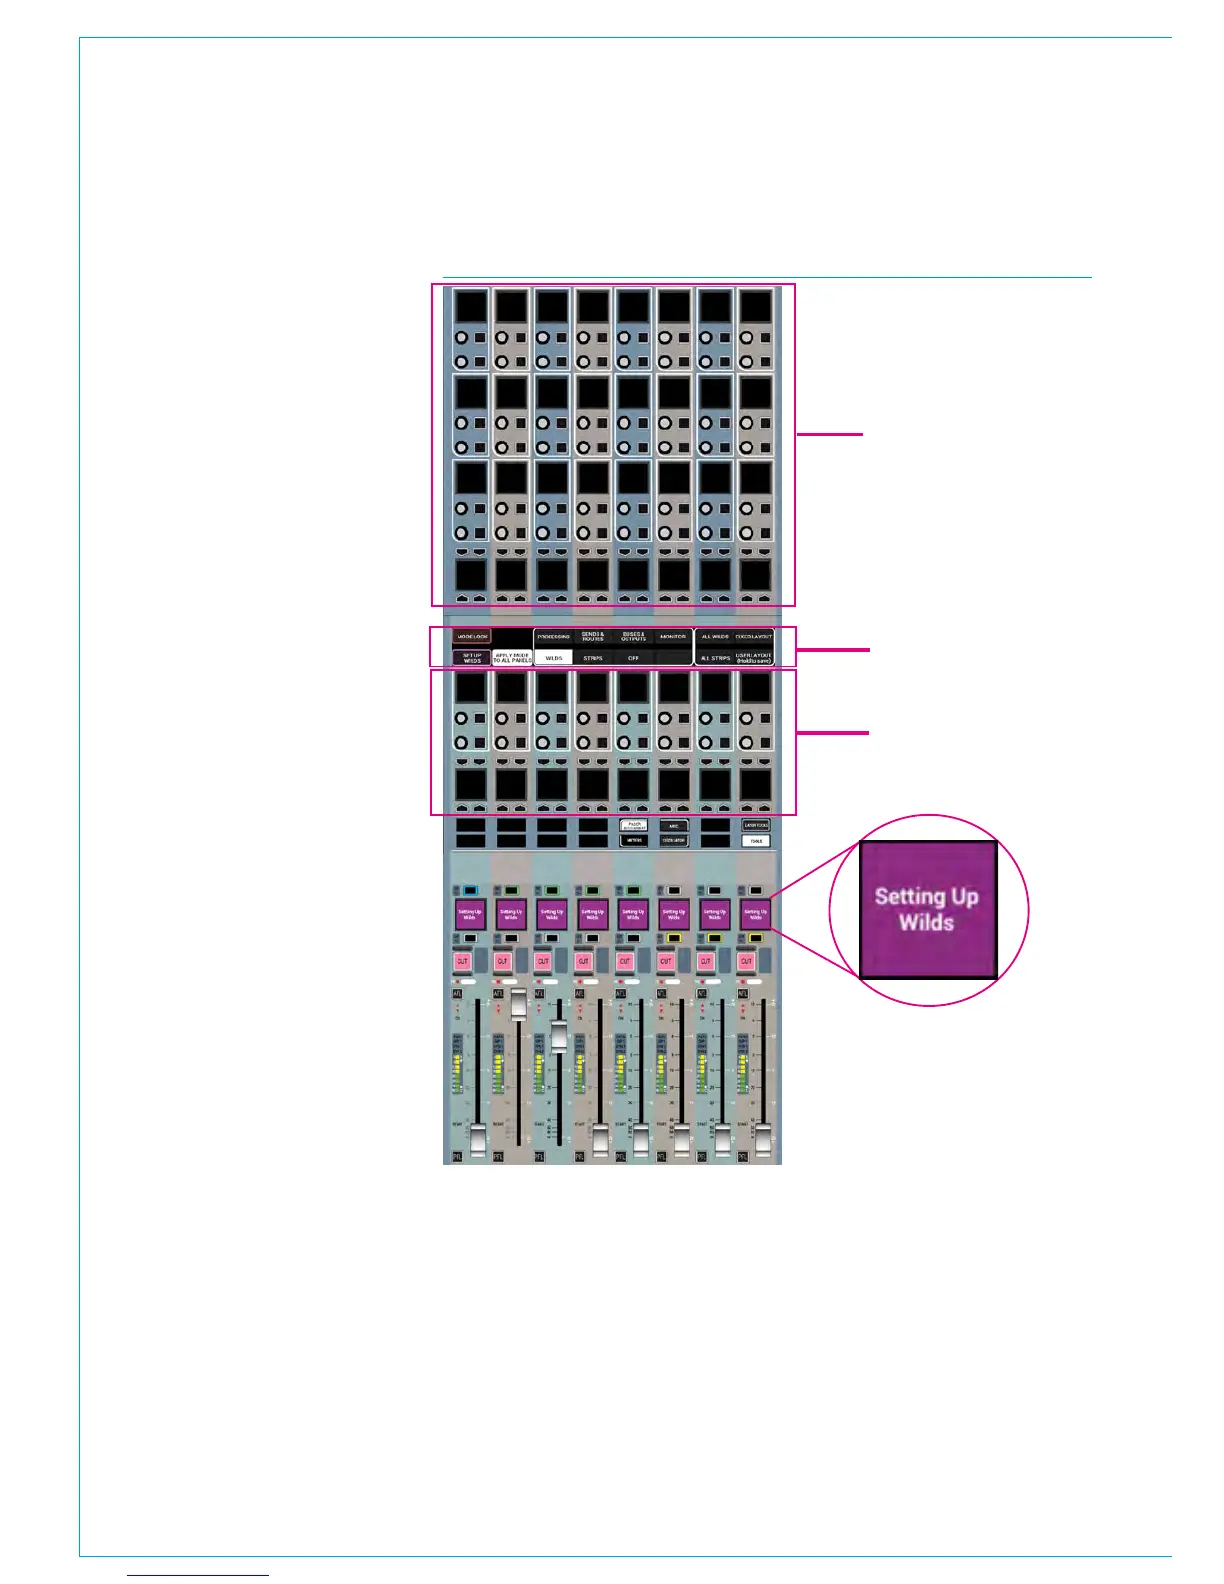
FIG 1 - WILD ASSIGNMENT IN WILDS MODE
Modes row
Wild assignment
area on Assign
Panel
Fader Wild
assignment area
on single Fader
Panel
If the LINK WILD SELECTIONS button is
selected, any subsequent press of a wild
control will select the entire row - through
all layers of the console - and put them all
into selected wild assignment flashing red.
Memorising Wilds
Once wild assignments have been created
they are stored in memories and can be
copied elsewhere using the Copy Path
tool or using Presets which also allows
Wilds to be transferred between Apollo &
Artemis consoles.