InteliDrive Lite, SW version 1.9
ID-FLX-Lite-1.9r1 Reference Guide.pdf, ©ComAp – August 2015
3.4 Extension plug-in modules
3.4.1 Extension plug-in modules installation
To insert the module, you must open the cover first (use screwdriver to open) and then insert the
module into slot. Once you have inserted it, the module will snap under plastic teeth. It is supposed to
be installed permanently. Should you need to remove it, the safest way is to remove whole back cover
and than remove module manually.
For configuration of extension plug-in modules go to LiteEdit and press button in Modify
configuration window.
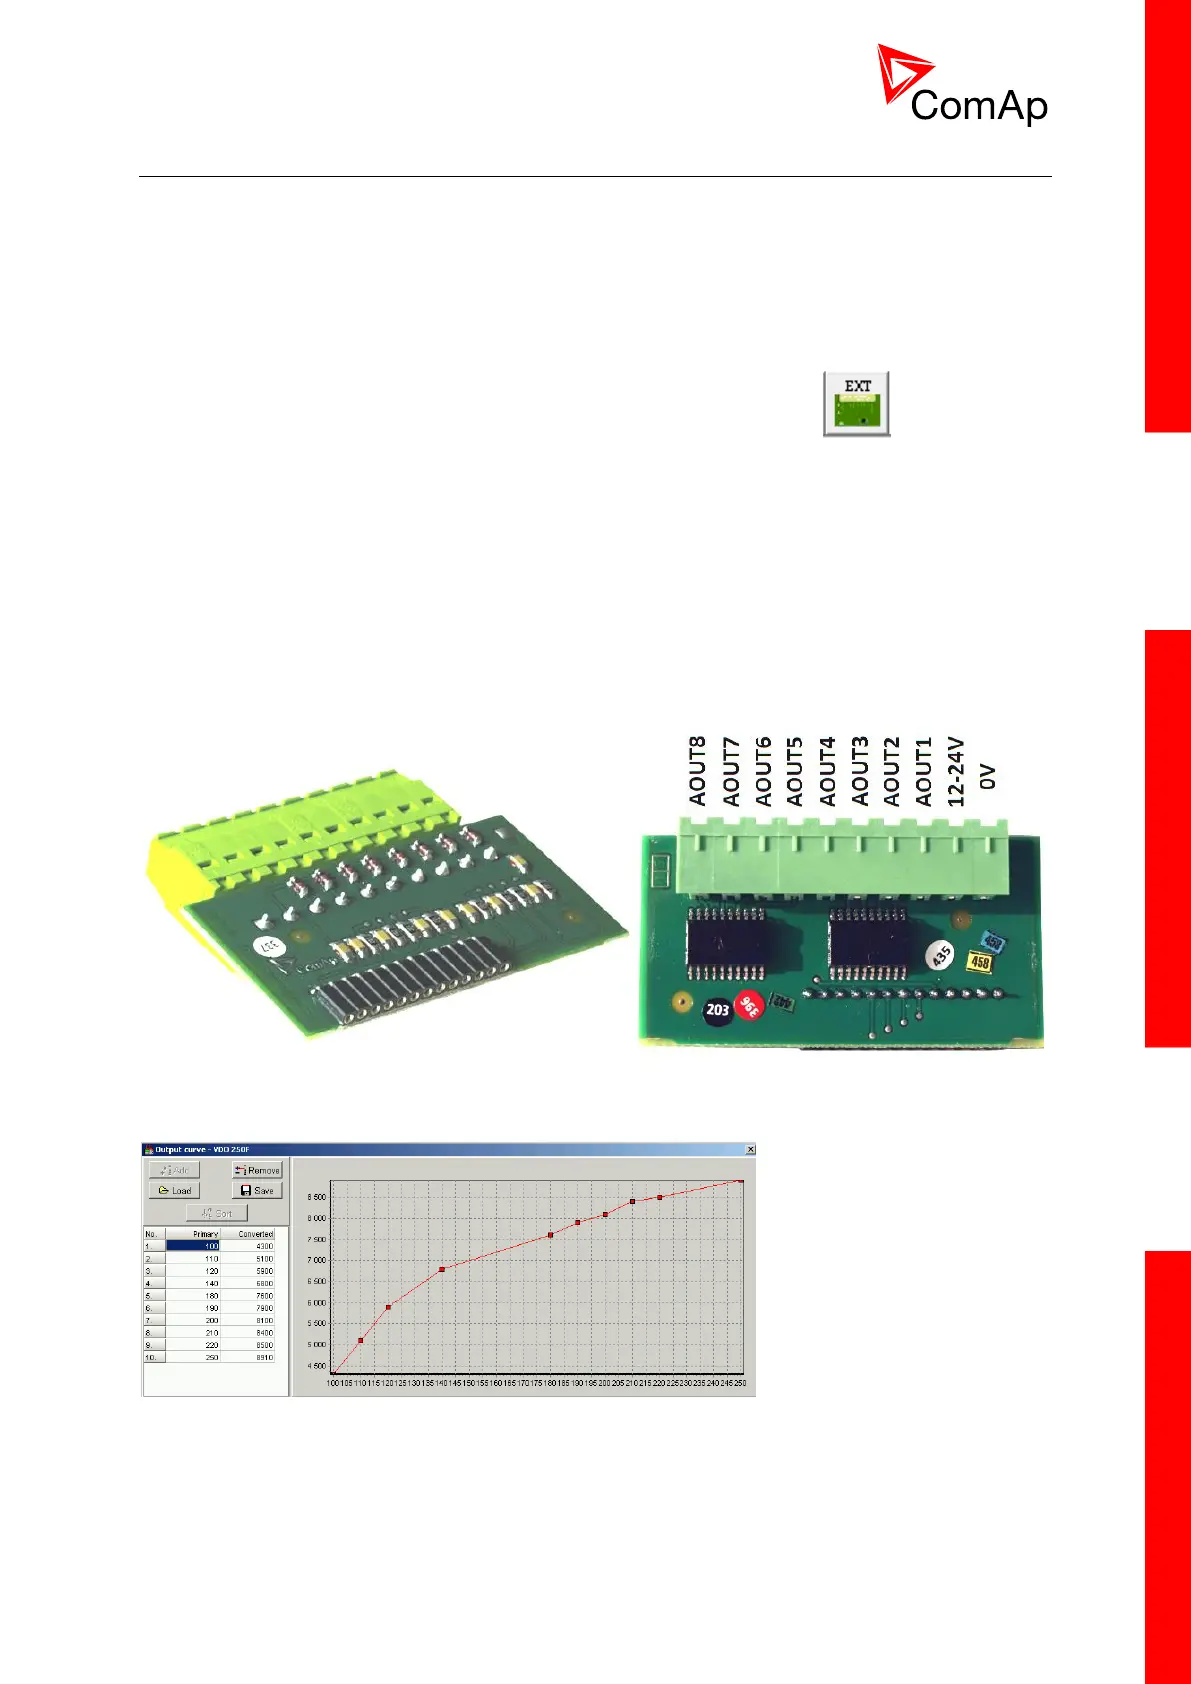
3.4.2 IL-NT AOUT8
IL-NT AOUT8 is optional plug-in card. Through this card can the controller drive up to 8 VDO style
industrial/automotive gauges. This is to provide visual indication of typically ECU values without
installing additional sensors on the engine. PWM signal emulates sensor which would be typically
mounted on the engine. Sensor/gauge curve and value are configured in LiteEdit PC tool. Any analog
value from the controller may be configured to the outputs. All outputs operate as PWM signal at
1200Hz.
Examples of default analog output curves: