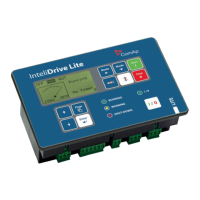
InteliDrive Lite, SW version 1.9
ID-FLX-Lite-1.9r1 Reference Guide.pdf, ©ComAp – August 2015
5.3 Display menus
There are 3 display menus available: MEASUREMENT and ADJUSTMENT and HISTORY in
Engineer interface and only MEASUREMENT in User interface.
Each menu consists of several screens. Press repeatedly PAGE button to select requested menu.
5.3.1 Switching between User and Engineer menus
Hold ENTER and then press PAGE to activate info Firmware screen and the panel LED test. Within
5s press PAGE to switch to Language selection screen and the second time PAGE to switch to User
interface selection. Use and to select appropriate interface and press ENTER
5.4 How to select the engine mode?
Use MODE or MODE to select requested engine operation mode (OFF – MAN – AUT)
5.5 How to view measured data?
1. Use repeatedly PAGE button to select the MEASUREMENT menu.
2. Use and to select the screen with requested data.
5.6 How to view and edit setpoints?
1. Use repeatedly PAGE button to select the ADJUSTMENT menu.
2. Use or to select requested set points group.
3. Press ENTER to confirm.
4. Use or to select requested set point.
5. Set points marked “*” are password protected.
6. Press ENTER to edit.
7. Use or to modify the set point. When or is pressed for 2 sec, auto repeat function is
activated.
8. Press ENTER to confirm or PAGE to leave without change.
9. Press PAGE to leave selected set points group.
5.6.1 How to change the display contrast?
Press ENTER and or at the same time to adjust the best display contrast
HINT
Only in MEASUREMENT screen.
5.6.2 How to check software revision?
Hold ENTER and then press PAGE. This activates the panel LED test and controller’s display is
switched to Firmware screen. On the display you can see (for 10 seconds) InteliDrive Lite Firmware
screen containing:
1) Controller name (see Basic setting group)