Appendix A Revision 4
CDM-760 Advanced High-Speed Trunking Modem MN-CDM760
A–8
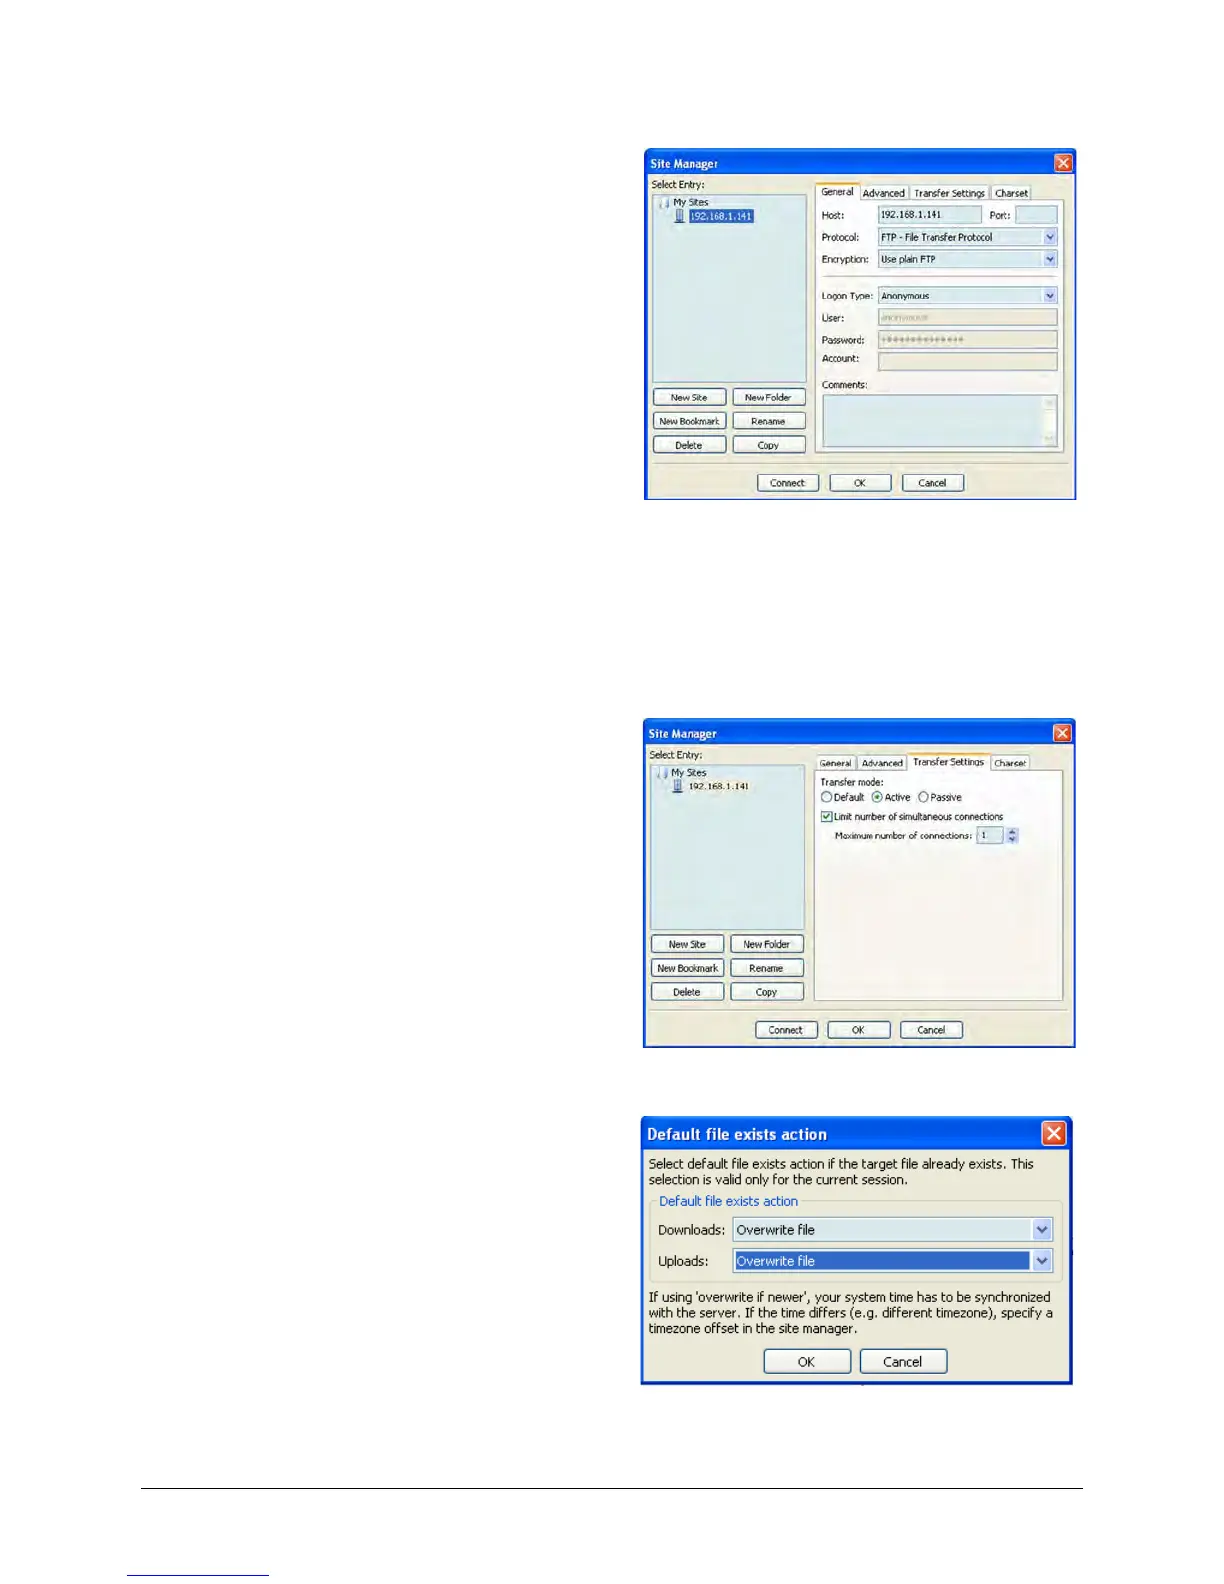
2. Select File → Site Manager... or click the
Site Manager icon (the first icon at the
far left on the Toolbar). The “Site
Manager” dialogue box appears:
3. Click [New Site] (located below the Select Entry: window) and enter a name (e.g., this
example uses the assigned CDM-760 Ethernet Management IP Address).
4. Select the “General” tab to display the dialog box and fill out the fields:
• For “Host:” enter a name (e.g., the CDM-760 Ethernet Management IP Address).
• For “Protocol:” make sure the drop-down list is set to “FTP – File Transfer Protocol”.
• For “Encryption:” make sure the drop-down list is set to “Use plain FTP”.
• For “Logon Type:” make sure the drop-down list is set to “Anonymous”.
5. Select the “Transfer Settings” tab to
display the dialog box:
• For “Transfer Mode:” click the
“Active” option button.
• Put a checkmark in the “Limit
number of simultaneous
connections” checkbox, and then
make sure the “Maximum number
of connections:” drop-down list is
set to “1” (the CDM-760 supports
only one FTP connection at a time).
Click [OK] to save the settings. The dialog box will close and you will return to the main
window.
6. From the main window, select Transfer
→ Default file exists action… The
“Default file exists action“ dialog box
appears:
Make sure that both the “Downloads:”
and “Uploads:” drop-down lists are set
to “Overwrite file”.
Click [OK] to save the settings. The
dialog box will close and you will return
to the main window.