TX1310 M1
Upgrade and Maintenance Manual 195
System board and components
14.2.2 Replacing the defective CMOS battery
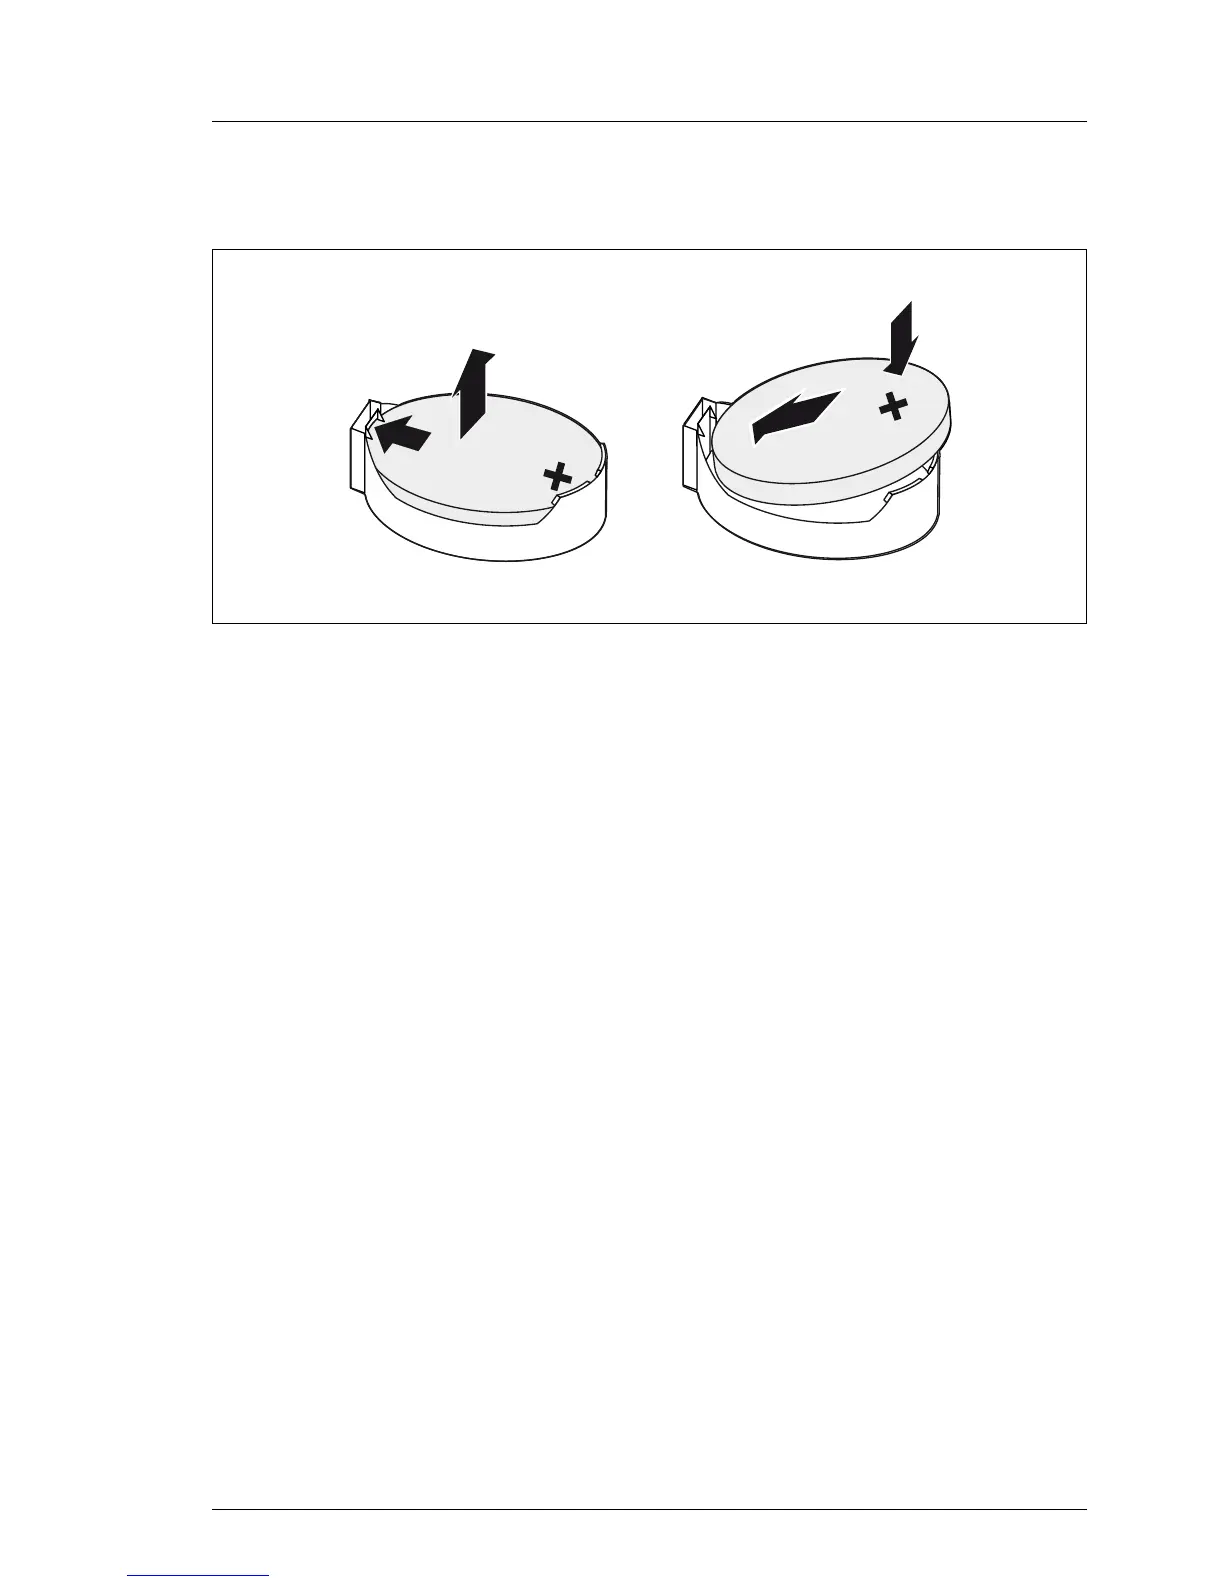
Figure 145: Replacing the CMOS battery
Ê Press the locking spring into direction of the arrow (1), so that the CMOS
battery jumps out of its socket.
Ê Remove the CMOS battery (2).
V CAUTION!
Sharp tools such as screw drivers might damage system board
components in case of slipping.
If the CMOS battery cannot be ejected without the help of a tool, it is
recommended to use a tooth pick.
Ê Insert a new CMOS battery of the same type into the socket (3) and (4).
14.2.3 Concluding steps
Ê Dispose of the CMOS battery in accordance with local regulations
concerning special waste.
Ê "Installing the HDD cage" on page 59
Ê "Installing the front cover" on page 48
Ê Install all removed accessible drives as described in section "Installing
accessible drives" on page 49.
Ê "Installing the side cover" on page 53
1
2
3
4

 Loading...