GE MEDICAL SYSTEMS PROPRIETARY TO GE
D
IRECTION 2294854-100, REVISION 3 LOGIQ™ 9 PROPRIETARY MANUAL
6-16 Section 6-7 - Brake Adjustment
6-7-2-4 Rear Wheel Removal Procedure
4.) Elevate the scanner by placing the bottle jack on the back frame on the side of the bottom shield of
the wheel you will be removing. You can also use a block of wood as a lever to raise the scanner
and place a second block of wood under the chassis to support the rear wheel off of the ground.
5.) Remove the four screws and remove the wheel from the scanner.
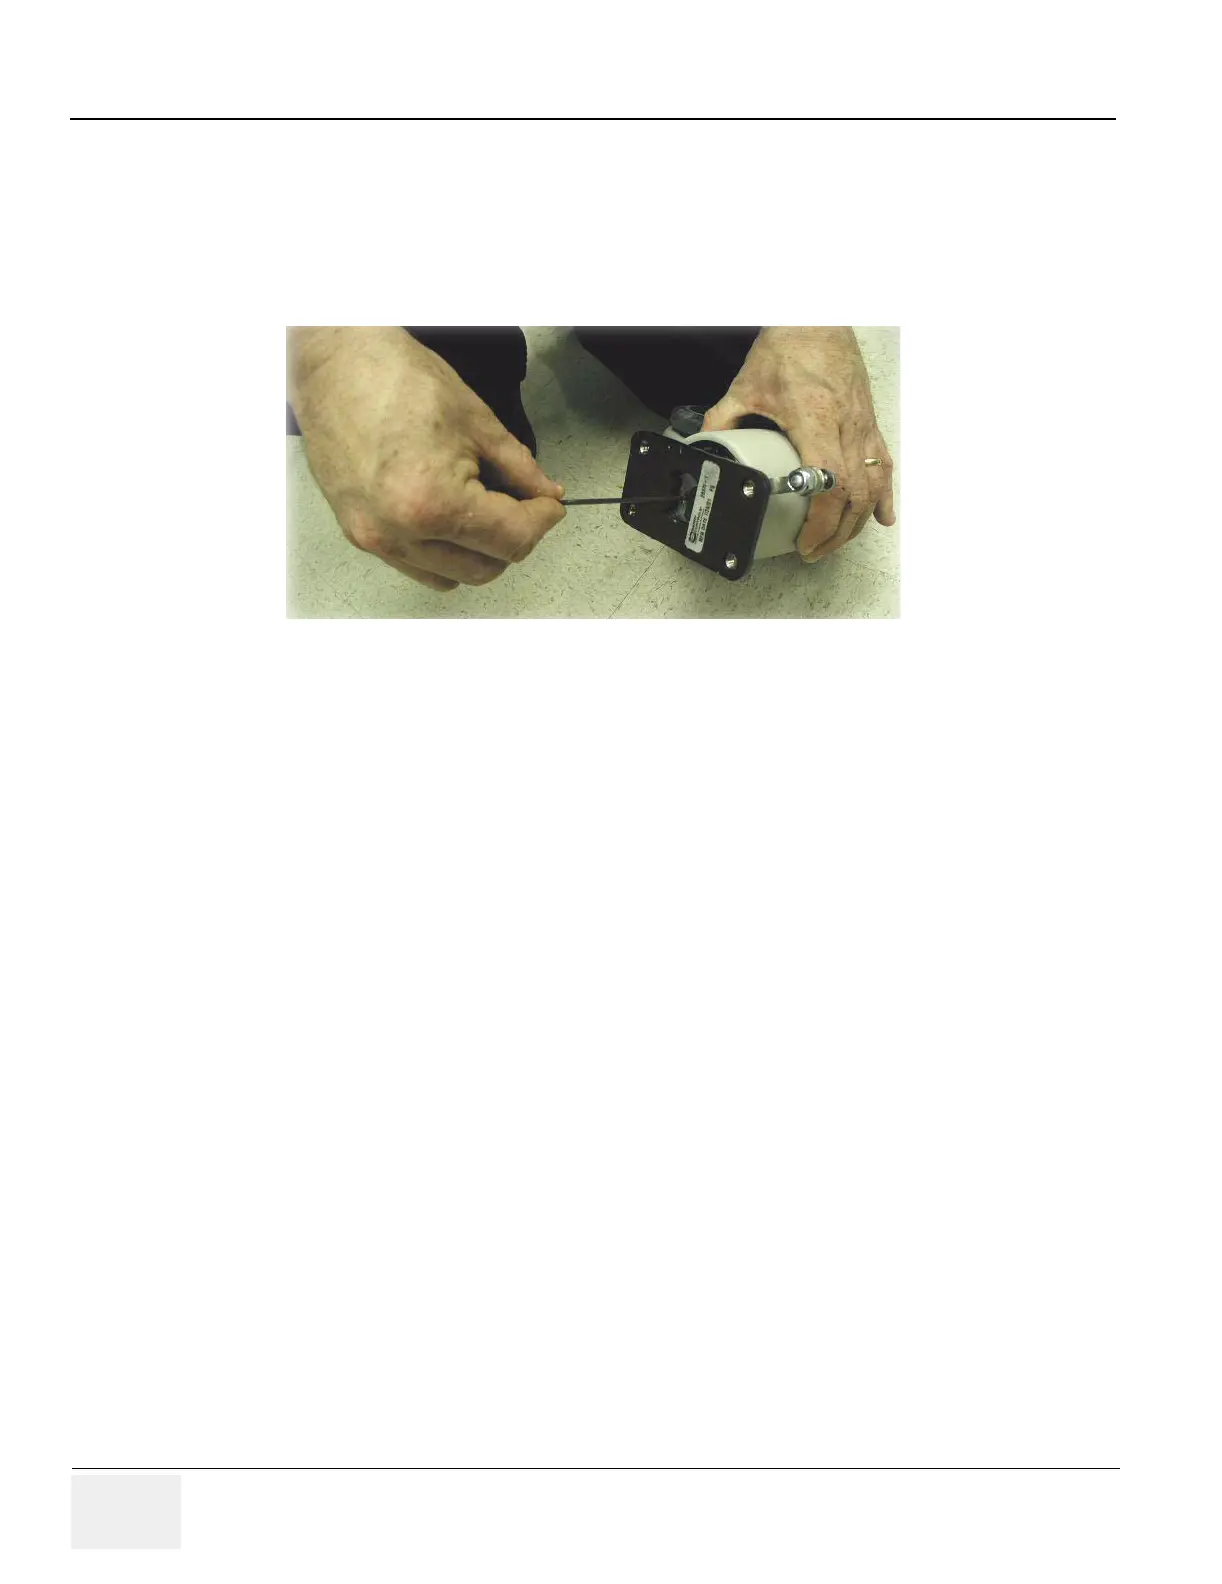
6.) Use an allen wrench to adjust the brake so it will properly “bite” and release the rear tire.
6-7-2-5 Rear Wheel Installation Procedure
1.) After adjusting the rear brake, install the rear wheel on the scanner. Hand tighten the four screws.
2.) Carefully lower the scanner and remove the bottle jack.
3.) Tighten the four screws using the weight of the scanner to provide resistance.
4.) Verify brake and scanner operation then replace all covers previously removed.
Figure 6-13 Rear Brake Adjustment