GE MEDICAL SYSTEMS PROPRIETARY TO GE
D
IRECTION 2294854-100, REVISION 3 LOGIQ™ 9 PROPRIETARY MANUAL
8-150 Section 8-36 - Rear Caster Replacement Procedure
8-36-4 Rear Caster Removal Procedure (cont’d)
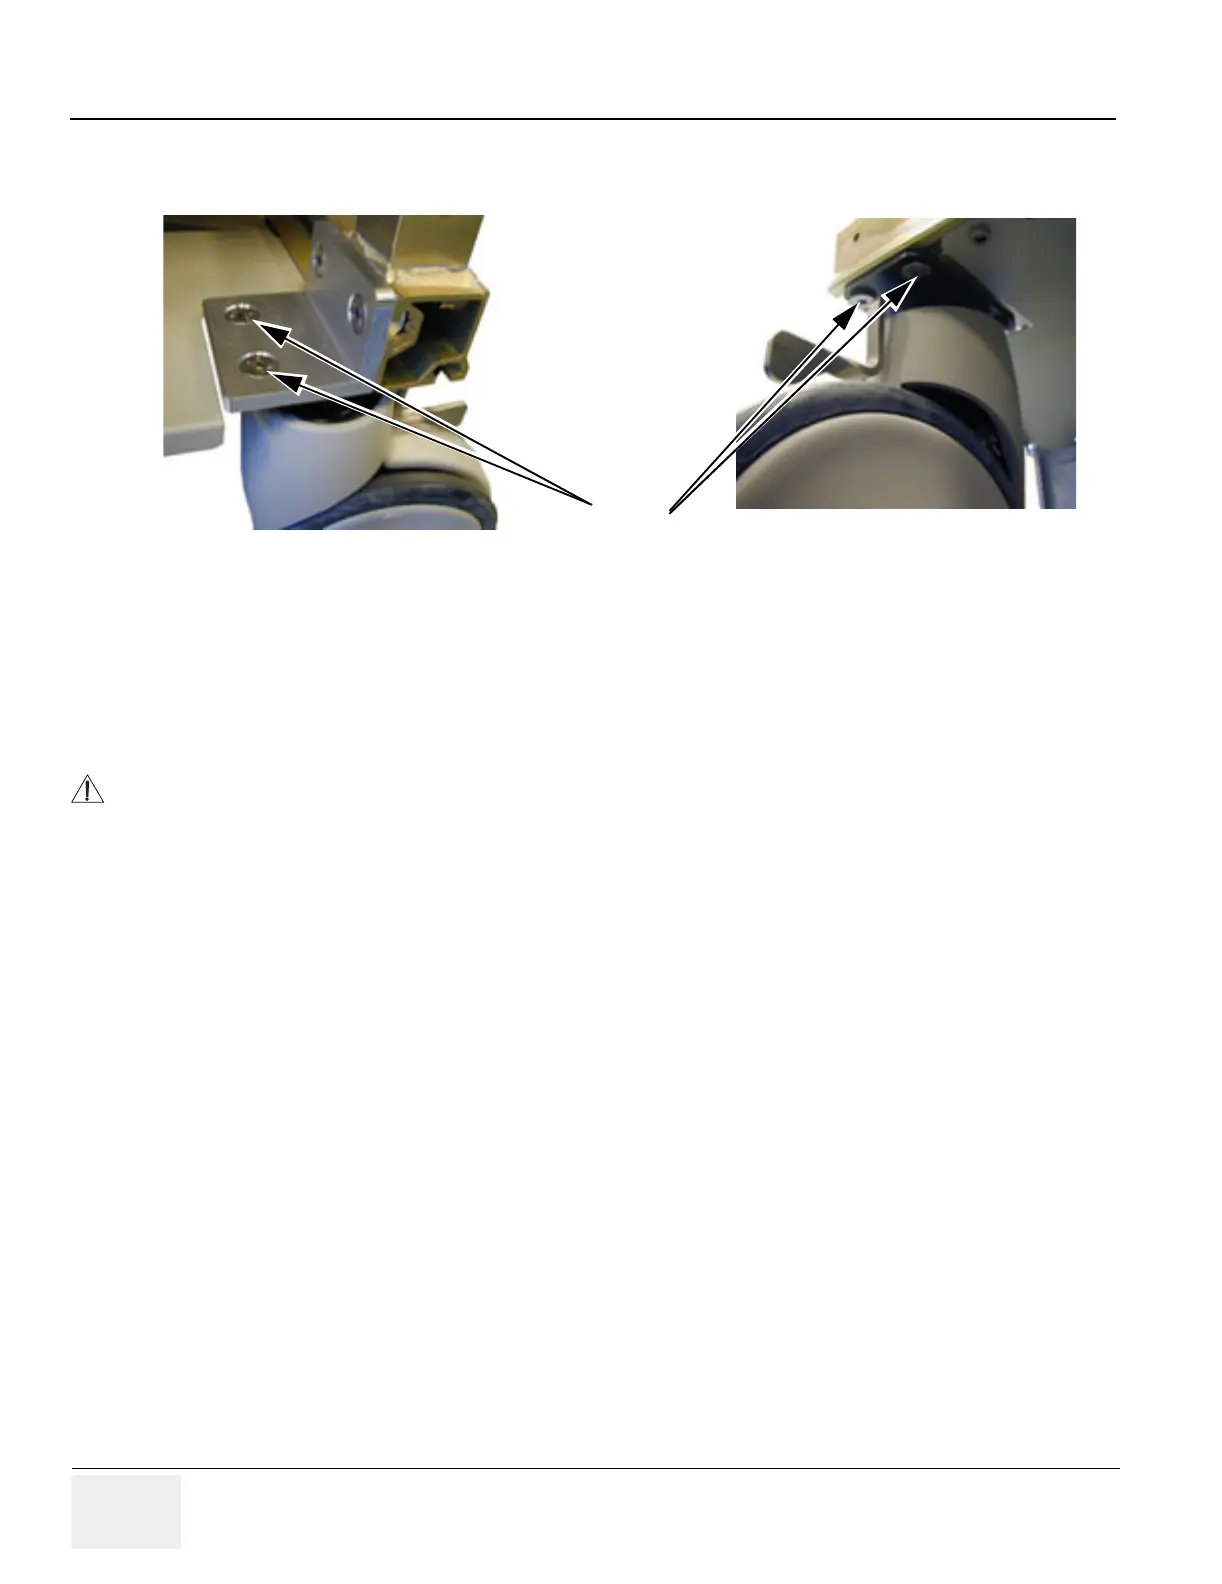
9.) Remove four (4x) screws fastening Caster.
10.)Remove Caster
8-36-5 Rear Caster Installation Procedure
1.) Replace the Caster and tightly fasten it with four (4x) screws.
2.) Remove the Wooden Wedge.
3.) Roll the system off the Bevel Edged Board.
4.) To replace the other Rear Caster, repeat all the steps from Front Caster Replacement Procedure
on page 8-151, but now using the Bevel Edged board and the Wooden Wedge on the other side of
the system.
5.) Install the Upper Rear Cover as described in Section 8-2-3 on page 8-7.
6.) Install the Lower Rear Cover as described on Section 8-2-6 on page 8-10 and Section 8-2-3 on
page 8-7.
7.) Install the Side Covers as described in Section 8-2-2 on page 8-5.
Figure 8-157 Rear Caster fastening
WARNINGWARNING
Use extreme caution in the next two steps. The scanner is unstable.
Screws