GE MEDICAL SYSTEMS PROPRIETARY TO GE
D
IRECTION 2294854-100, REVISION 3 LOGIQ™ 9 PROPRIETARY MANUAL
8-108 Section 8-26 - Upper Operator Panel Replacement Procedure
Section 8-26
Upper Operator Panel Replacement Procedure
8-26-1 Manpower
One person, 1 hour
8-26-2 Tools
Phillips screwdriver
8-26-3 Preparations
1.) Power Down/Shutdown the system as described in Section 4-3-2 on page 4-3
8-26-4 Upper Operator Panel Removal Procedure
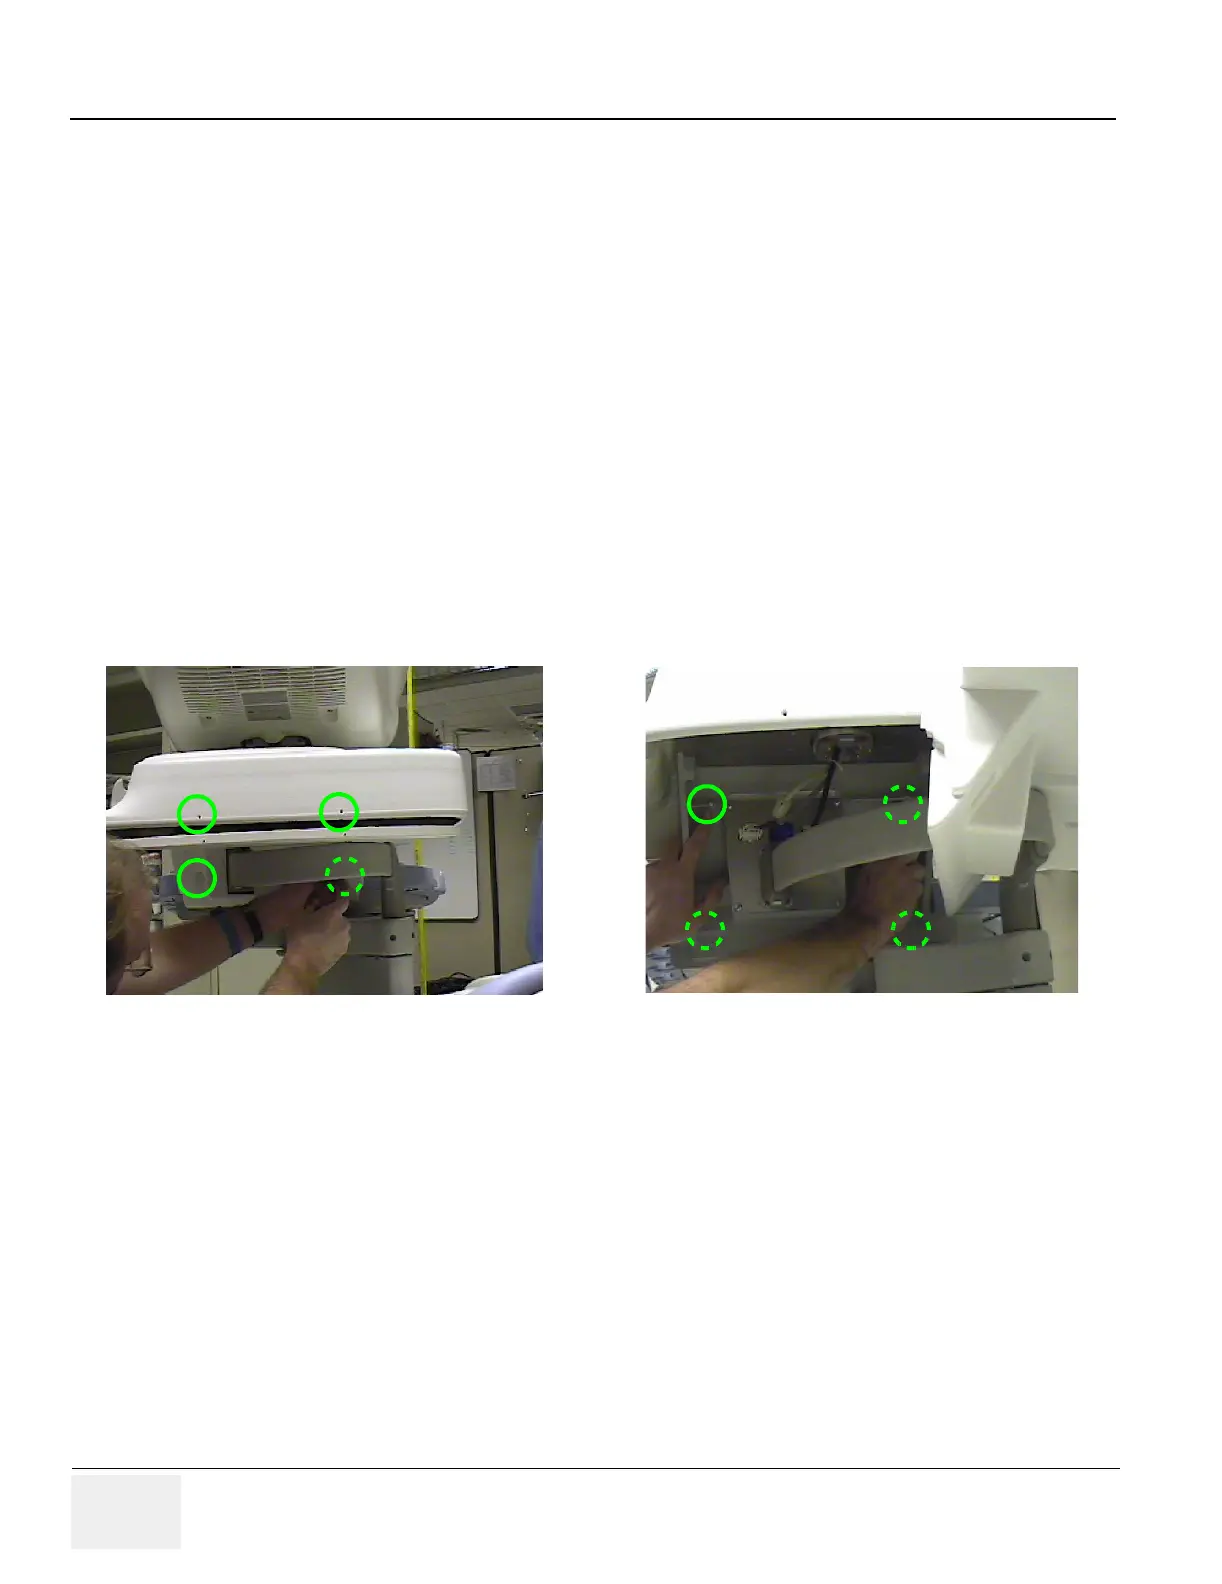
1.) Remove the two Philips screws at the rear of the unit that secure the Under Shelf Cover to the Shelf
Cover Assembly.
2.) Remove the two Phillips screws underneath the Under Shelf Cover that secure the Under Shelf
Cover to the frame behind the Upper Operator panel.
3.) Slide the Under Shelf Cover out of the way to gain access to the screws that secure the Upper
Operator panel to the ultrasound frame.
4.) Remove the screws securing the Upper Operator panel to the ultrasound frame. (Your model
should only have the top two screws, however it may have four)
Figure 8-118 Steps 1 through 4
Step 1
Step 2
Step 3
Step 4