GE MEDICAL SYSTEMS PROPRIETARY TO GE
D
IRECTION 2294854-100, REVISION 3 LOGIQ™ 9 PROPRIETARY MANUAL
Chapter 8 Replacement Procedures 8-101
Section 8-22
X/Y Release Handle Replacement
8-22-1 Manpower
One person, 30 minutes
8-22-2 Tools
Hexagon key 3 mm
Phillips screwdriver size 3
Socket 8 mm
8-22-3 XY-Release Handle Removal Procedure
1.) Unscrew 1 hexagon screw and release Z-handle.
2.) Unscrew 4 Phillips screws and remove Front Handle.
3.) Unscrew 1 nut and remove XY-handle.
8-22-4 XY-Release Handle Installation Procedure
1.) Install a new handle.
2.) Fasten the nut.
3.) Install Front handle.
4.) Install Z-handle.
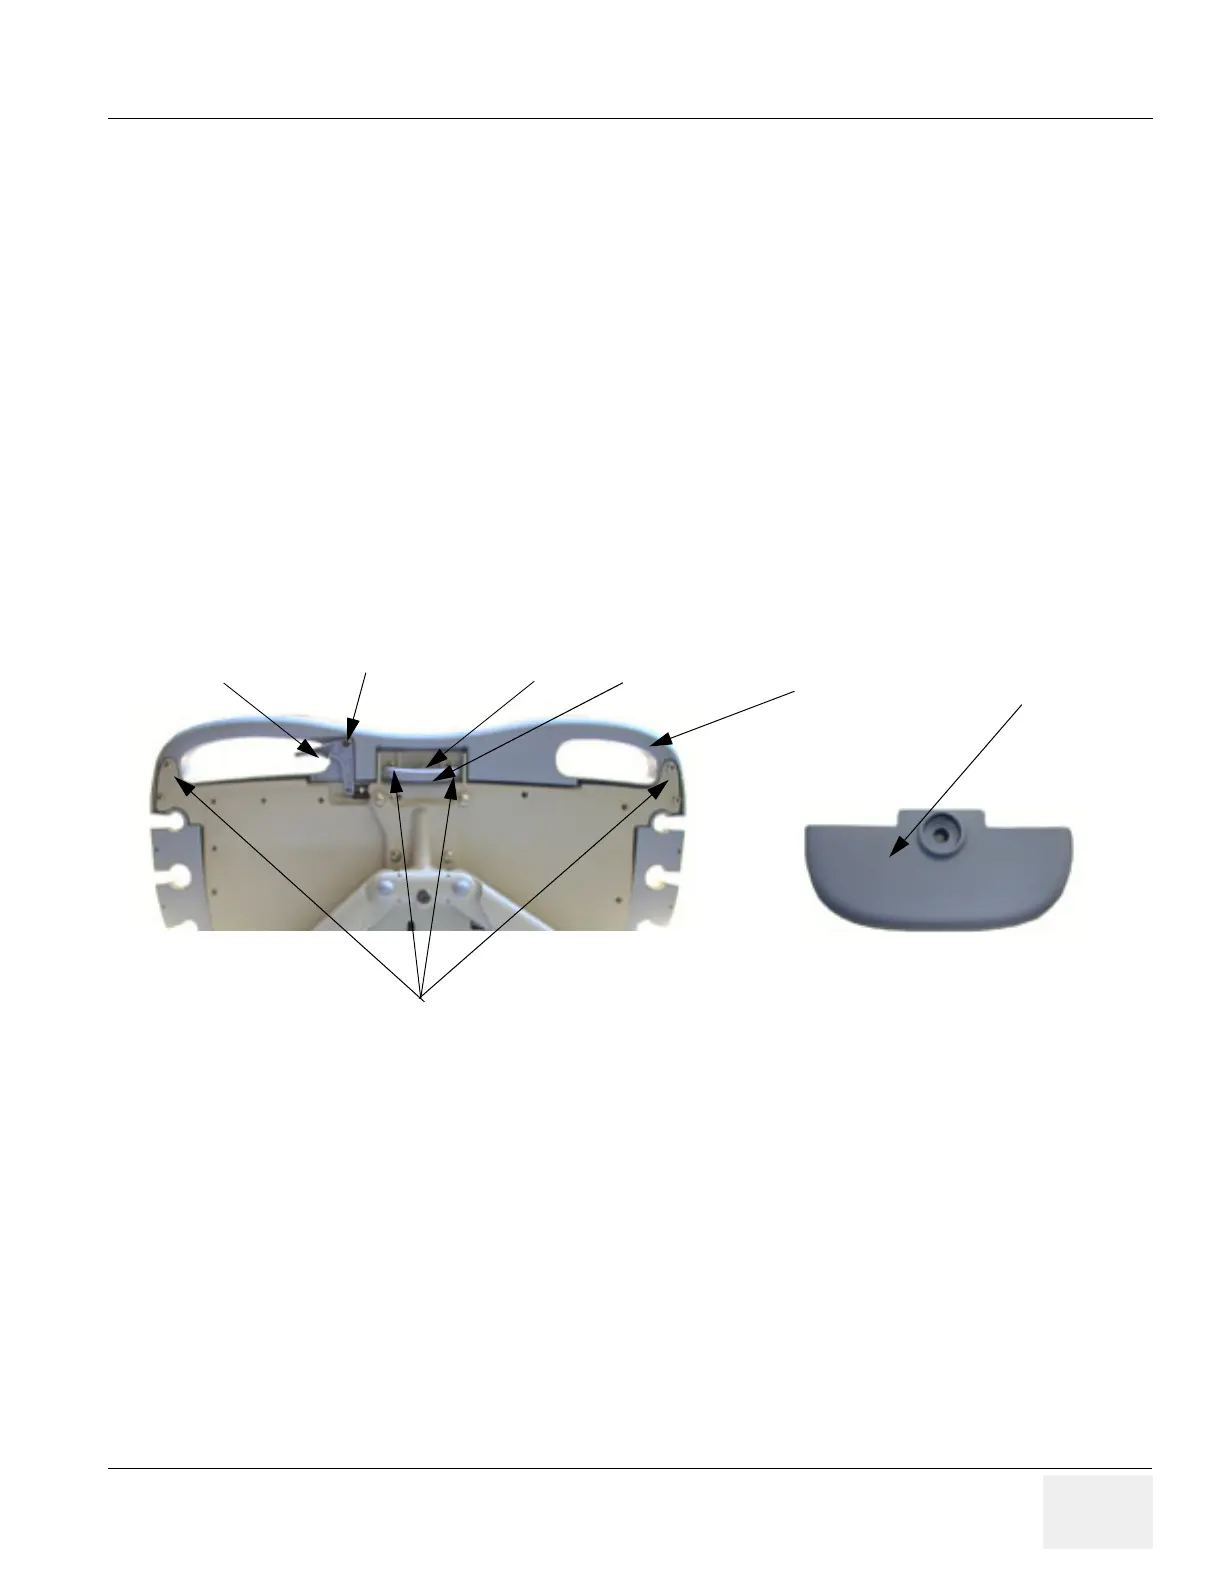
Figure 8-112 XY-release handle
XY-handleHexagon screw
Z-handle
Nut
Screws
Front Handle
XY-handle