GE MEDICAL SYSTEMS PROPRIETARY TO GE
D
IRECTION 2294854-100, REVISION 3 LOGIQ™ 9 PROPRIETARY MANUAL
Chapter 7 Diagnostics/Troubleshooting 7-7
7-4-3Capturing a Screen (cont’d)
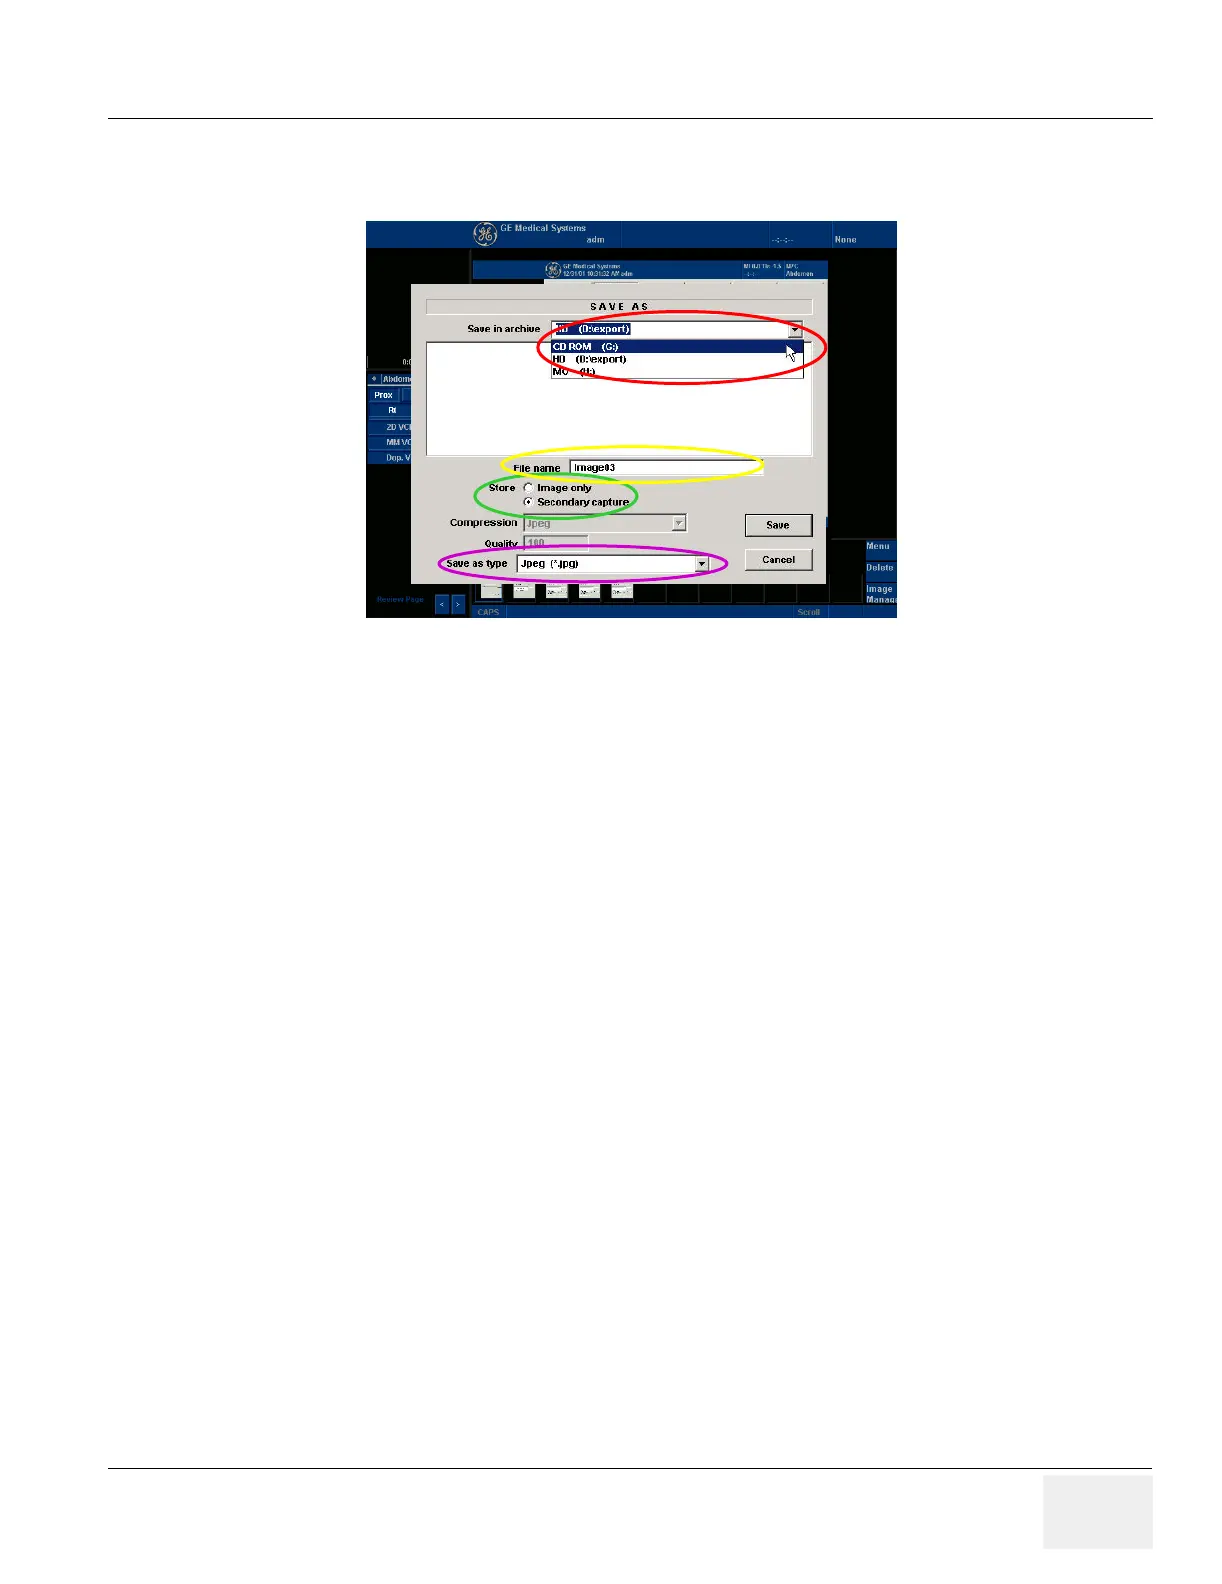
6.) A Save dialog box will be opened. Choose d:\export folder as the archive location to save the
image on the hard disk, MOD or CD-R.
The InSite connection will have access to the export folder on the “D” drive to retrieve these images.
7-4-4 Reset the P4 Key to Customer’s Functionality
If the customer had programmed the P4 Key to a function other than screen capture, restore that
functionality recorded in Section 7-4-1 on page 7-4. Refer to Figure 7-2.
1.) Select Utility from the Touch Panel.
2.) Select Connectivity from the Utilities Menu.
3.) Select the Buttons tab on the Connectivity screen.
4.) In the Button field, select Print4.
5.) In the Destinations section, select the service(s) recorded in step 5, Section 7-4-1. The
destinations list displays the following information:
* Name: user defined during service configuration
* Type: the type of service
* Server: the device for which the service was configured
* Dir: direction: output, input, or both (I+O)
NOTE: Only output services can be associated to the print keys.
6.) In the Image generated section, select the parameters related to the service recorded in
step 6, Section 7-4-1.
Figure 7-5 Save Dialog Box