GE MEDICAL SYSTEMS PROPRIETARY TO GE
D
IRECTION 2294854-100, REVISION 3 LOGIQ™ 9 PROPRIETARY MANUAL
8-106 Section 8-25 - AC Controller Replacement Procedure
Section 8-25
AC Controller Replacement Procedure
8-25-1 Manpower
1 person, 1 hours
8-25-2 Tools
Phillips screw driver No. 2
8-25-3 Preparations (click here to view the cover removal video)
1.) Power Down/Shutdown the system as described in Section 4-3-2 on page 4-3.
2.) Remove the Right and Left Covers as described on Section 8-2-2 on page 8-5.
3.) Remove the Upper Rear Cover as described in Section 8-2-3 on page 8-7 and the Lower Rear
Cover as described in Section 8-2-6 on page 8-10.
NOTE: Identify the Part Number and Voltage type of AC power being replaced
8-25-4 AC Controller Removal Procedure
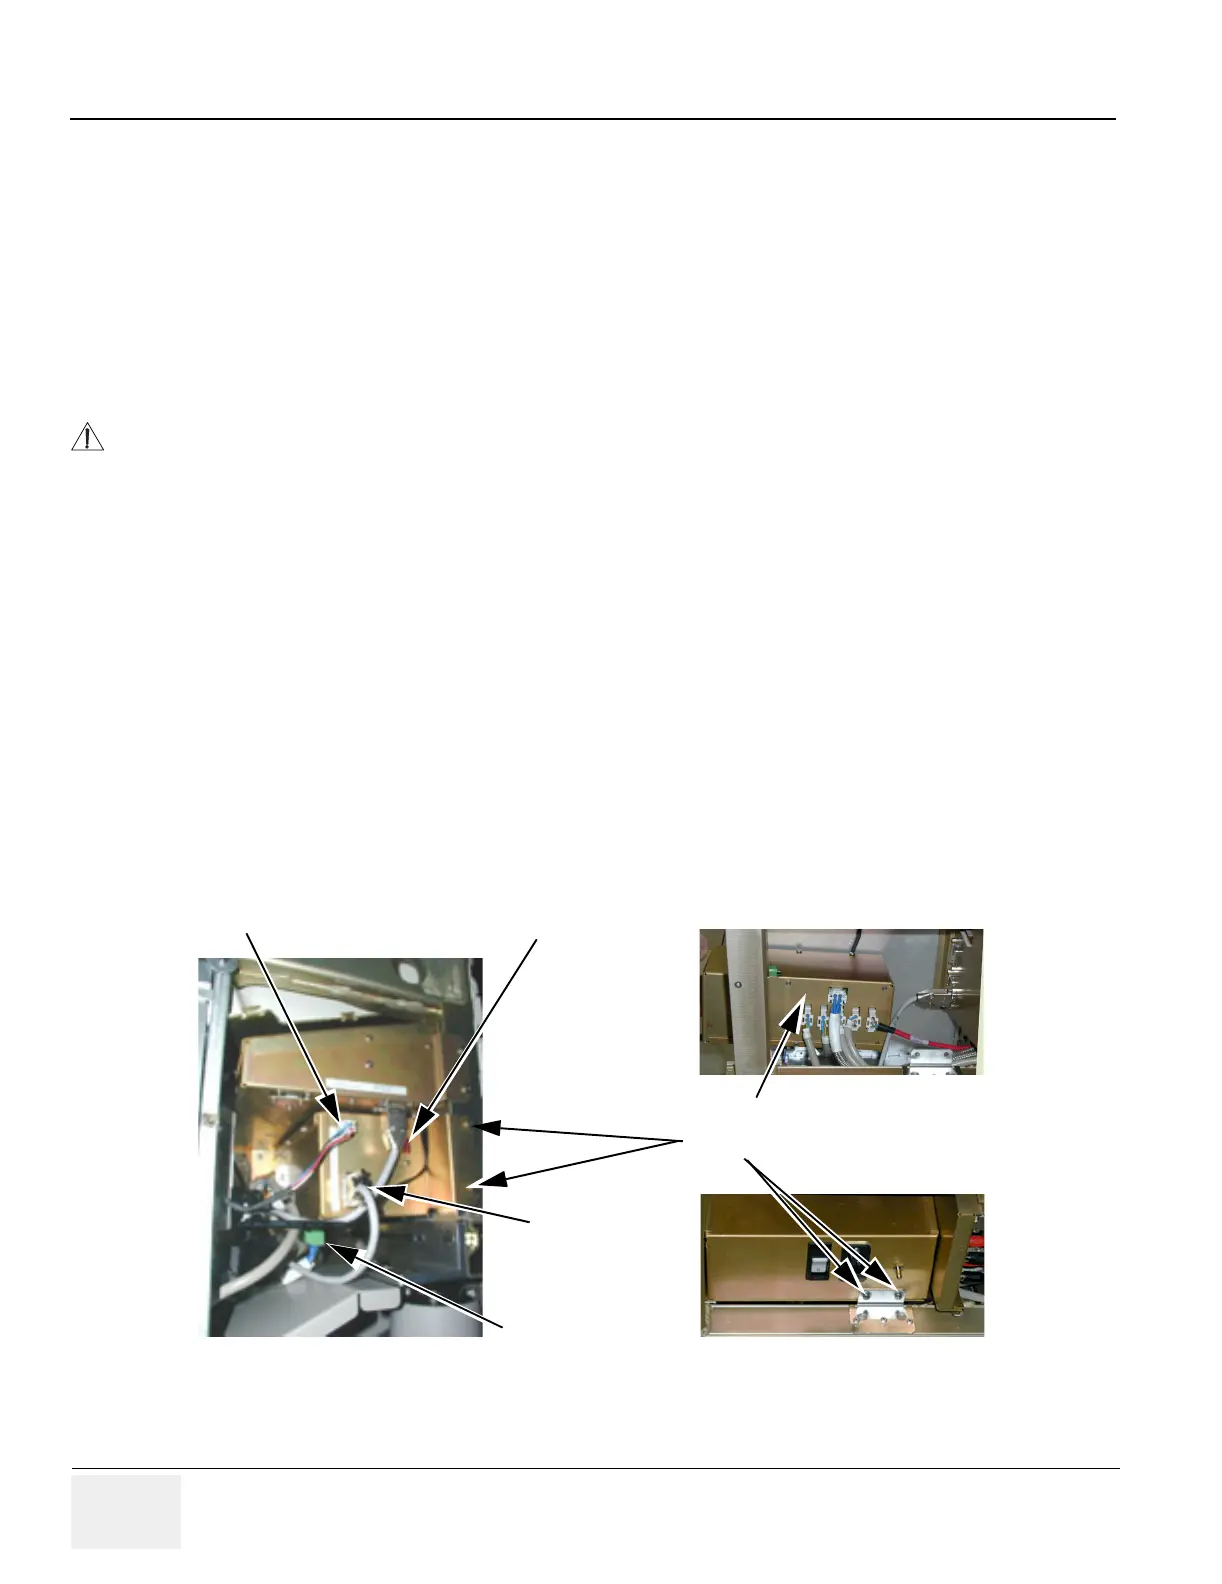
1.) Disconnect Speed Control cable, Fan cable and Input Voltage cable.
2.) Remove four (4) screws holding AC Power.
3.) Turn AC Power Module to get better access and unplug the rest of the cables. Make sure each
connector and socket are properly marked, and easy to identify during installation.
DANGER
Dangerous voltages are present in this equipment. Completely power off and
shut down the scanner before servicing.
Figure 8-116 AC Power Module
Fan Cable
Speed Cable
Screws
Peripheral Voltage Select
Box turned for access to cabling.
Input Voltage cable