390
Chapter 36:
Digitizing Artwork
Marking line and curve points
Marking the artwork means drawing short lines through the design’s outline at each point to be
digitized. This enhances the integrity of the digitized design. Label the first mark S, for start,
and draw a small arrow to indicate the direction you’re digitizing. Continue to mark the
perimeter of each shape within the design.
Note: It does not matter whether you digitize clockwise or counterclockwise.
When marking curves, the tighter the curve the more points it requires. Line segments require
few points. If you digitize too many points, you’ll get a bumpy appearance; digitize too few
points and you’ll lose definition and detail. Generally, just one point is needed whenever the
line changes angle or turns into a curve.
After marking the curves, you can label them with the appropriate puck button numbers
depending on the type of point you are digitizing. For example, you may have a point labeled
1,2 indicating that you will digitize and start a curve at this point.
Tip: After completing the digitizing exercises at the end of this section, you’ll have a better
feel for how to mark the artwork properly.
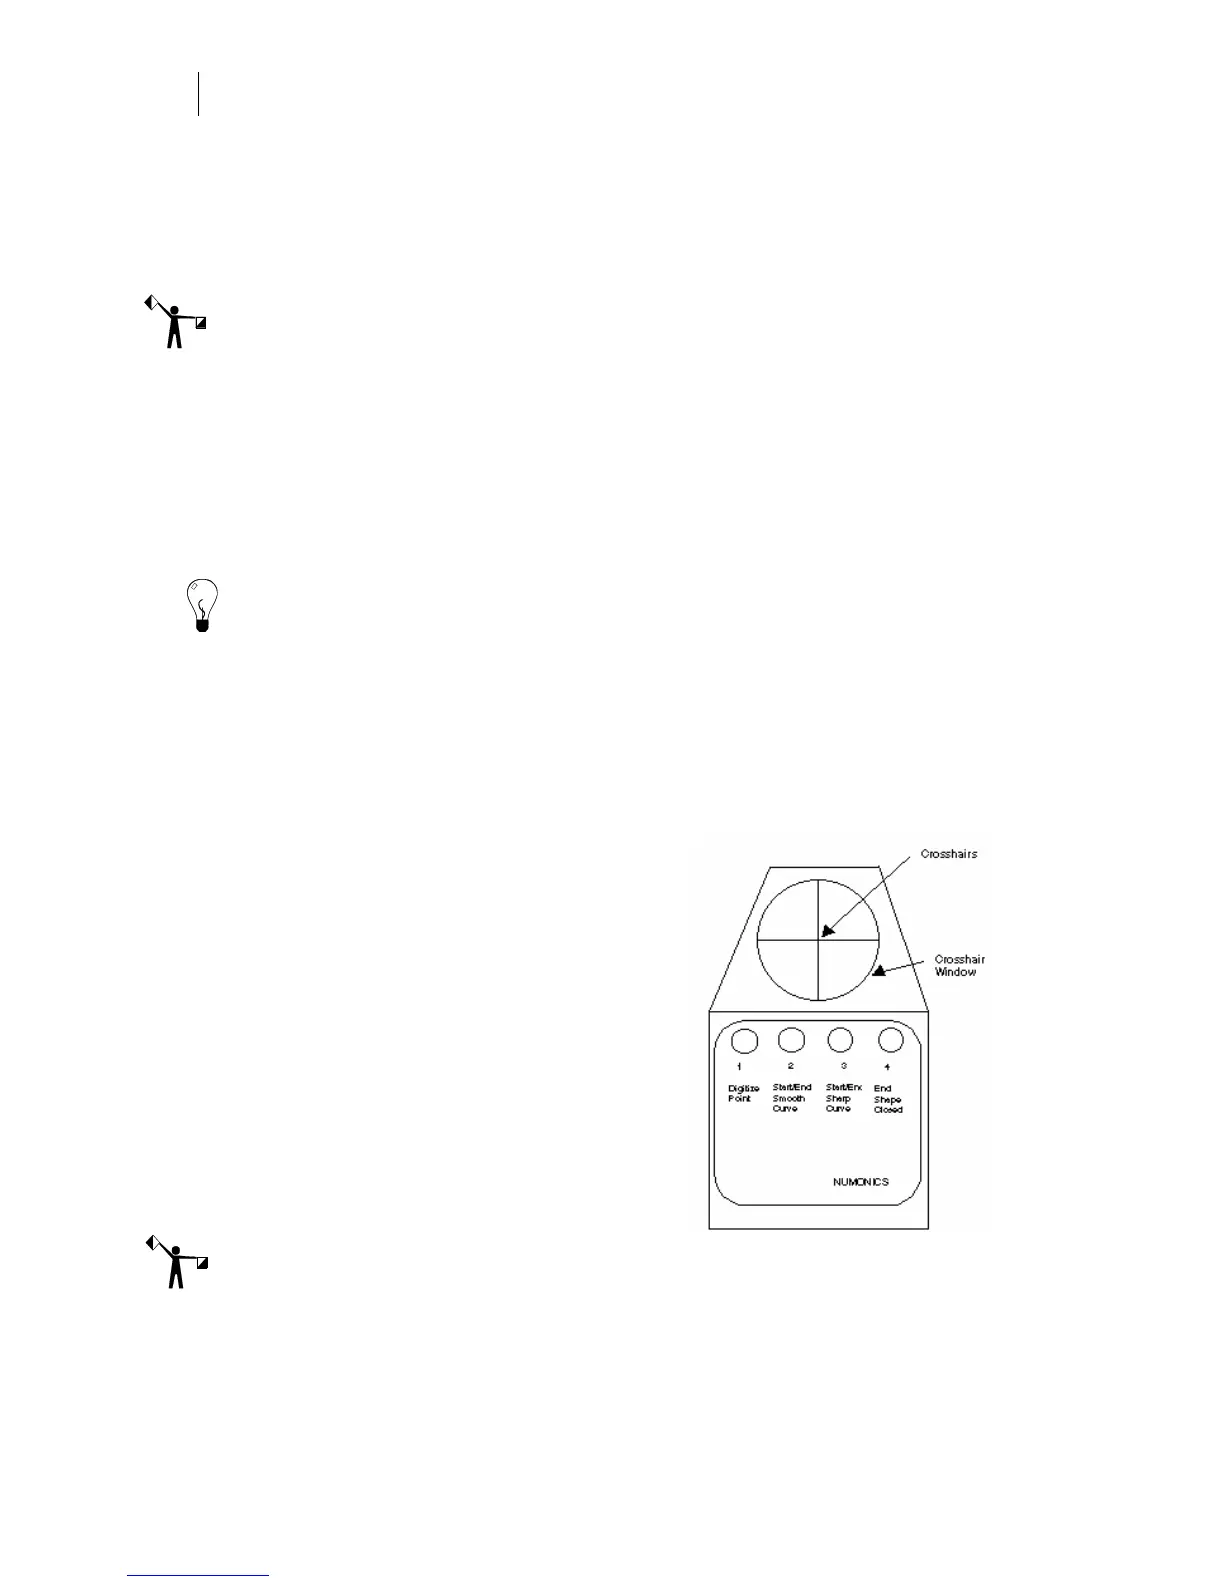
Using the digitizing puck
The digitizing puck is used to add points to create the design. It consists of crosshairs, a
crosshair window and four buttons. To ensure accurate digitizing, place the puck crosshairs
directly over the point to be added on the artwork. The four buttons on the puck tell the
computer what kind of line is being digitized from one point to the next. The buttons on the
puck are numbered 1, 2, 3, and 4. Each button’s function and additional keyboard shortcut keys
are described in the following list:
♦ 1: Add/Place Point
♦ 2 or F11: Start/End Smooth Curve
♦ 3 or End: Start/End Sharp Curve
♦ 4 or F12: End Shape Closed
♦ Shift+End: Ends Open Shape
♦ Ctrl+B: Box tool
♦ Shift+O: Circle tool
♦ P: Pointer tool
♦ L: Line mode
Note: There are several different models of pucks, your puck may look different and have
different button numbers.
 Loading...