Chapter 3: Operating Principles
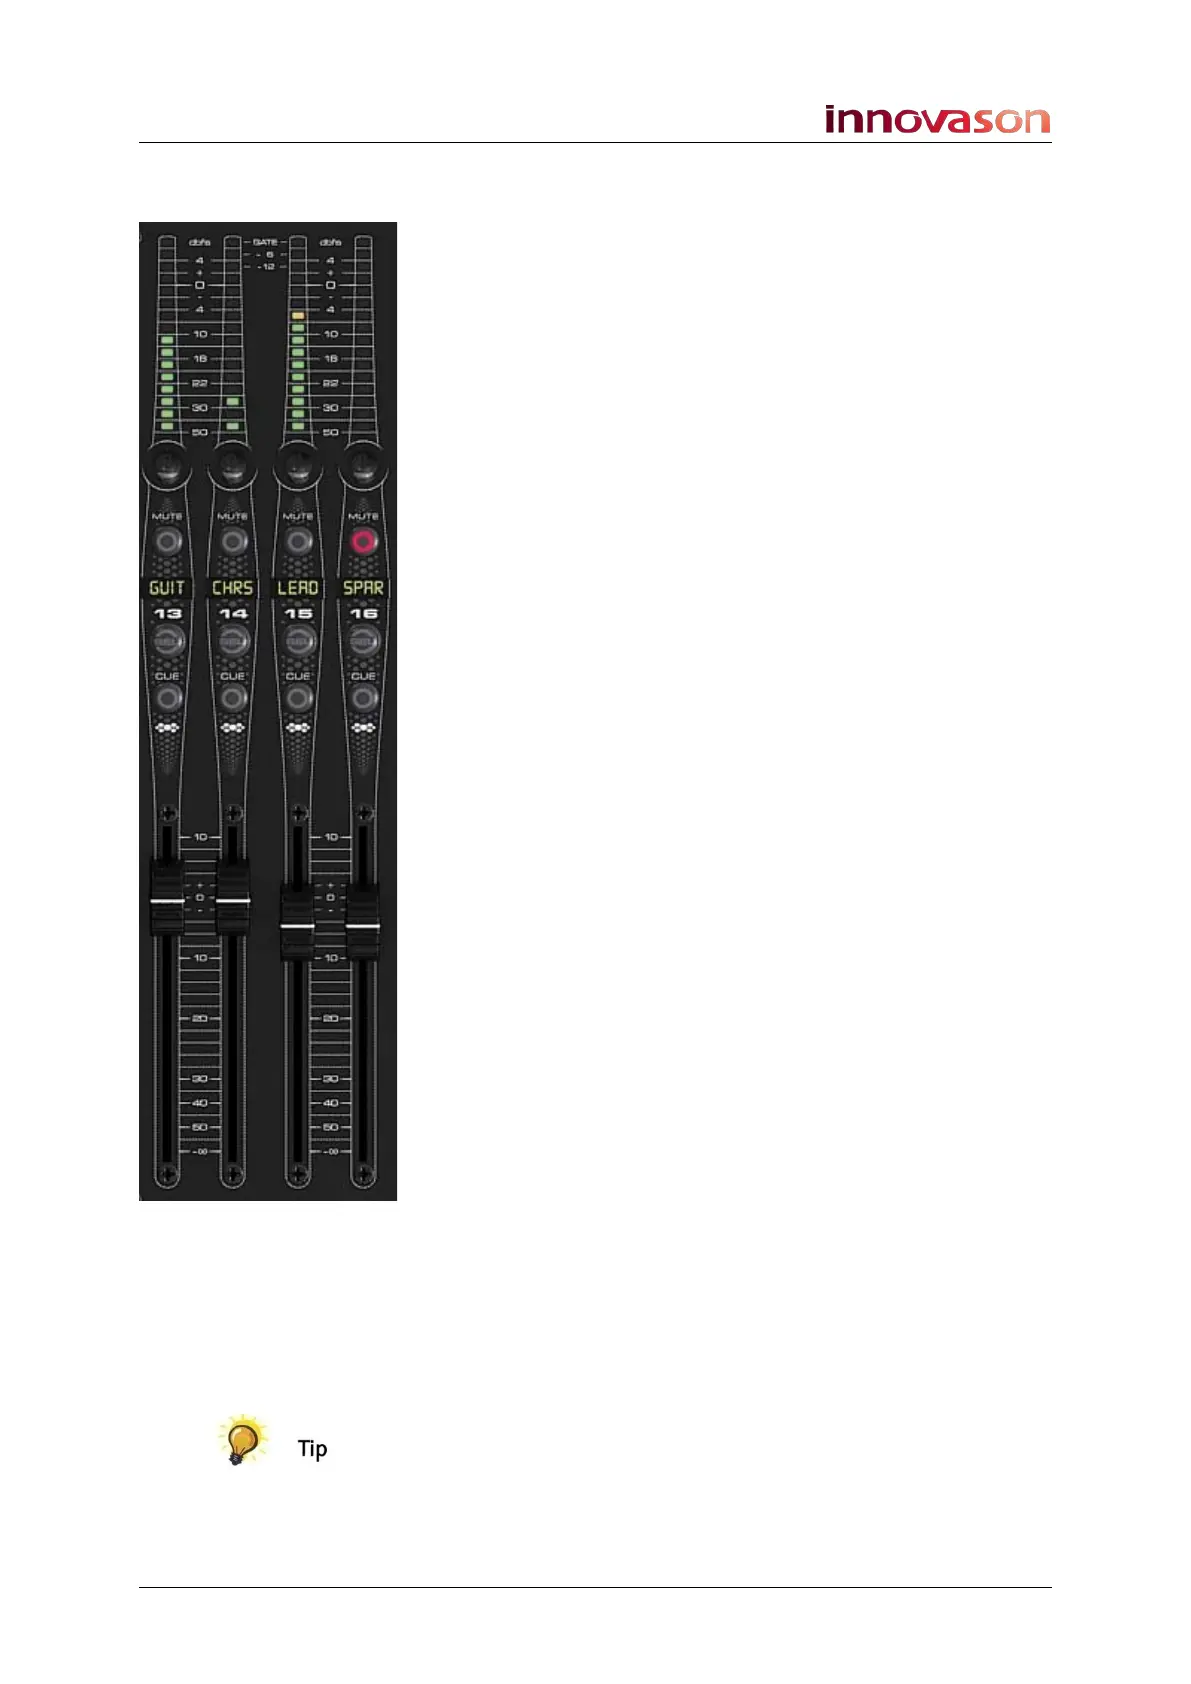
Fader Strips
62/ 526 2.0 Eclipse User Guide
SEL (Select button)
1. Press SEL to select the channel; the SEL button and
Label flash.
Selecting a channel performs two functions:
• It assigns the channel to the Selected Channel controls
so that you can adjust EQ, Dynamics, etc.
• It displays bus routing – any steady state SEL buttons
are routed to, or from, the selected channel.
Note that both routing and sends are set in one operation. This
means that the console’s faders can be controlling either:
• the main level of the channel.
• Or the send level from the channel to an Aux or Matrix.
The mode depends on which type of channel is selected (input,
Aux, Master, etc.). See Page 74.
CUE
1. Press CUE to cue the channel.
On input channels, CUE may operate as PFL, AFL or SIP
(Solo-in-Place).
On output channels, CUE may operate as PFL, AFL or APL
(After Processing Listen).
On stereo channels or Smart VCAs the button activates CUEs
on all slave channels. Note that this will only work if all slave
CUEs are in the same state – either all on or all off.
You cannot CUE a VCA.
CUEs on output channels always intercancel; on input
channels, you can select intercanceling or additive CUEs.
Cue options are set from the TB/MONITORING panel, which
includes a CUE Clear button. See Page 206.
ID
The colour-coded LED identifies the channel type – input, Aux,
Master, etc. See Page 58 for a full list of colours.
Fader
The Fader is touch-sensitive and motorised. It may control
either the main channel level or an Aux/Matrix send level
depending on which type of channel is selected.
When you touch a fader its level, in dB, can replace the Label
(defined from “Util -> General Preferences”, see Page 428.)
Each fader also has a notch which you will feel when you move
the fader. This indicates the last level you set for the channel,
and is a great way to tell if your mix is getting louder or quieter!