Chapter 6: Console Configuration
The Patch Output Display
Eclipse User Guide 2.0 247/ 526
The Patch Output Display
1. Select the PATCH OUTPUT display by pressing the
PATCH OUT button on the UTILITIES panel.
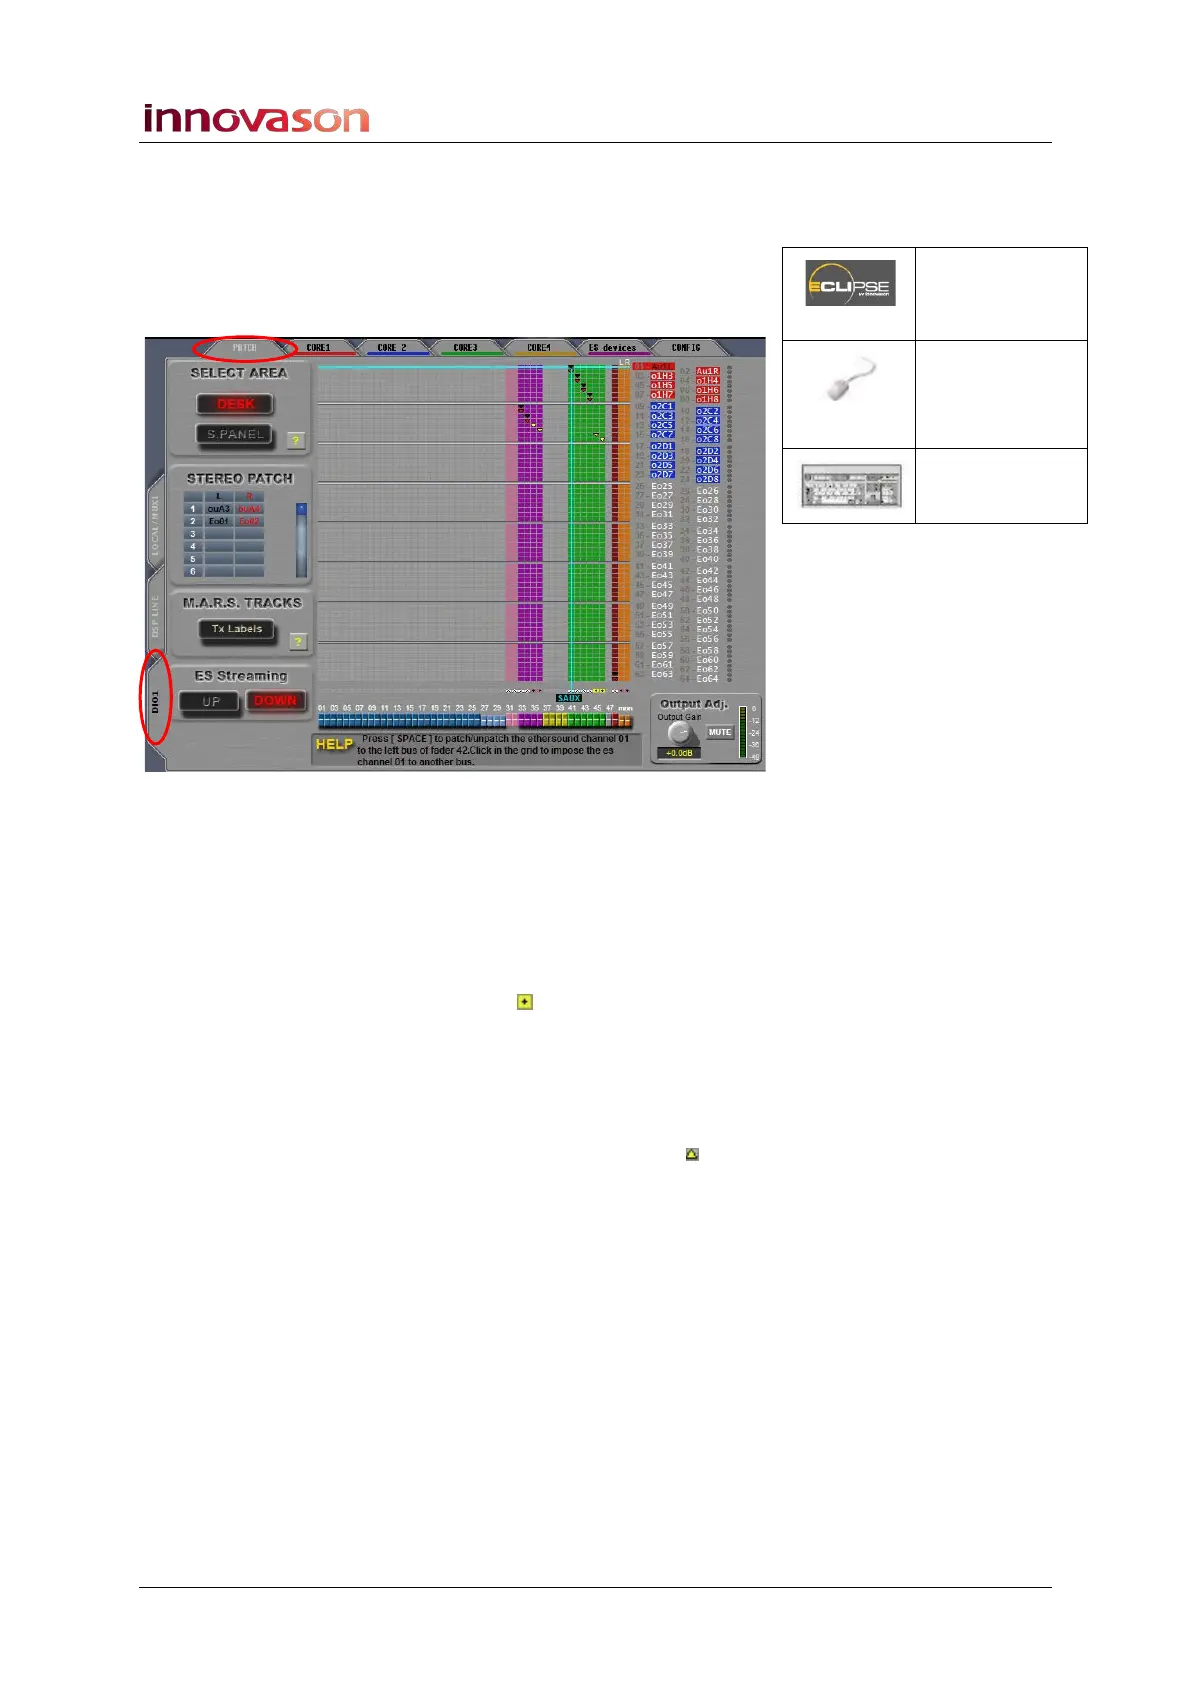
2. And select the PATCH and LOCAL / MUXI tabs:
This grid operates in a very similar way to the PATCH INPUT
display. But this time you are patching output faders (at the
bottom) to Ethersound channels (on the right).
The Ethersound channels are colour coded to indicate their final
destination: red for DioCore 1, blue for DioCore 2, etc. The
faders are colour coded as Auxes (green), Masters (red),
Groups (pink), etc. The row of boxes above faders 01 to 48
indicates whether an output is mono or stereo (white with a
black cross).
The PATCH OUTPUT grid is only used to patch output
channels (Aux, Group, Matrix or Master) to destinations.
Therefore you cannot select an input or VCA fader.
Mono connections are indicated by a yellow triangle within
the grid. Stereo connections are indicated by black and red
triangles for left and right. If a stereo fader is selected, then the
individual left, right and centre destinations are shown in the
STEREO PATCH area on the left of the display.
A column of LEDs on the right shows if an output is muted
(red).
The HELP area at the bottom of the display provides useful
help text on how to perform the next operation. Or you can
interrogate an on-screen function by clicking on its yellow
question mark.
At the bottom right of the display, the Output Adj screen
controls adjust and meter the selected destination.
Patch OUT
(UTILITIES)
“GRID ->
Patch
Output”
[F12]