4-92 Printer Service Manual
5057-XXX
3. Turn on the machine.
Note: If an 84.xx error occurs, it means that the NVM board was incorrectly installed. Make sure that the NVM
board installed is the old NVM board from the defective upper printer engine card.
4. Perform color registration adjustment.
Lower printer engine card bracket assembly removal
1. Remove the rear upper cooling fan bracket assembly. See “Rear upper cooling fan bracket assembly removal”
on page 4-111.
2. Remove the developer / transfer roll HVPS card assembly. See “Developer / transfer roll HVPS card assembly
removal” on page 4-112.
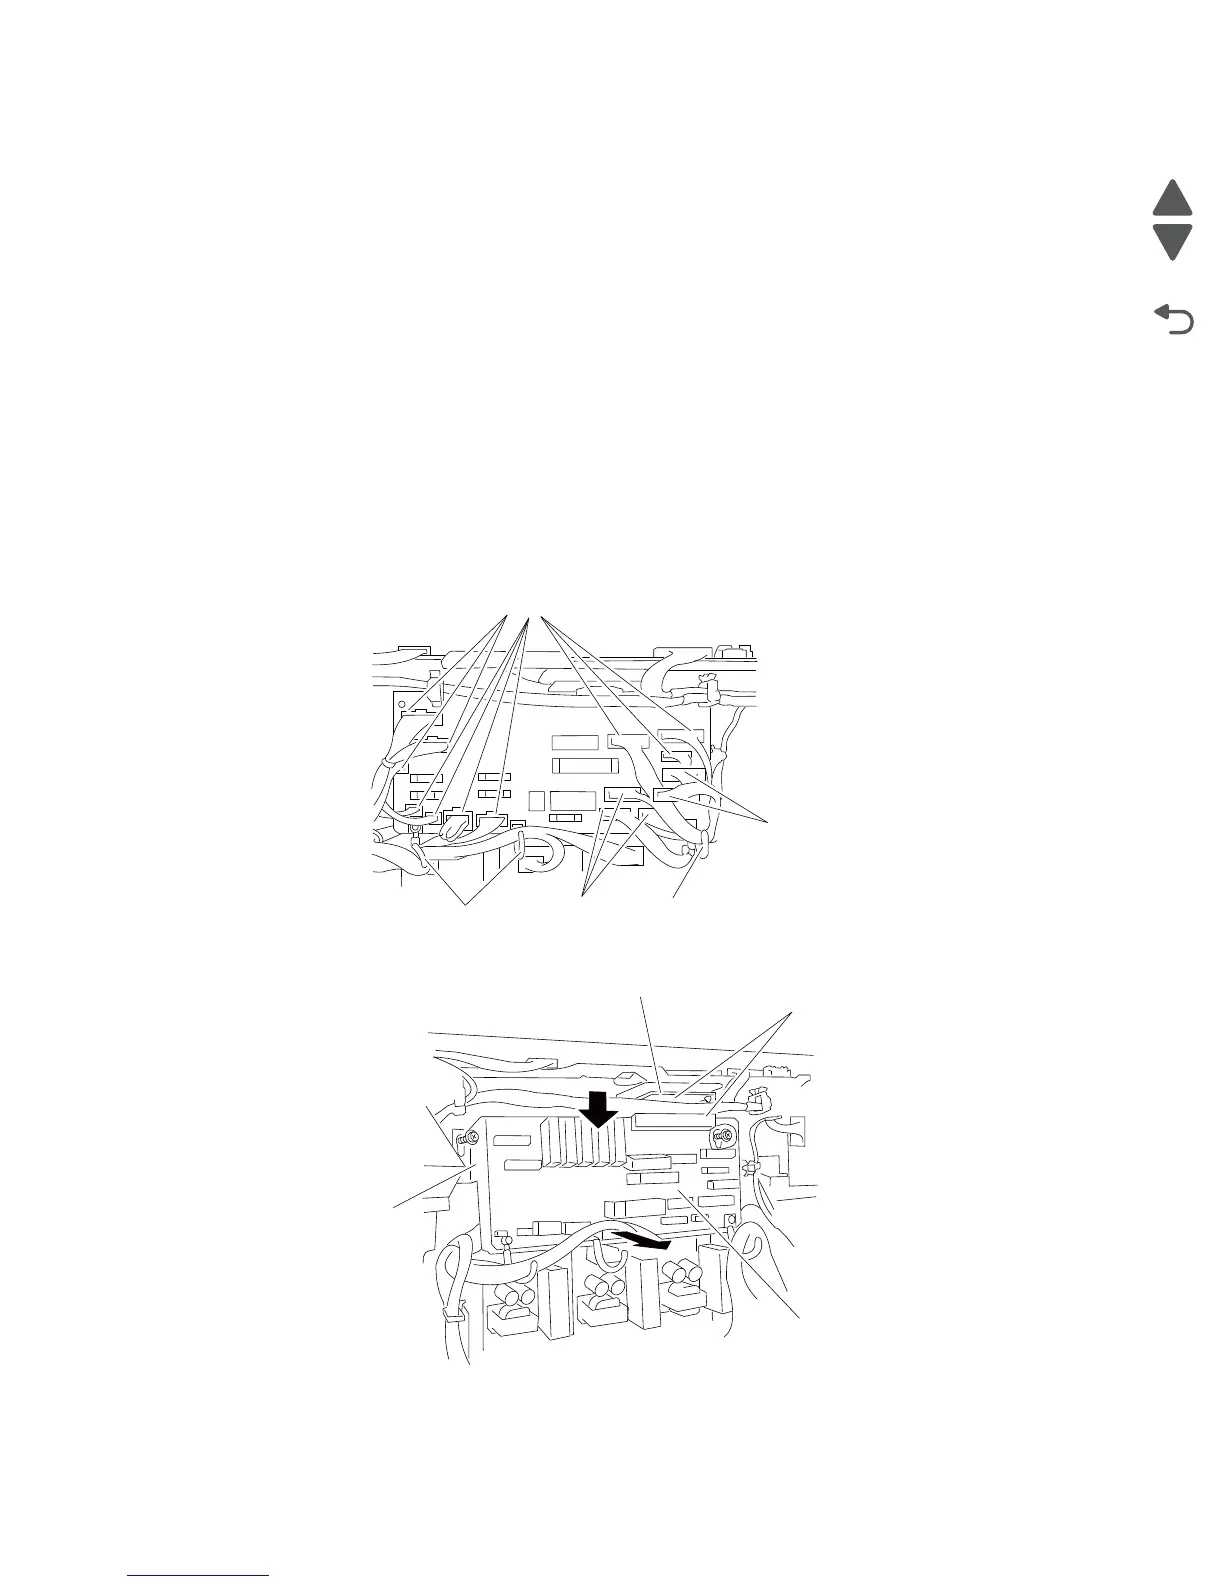
3. Remove the fifteen connectors from the lower printer engine card bracket assembly (A).
4. Remove the harnesses from the clamps.
5. Remove the two screws securing the lower printer engine card bracket assembly (A) to the machine.
Note: When removing the lower printer engine card bracket assembly (A), the lower printer engine card assembly
(B) and the upper printer engine card assembly (C) will become detached.
6. Move the lower printer engine card bracket assembly (A) down.
7. Remove the lower printer engine card bracket assembly (A).
Connectors
Clamps
Connectors
Connectors
Clamp