Installing cable fittings
OmniTrax Product Guide Page 125
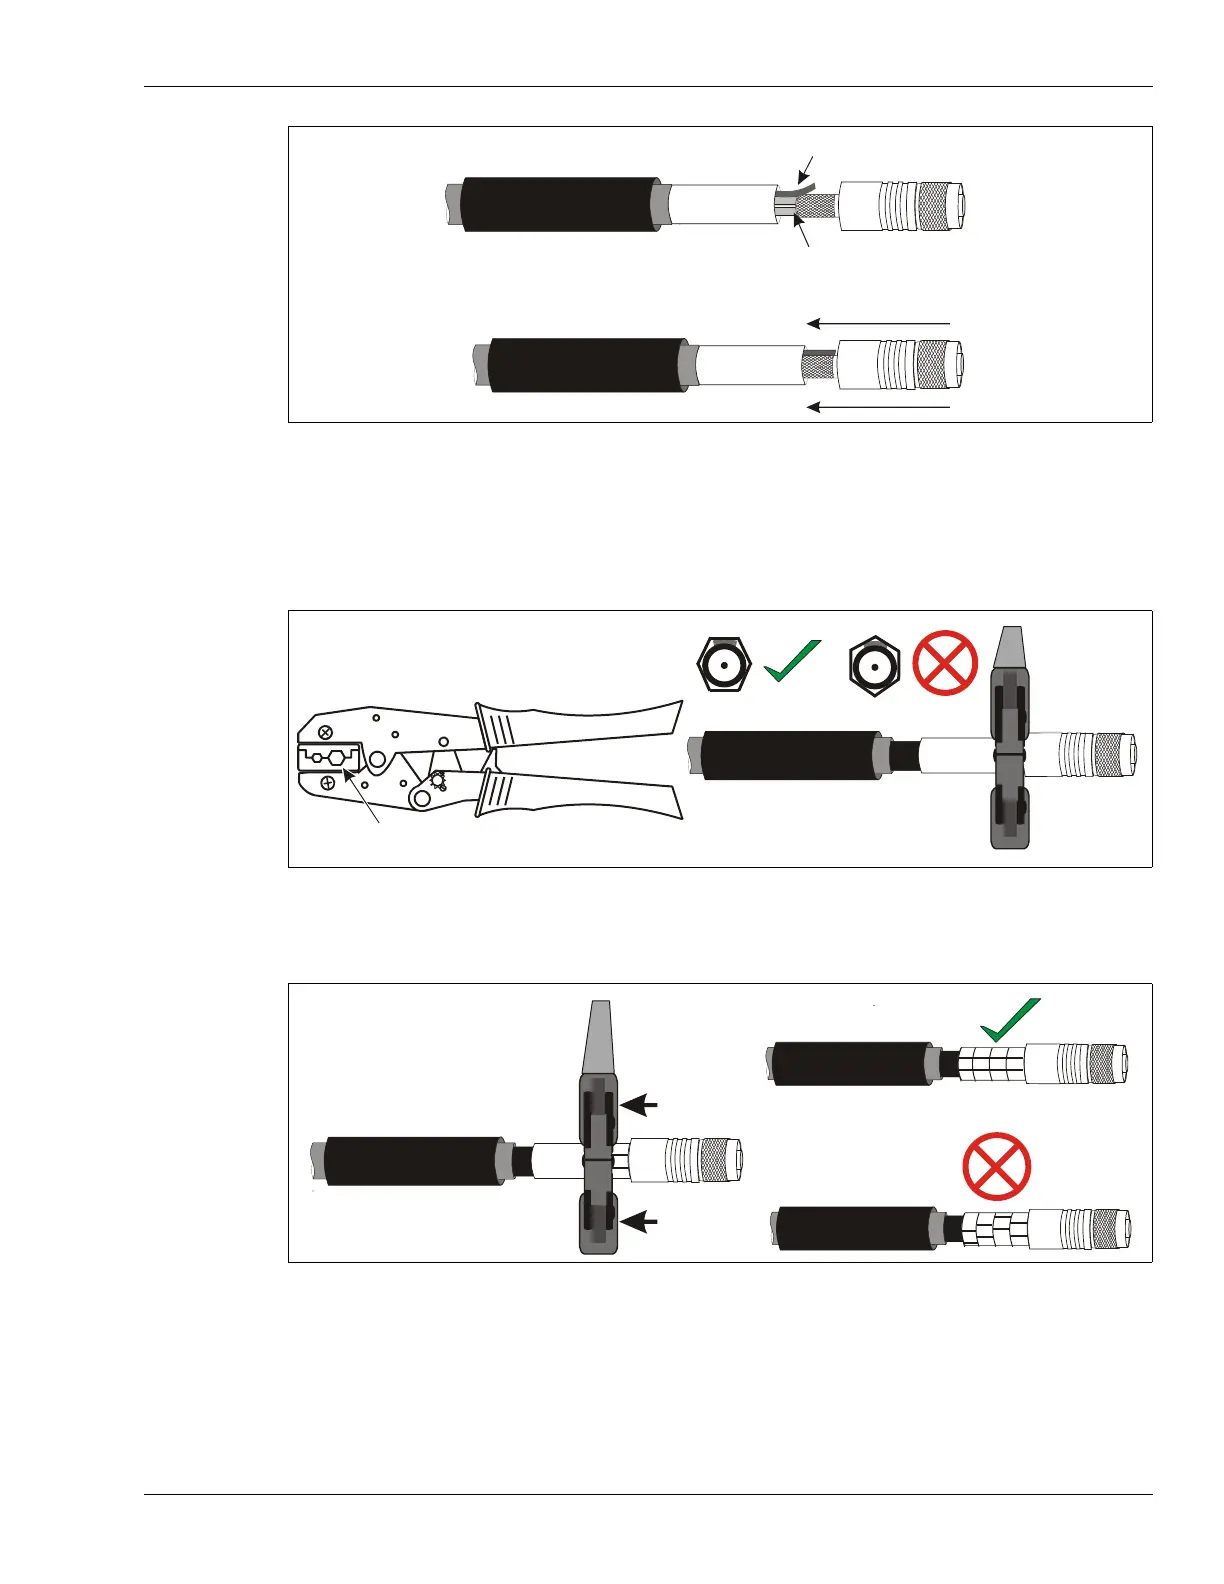
5. Firmly, press the connector shell onto the sensor cable until the midsection is flush with the
outside end of the crimp ring.
6. Using the larger hexagonal hole (.429) position the crimp tool over the crimp ring so that the
edge of the crimp tool is right against the smooth midsection of the connector, and a flat
crimping surface is directly above the drain braid. Make the first crimp.
7. Open the crimp tool, and without rotating the crimp tool, connector, or sensor cable, move the
crimp tool over the uncrimped area beside the first crimp and make a second crimp.
8. Make two more crimps so that the full length of the crimp ring is crimped, and the four crimps
are lined up straight.
9. Slide the heatshrink over the crimp until it covers the smooth portion of the connector’s
midsection. DO NOT allow the heatshrink to cover any portion of the rotating end of the
connector.
Figure 93: OC2 connector installation
Figure 94: Making the first crimp
Figure 95: Making the second crimp
drain braid outside connector shell
center pin, foil and dielectric core inside connector shell
press the connector shell onto the cable until the midsection is flush against the crimp ring
Connex crimp tool
use only the larger hexagonal opening (.429)
make the first crimp at the edge of
the smooth midsection of the
connector shell above the location
of the drain braid
Ensure that the four crimps line
up with no deviation.