Installing auxiliary cards
Page 182 OmniTrax Product Guide
3. Hold the lightning arrestor assembly horizontally with the gas capsule holders facing upwards.
Using a large bladed slot screwdriver, remove the gas capsule holder from the lightning
arrestor (see Figure 160:
).
4. Remove and retain the pressure ring. Remove and discard the used gas capsule.
5. Insert the replacement gas capsule into the lightning arrestor.
6. Carefully fit the pressure ring onto the capsule and tighten the gas capsule holder securely.
7. Repeat for each lightning arrestor.
8. Refer to Figure 161:
to reconnect the lightning arrestors to the processor.
9. Reconnect the sensor cables to the lightning arrestors.
Installing auxiliary cards
There are three auxiliary cards available for the OmniTrax system. The Network Interface card is
required for all processors that communicate via the Silver Network. The Relay Output card (ROC)
provides an additional 8 relay outputs to the processor. The Universal Input card (UIC) provides an
additional 8 inputs to the processor. A processor can use two auxiliary cards, the NIC and either an
ROC or a UIC. A processor cannot use an ROC and a UIC. The auxiliary cards piggyback onto J1,
the 40 pin socket on the processor card.
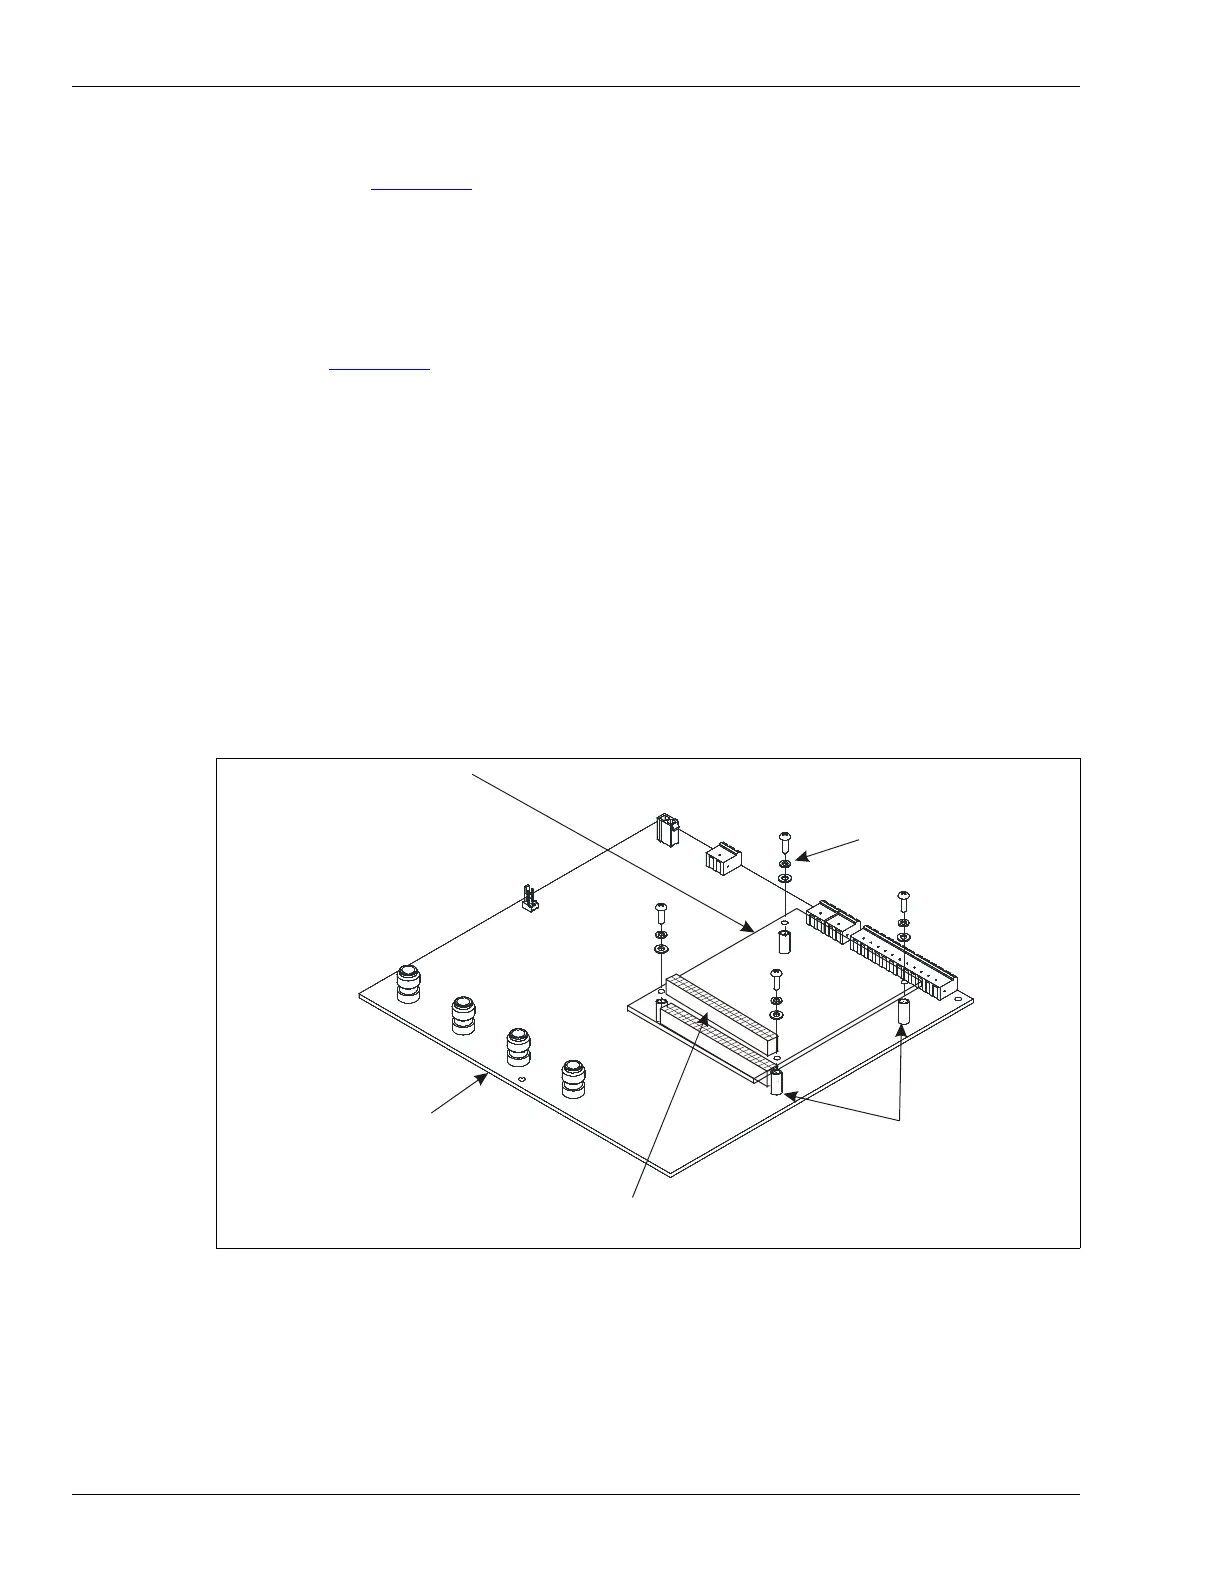
Figure 162: Auxiliary card installation
auxiliary card foot print
(3 cards available:
network interface card
relay output card
universal input card
auxiliary cards piggyback on 40
pin socket J1 on processor)
mounting hardware
(4 places)
metal standoffs
(4 places)
40 pin socket (on component side)
40 pin header (on solder side, not shown)
OmniTrax processor