Installing cable fittings
OmniTrax Product Guide Page 133
Sealing the heatshrink over decouplers/splices
1. Position the heatshrink so that it is centered over the decoupler/splice.
2. Support the sensor cables on both sides of the heatshrink, and use a heat gun to apply heat
evenly across the heatshrink, moving from the center to the outside edges.
3. Continue applying heat evenly until the heatshrink is tightly collapsed and the sealant begins
to ooze outside both ends.
4. Verify that there are no bubbles or air pockets in the heatshrink.
5. Continue to support the sensor cables until the heatshrink has completely cooled.
OC2/SC2 decoupler installation procedure
CAUTION Use care when sealing the heatshrink. Excessive heat can burn the
heatshrink and damage the sensor cable. Ensure that the heatshrink
used when installing the connectors has completely cooled BEFORE
applying heat to the decoupler/splice heatshrink.
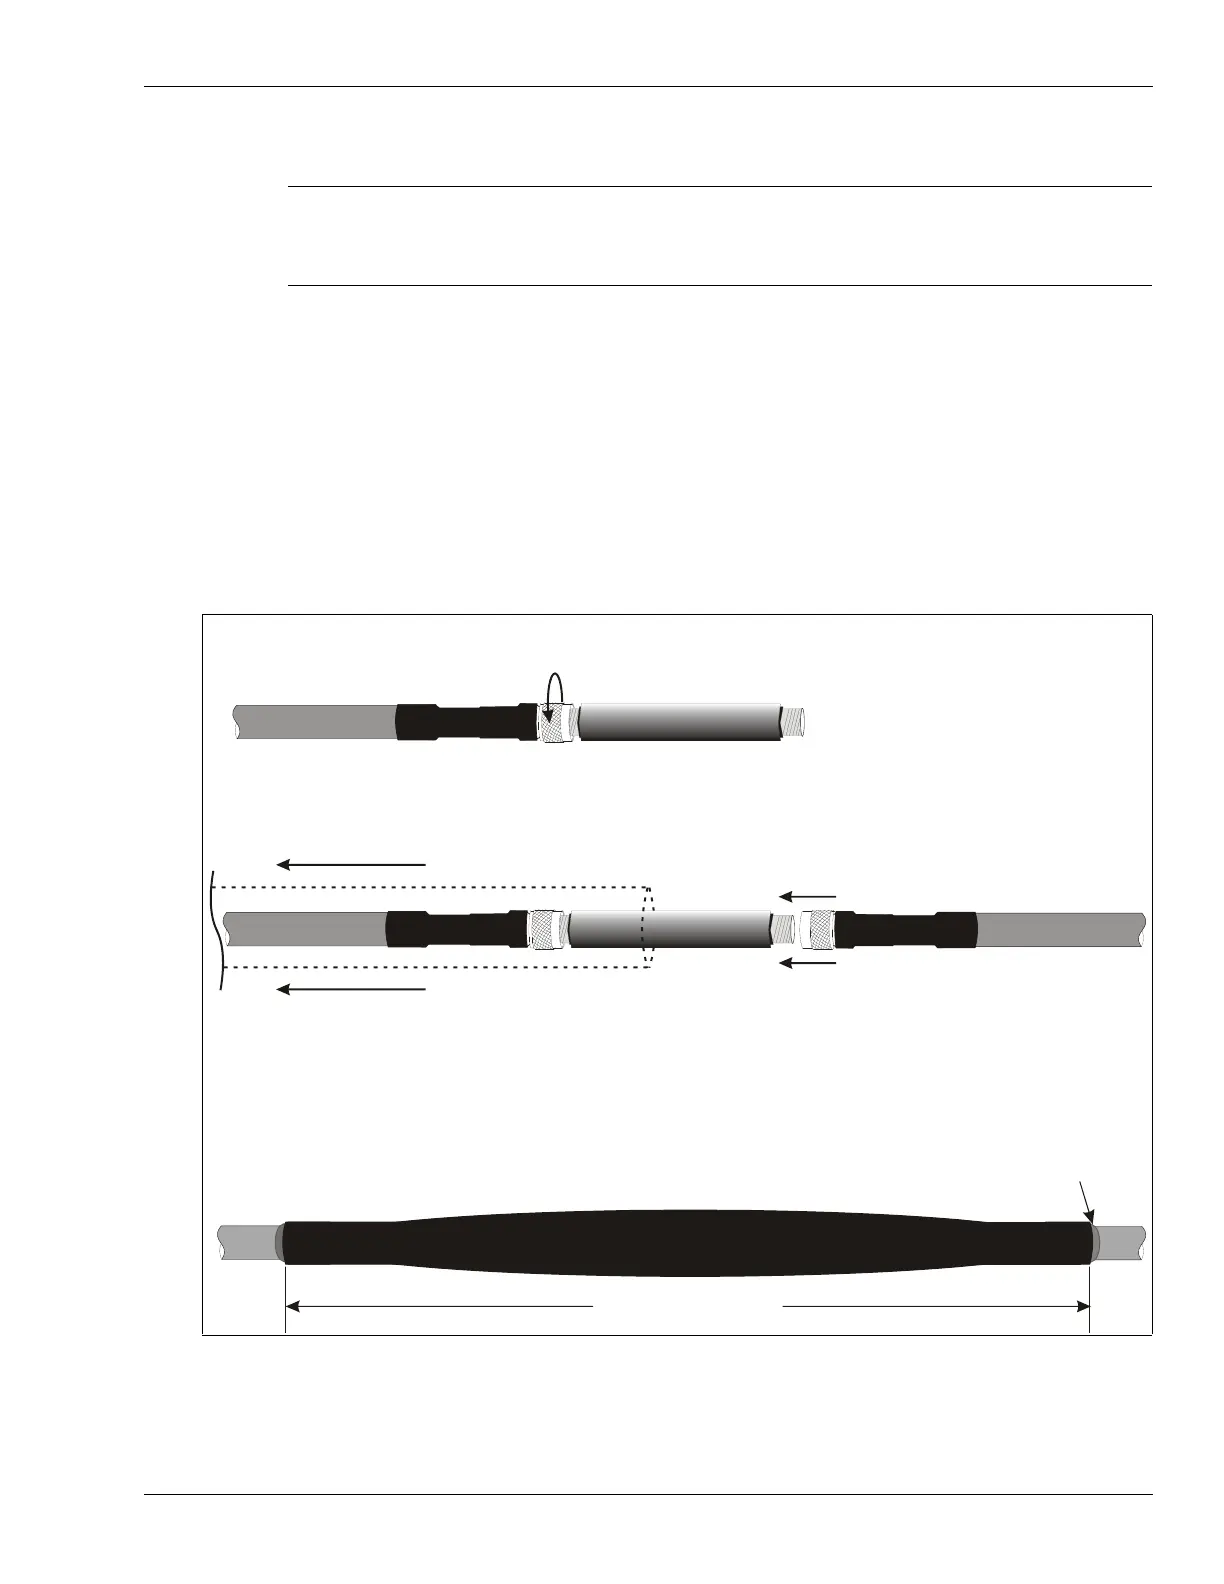
Figure 110: Installing decouplers
1. Align the connector and decoupler.
Hold the decoupler firmly and turn the connector shell on the sensor cable.
NOTE: Connect TXA to TXB and RXA to RXB.
2. Slide the piece of heatshrink over the decoupler and sensor cable.
Align the connector on the second cable with the decoupler.
Hold the decoupler firmly and turn the connector shell on the cable.
NOTE: Test the connections BEFORE sealing the heatshrink.
3. Center the heatshrink over the decoupler.
Hold both sensor cables to keep the assembly steady, and using a heat gun, apply heat evenly over the full length of the
heatshrink, working from the middle toward the ends. Apply heat until the heatshrink fits tightly on the sensor cable. Hold
the cable steady until the heatshrink cools.
DO NOT twist or bend the sensor cable.
NOTE: There MUST NOT be any bubbles or air pockets in the heatshrink.
Verify that weather sealant
is oozing out at both ends.
heatshrink
41 cm (16 in.)
DO NOT turn the decoupler