OmniTrax Product Guide Page 83
3 Installing enclosures
The OmniTrax enclosure
The OmniTrax enclosure is painted aluminum and includes two lockable latches on the top and
two hinges on the bottom to allow the door to hang freely. There are two sets of mounting studs on
the enclosure door, one for the optional 6 VDC local backup battery and the other for the optional
12 VDC auxiliary device power supply. The enclosure includes a vent to prevent gas build-up from
battery charging. It can be mounted outdoors inside a telecom style enclosure or a customer
supplied enclosure, and indoors on a fixed surface.
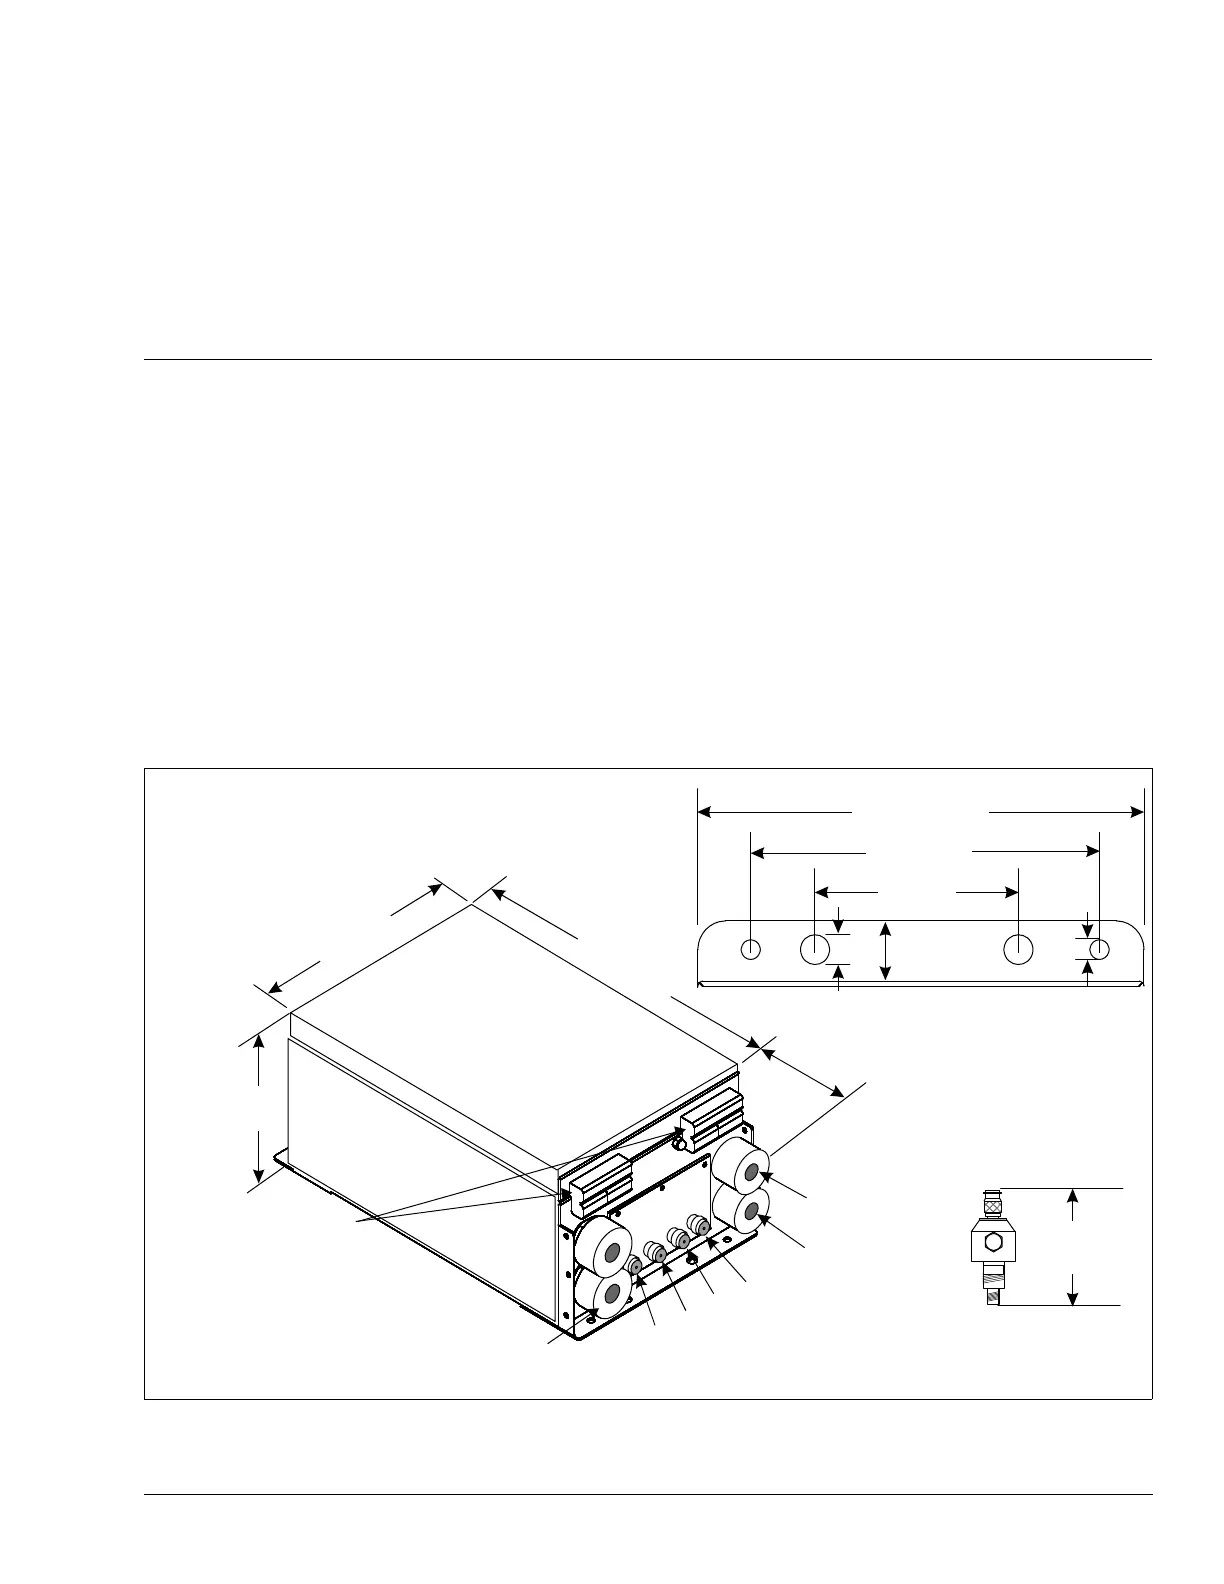
Figure 48: OmniTrax enclosure
23.5 cm
(9 ¼ in)
17.8 cm
(7 in)
8.5 cm
(3
3
/
8
in)
mounting hole details
2.5 cm (1 in.)
top & bottom
1 cm (
3
/
8
in.)
7 mm (0.3 in.)
35 cm
(13 ¾ in.)
23.5 cm
(9 ¼ in.)
4.5 cm
(1 ¾ in.)
OmniTrax
enclosure
16.5 cm
(6 ½ in.)
latches on top
of enclosure
hinges
earth ground
cable gland
I/O wiring
cable gland
sensor cable connections
(on bottom of enclosure)
TXA
RXA
RXB
TXB
The lightning arrestor adds
6.2 cm to the enclosure’s height.
NOTE:
6.2 cm
(2.44 in.)
power input
cable gland
I/O wiring
cable gland