Installing a telecom style enclosure
OmniTrax Product Guide Page 91
Indoor wall-mounting
For indoor wall-mounting, install the processor in a secure area. Four 7 mm (0.3 in.) holes are
provided on the enclosure flanges for mounting the enclosure to a stable, fixed structure. The type
of enclosure mounting hardware required depends on the mounting surface, and is supplied by the
installer.
Wall-mount procedure
1. Install a low resistance earth ground as close as possible to the processor location.
2. Using appropriate hardware, mount the enclosure on a stable, fixed surface (see Figure 57:
Indoor wall-mounting the OmniTrax enclosure).
3. Cut conduit for the power ground and data cables, if required (conduit is required to protect the
lead-in cables where they exit the building).
4. Label all cables and wires that are being routed into the enclosure.
5. Pull the sensor cables through the conduit, to the OmniTrax enclosure.
6. Connect the ground wire to the ground stud inside the enclosure.
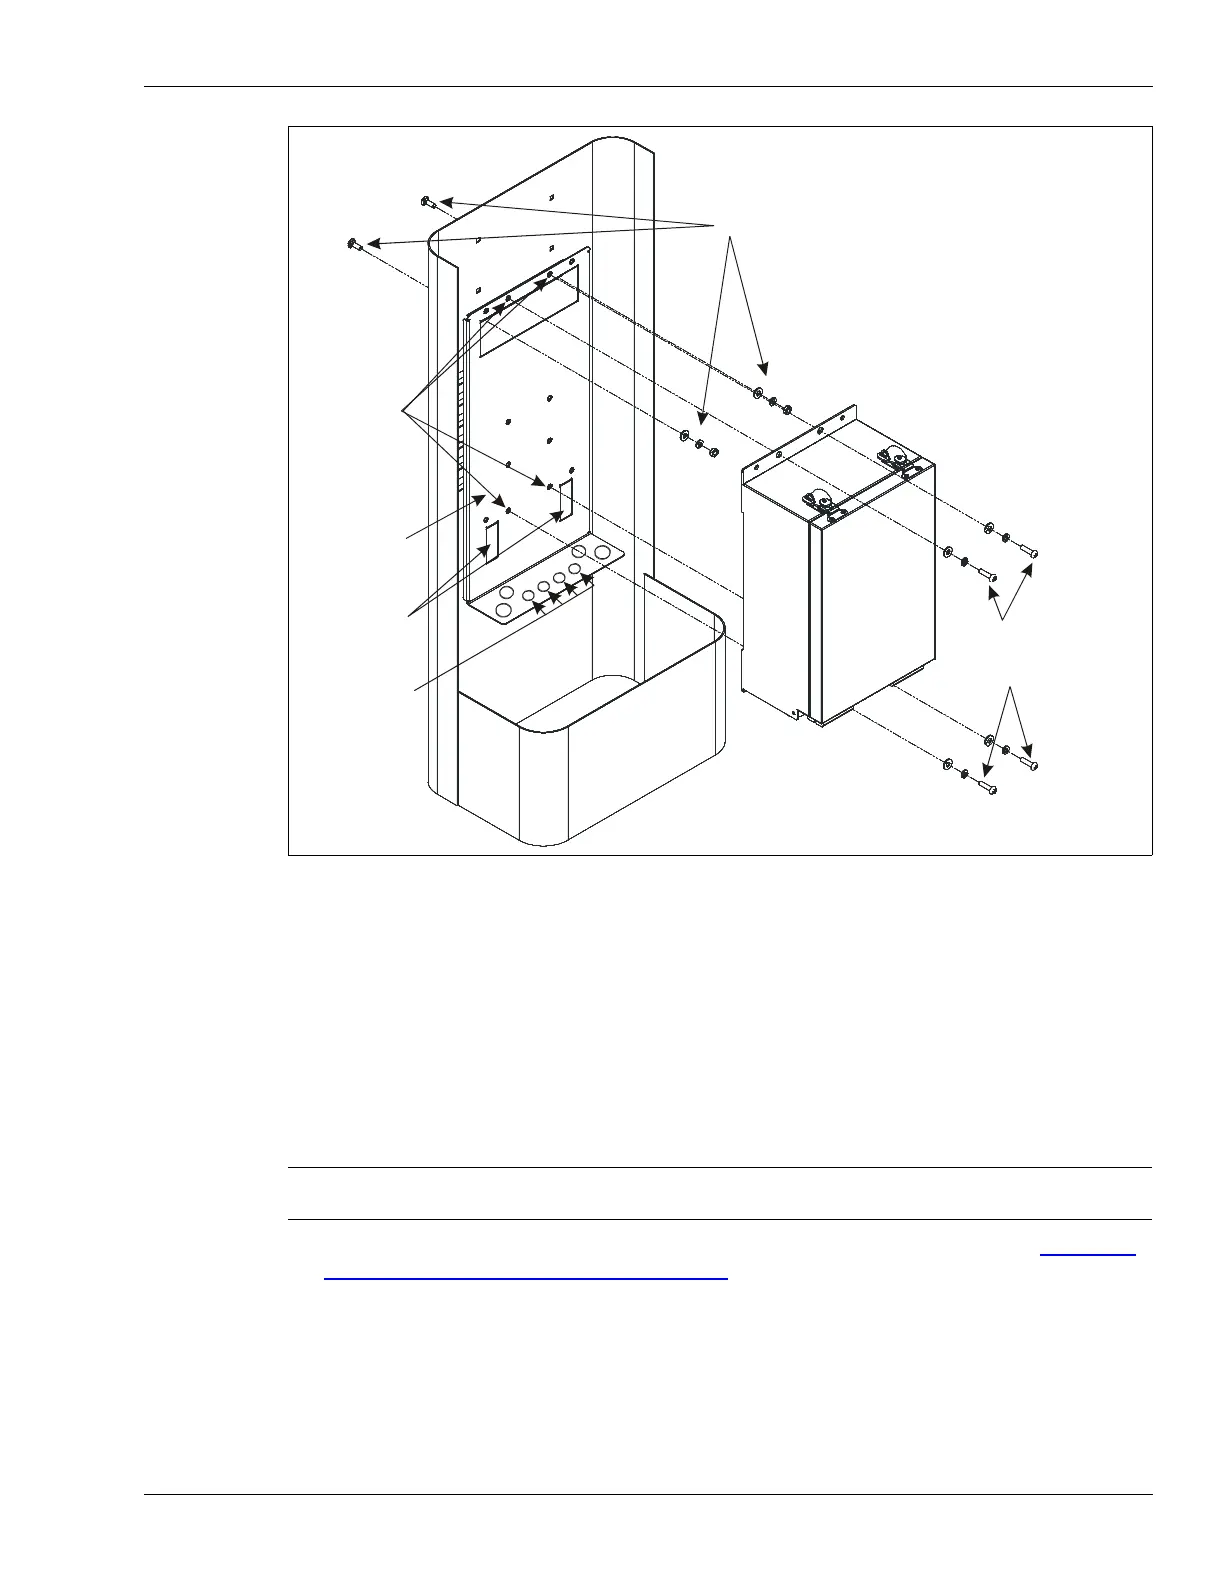
Figure 56: Mounting the bracket and OmniTrax enclosure - front view
Note Consult the local electrical code for information about installing a low
resistance earth ground.
bracket mounting hardware
enclosure
mounting
bracket
locking
tabs
telecom enclosure
OmniTrax
enclosure
enclosure
mounting
hardware
threaded
enclosure
mounting
holes
install nylon
grommets to
protect cables