Installing cable fittings
Page 124 OmniTrax Product Guide
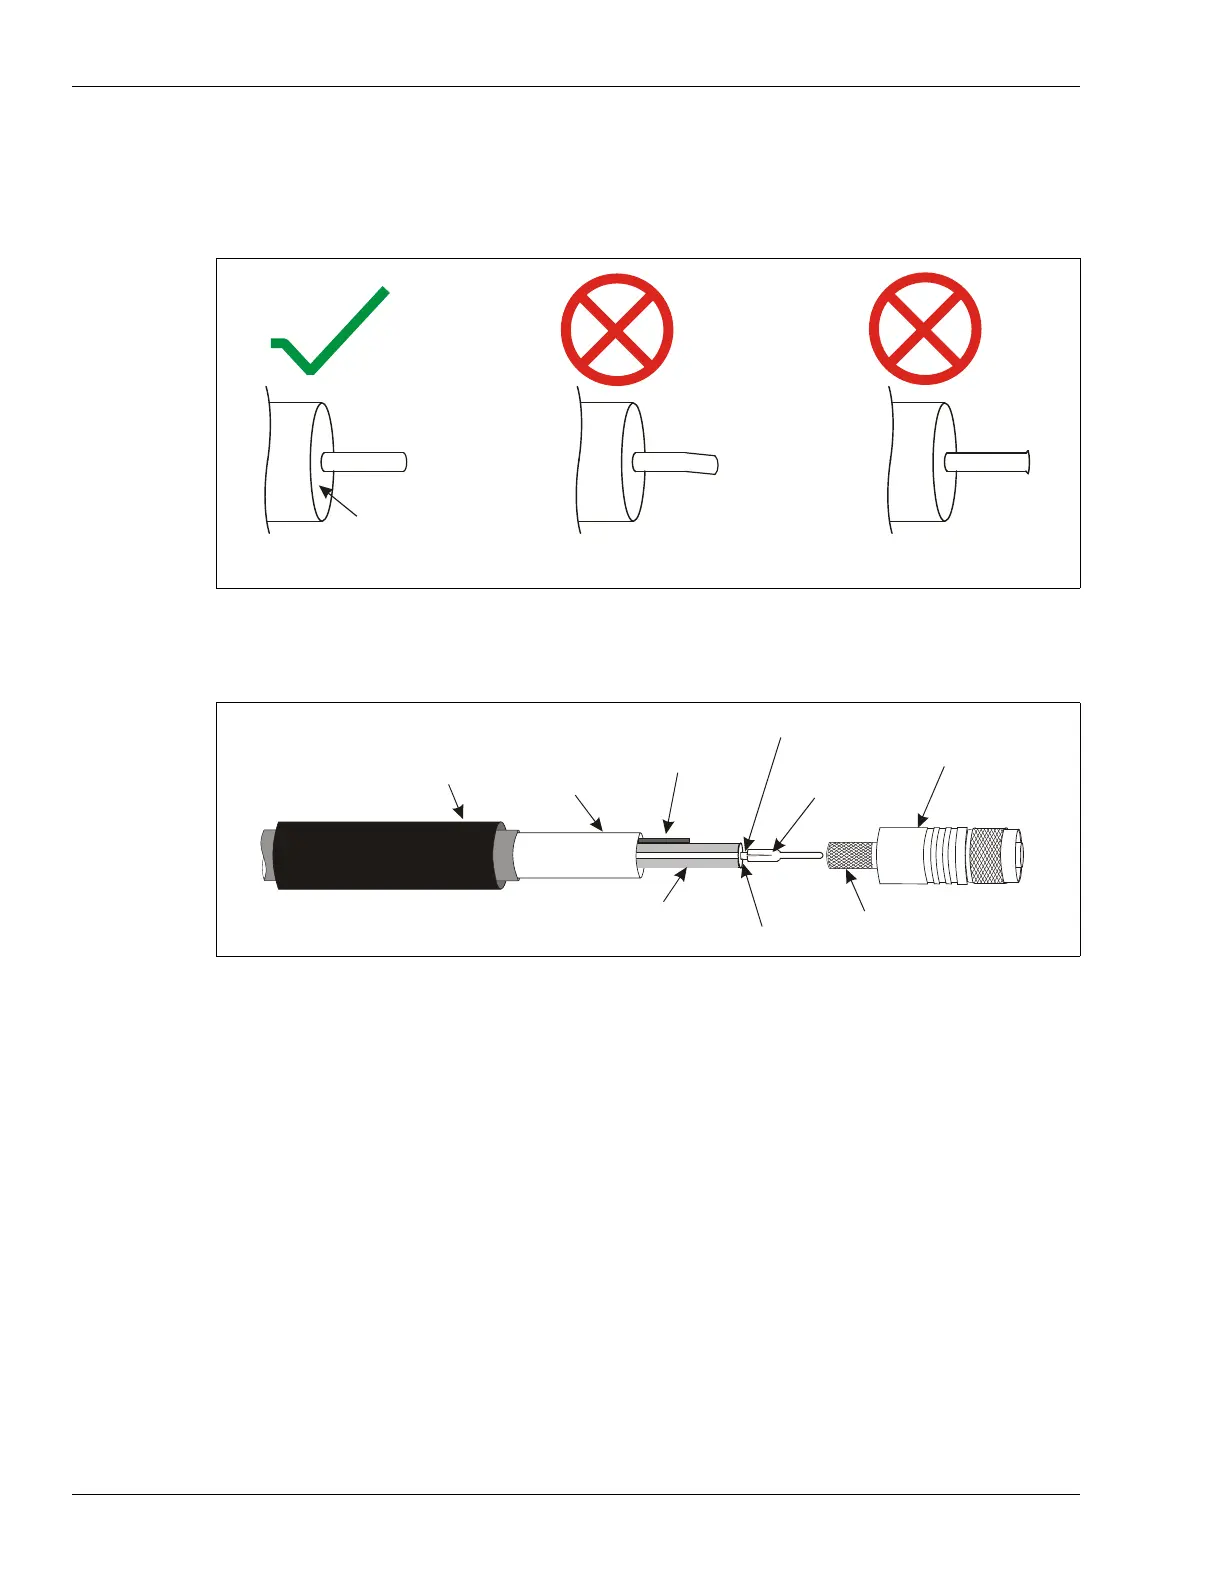
7. Ensure that the exposed center conductor is straight.
8. If necessary, remove any residue from the center conductor.
9. Using the deburring tool, deburr the end of the center conductor so that it is smooth and
rounded.
Part 2: Installing the connector
1. Press the center pin firmly onto the center conductor. There should be approximately 2 mm of
exposed center conductor showing between the center pin and dielectric core.
2. Slide the heatshrink over the sensor cable’s gray jacket.
3. Slide the crimp ring over the stripped sensor cable and drain braid until it butts up against the
gray jacket.
4. Lift the drain braid slightly, and then fit the connector shell onto the sensor cable, so the center
pin, foil and dielectric core fit smoothly into the connector shell, while the drain braid remains
outside.
Figure 91: Preparing the center conductor
Figure 92: OC2 connector installation
straight with smooth
rounded end
slight bend in
center conductor
burr on end
The center conductor MUST be straight and its end MUST be smooth and rounded. If the end is
bent or there is ANY lip or burr on the center conductor, it will NOT fit correctly into the center pin
CAUTION
no foil on dielectric
cross section
heatshrink
crimp ring
drain braid
connector midsection
center pin
center conductor
foil
dielectric core
connector shell