Installing cable fittings
Page 140 OmniTrax Product Guide
1. Refer to the site plan and cut both sensor cables side by side at the specified location.
2. Install TNC connectors on the cut cables (see Installing connectors on OC2 sensor cable
on
page 121, OR Installing connectors on SC1 and SC2 sensor cable on page 126).
3. Slide a piece of heatshrink over each sensor cable.
4. Install standalone decouplers on each of the sensor cables (see OC2/SC2 decoupler
installation (method 1 - active loops) on page 134).
5. Connect a terminator to one of the decouplers.
6. Connect the second terminator to the other decoupler.
7. Test the connections (see Cable-set continuity test (open ended perimeter)
on page 152).
8. Center a piece of heatshrink over each decoupler and use a heat gun to apply heat to seal the
heatshrink (see Sealing the heatshrink over decouplers/splices
on page 133).
Note Ensure that you follow the correct cable spacing and burial depth for the
terminators.
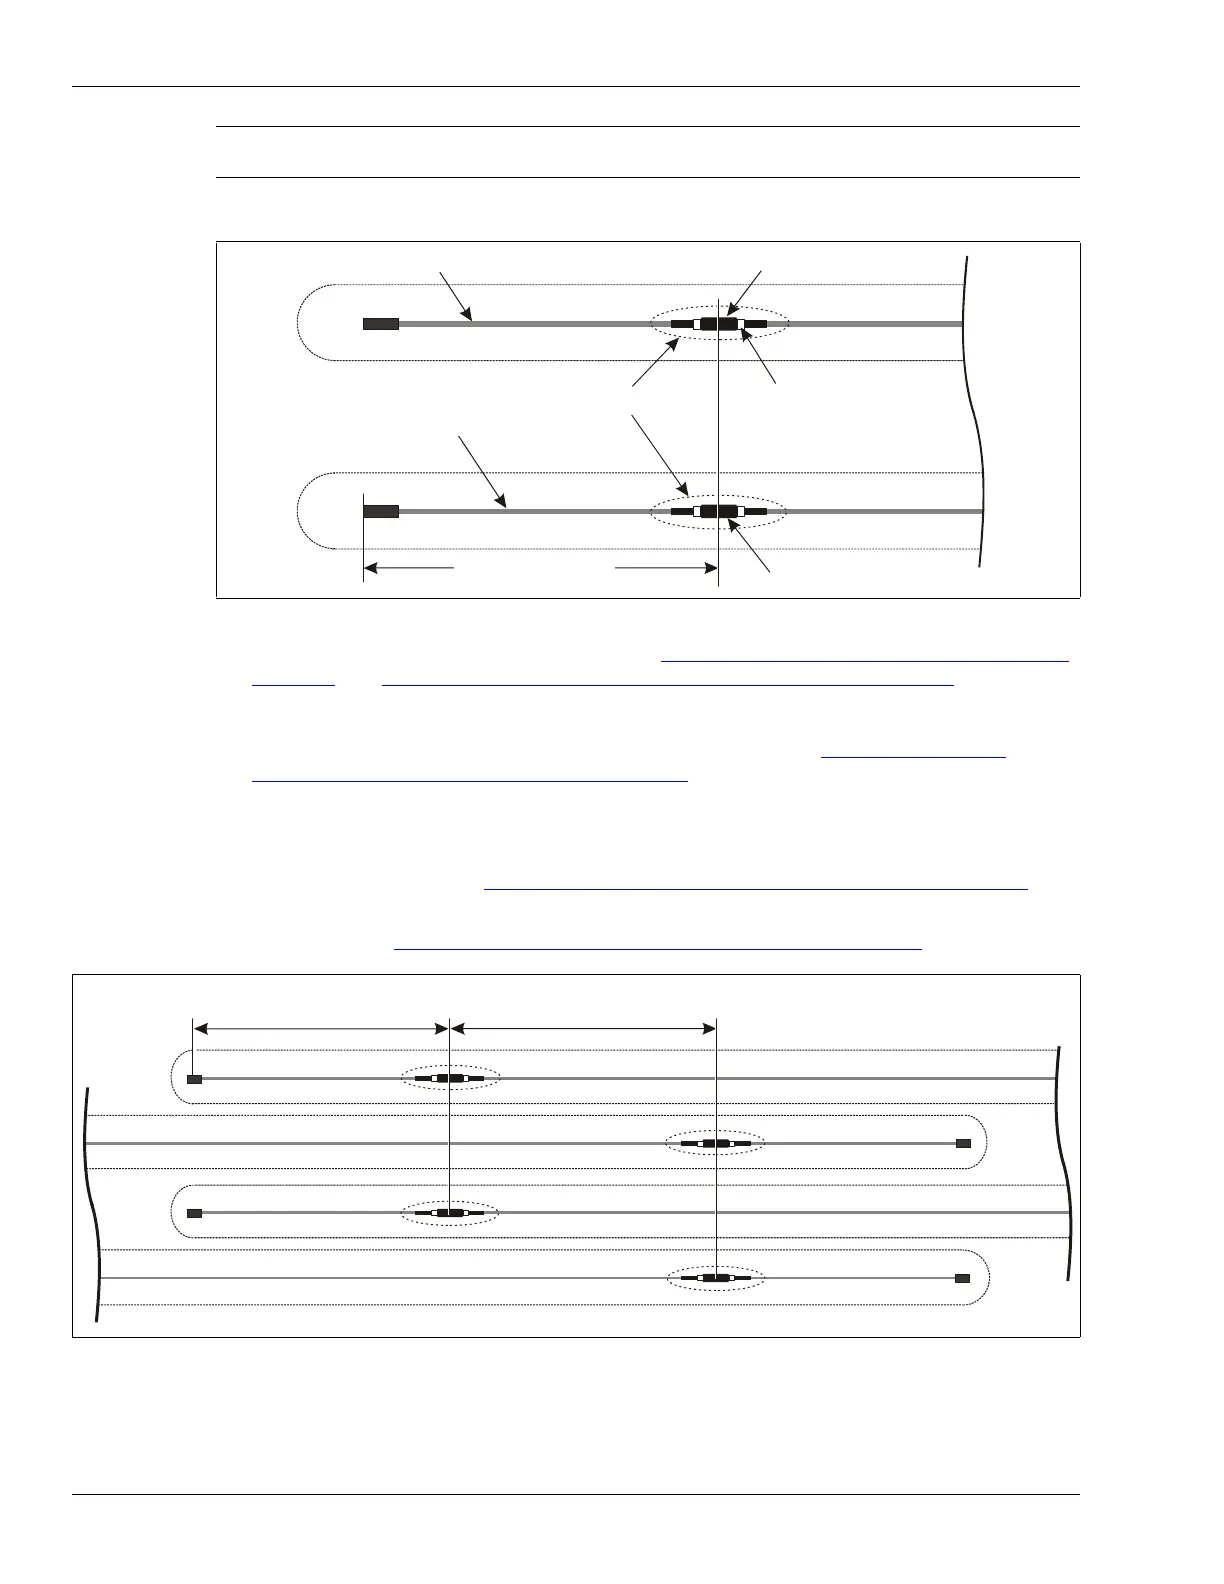
Figure 121: OC2/SC2 cable termination (terminators)
Figure 122: Overlapping OC2/SC2 terminators
terminator assembly
standalone decoupler
TNC connector
heatshrink
4 m (13 ft.)
standalone decoupler
terminator assembly
4 m (13 ft.) terminator
min. 4 m (13 ft.) overlap
of detecting cables
NOTE: Do not interleave the two sensor cable sets for narrow cable spacing single trench installations.