RDM 153
NEO Lighting Control Console
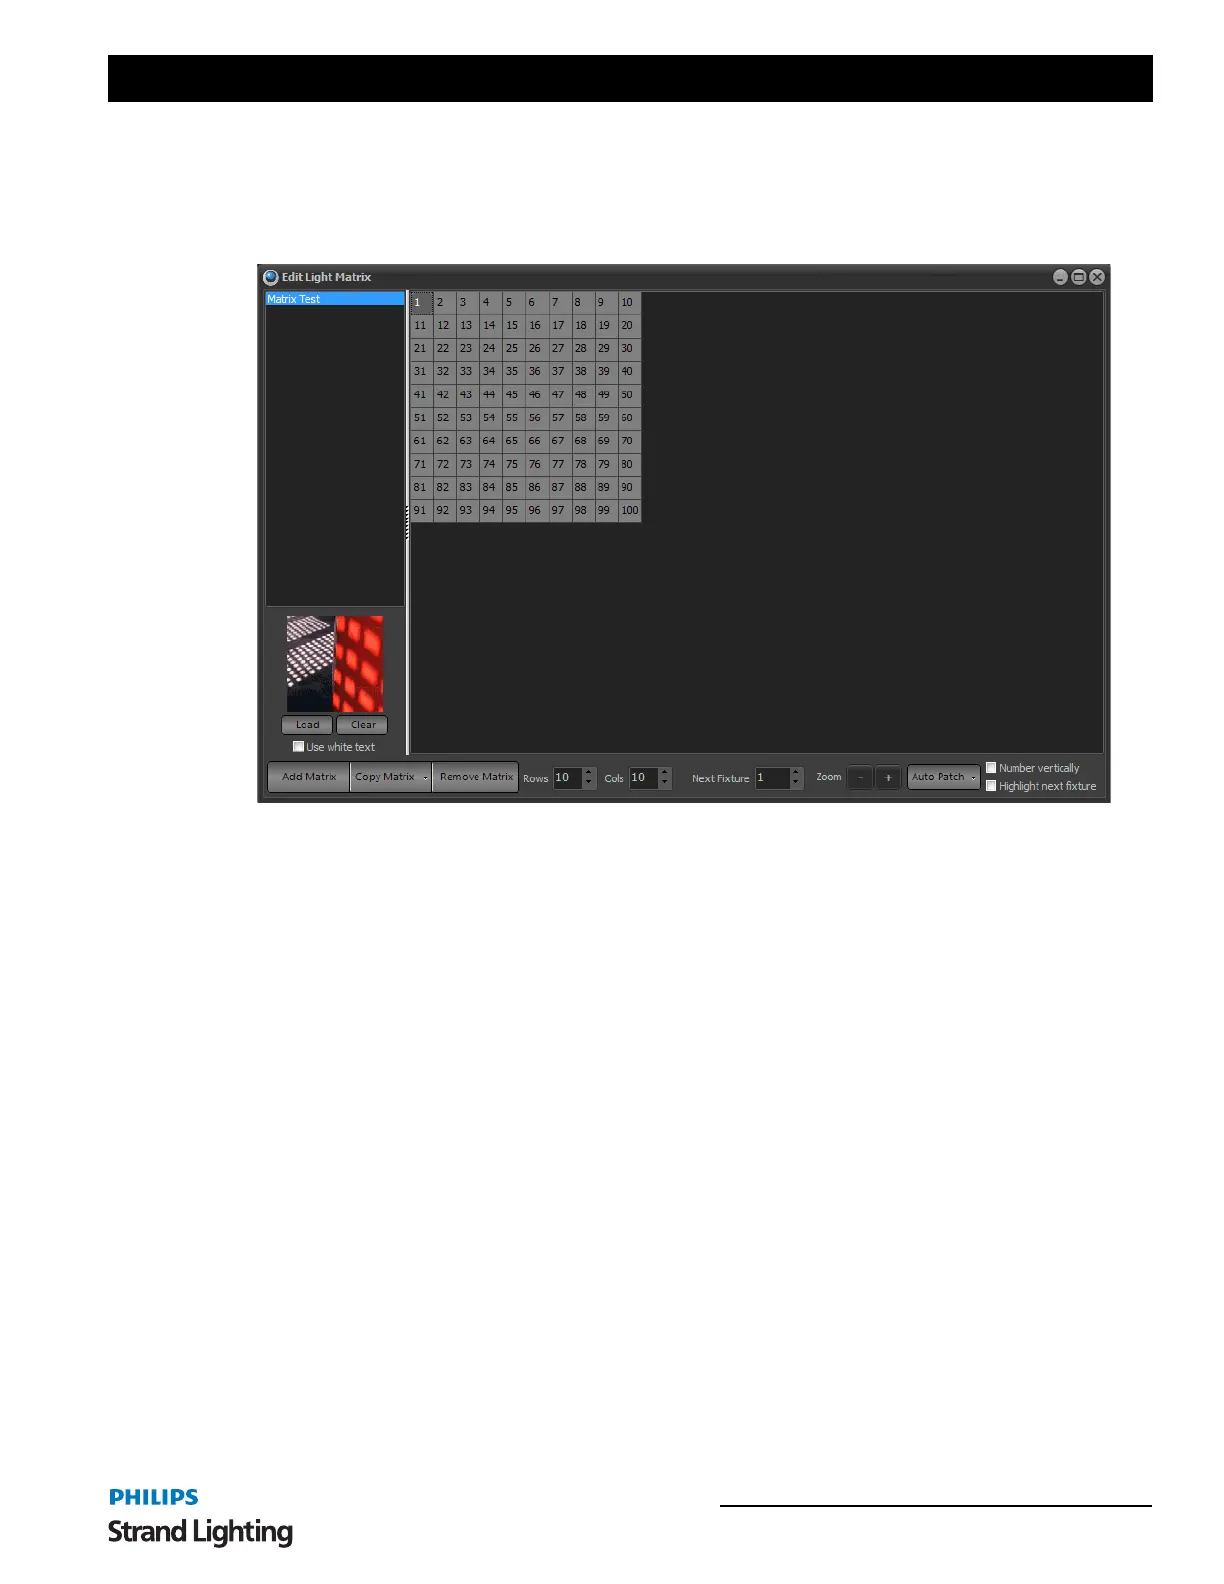
Edit Matrices
Before creating matrix or LED effects you must define how the fixtures and lights are laid out in the real world. The
"Edit Matrices" window provides a simple interface to provide a rough layout of the fixtures.
You can also access this window from the "Extras" menu on the NEO Command Line interface window.
A lighting matrix is a simple two dimensional grid where each cell can be assigned a channel or fixture from the
system. On the left of the window is a list of available matrices that have been created previously. To edit any matrix,
click on the name and the right hand grid will change to show the definition.
To create a new matrix definition click on the "Add Matrix" button in the bottom left corner of the window. A dialog
will ask you to enter a name for the new matrix. Click on the "OK" button and the new definition will appear in the
list on the left hand side of the window.
To delete a matrix click on the "Remove Matrix" button in the bottom left corner of the window. A dialog will ask
you to confirm the operation. Click on the "OK" button to delete it from the system.
The size of the matrix can be changed at any time by setting the columns and rows spin edit boxes along the bottom
of the window.
By default a matrix will be empty with no fixtures assigned. In order to output a matrix effect to fixtures you must
identify where the fixtures are in the grid. To do this click on the desired cell and a fixture number will appear. The
"Next Fixture" edit at the bottom of the window will automatically increment so that the next fixture can be assigned.
At any time you can change the "Next Fixture" number to any desired system channel.
By clicking in the grid (holding the mouse button down) and dragging the mouse over several cells you can assign a
number of fixtures at the same time. Each cell will be assigned a unique fixture and the "Next Fixture" value will be
incremented.
Assigning an Image
Use the Load & Clear options to assign a picture of the matrix for future reference. The image assigned to the matrix
is displayed behind the matrix editor and can be used to align the position of fixtures in a real environment.
Edit Matrix Window
 Loading...