7: PATHPILOT TOOLS AND FEATURES
l Select the Video Camera Recording button in the
Persistent Controls section.
Figure 7-55: Video Camera Recording button.
Whenever PathPilot is recording from a USB camera
and/or the virtual screen camera, the LED on this button
is green. If PathPilot is recording and the button is
pressed:
o
If a program is running and not paused at an
M00/M01, the recording is aborted.
o
If a program is not running, but the machine is
moving, the recording is aborted.
o
Otherwise, if a manual recording is in progress, it is
stopped and a file save as dialog will appear. If an
automatic e-stop loop recording is in progress, it is
aborted since no e-stop occurred.
To include a screen recording:
1. Toggle the Include PathPilot screen in recordings
checkbox in the Camera Settings area of the Camera(s)
tab to enable or disable screen recording.
Figure 7-56: Camera settings.
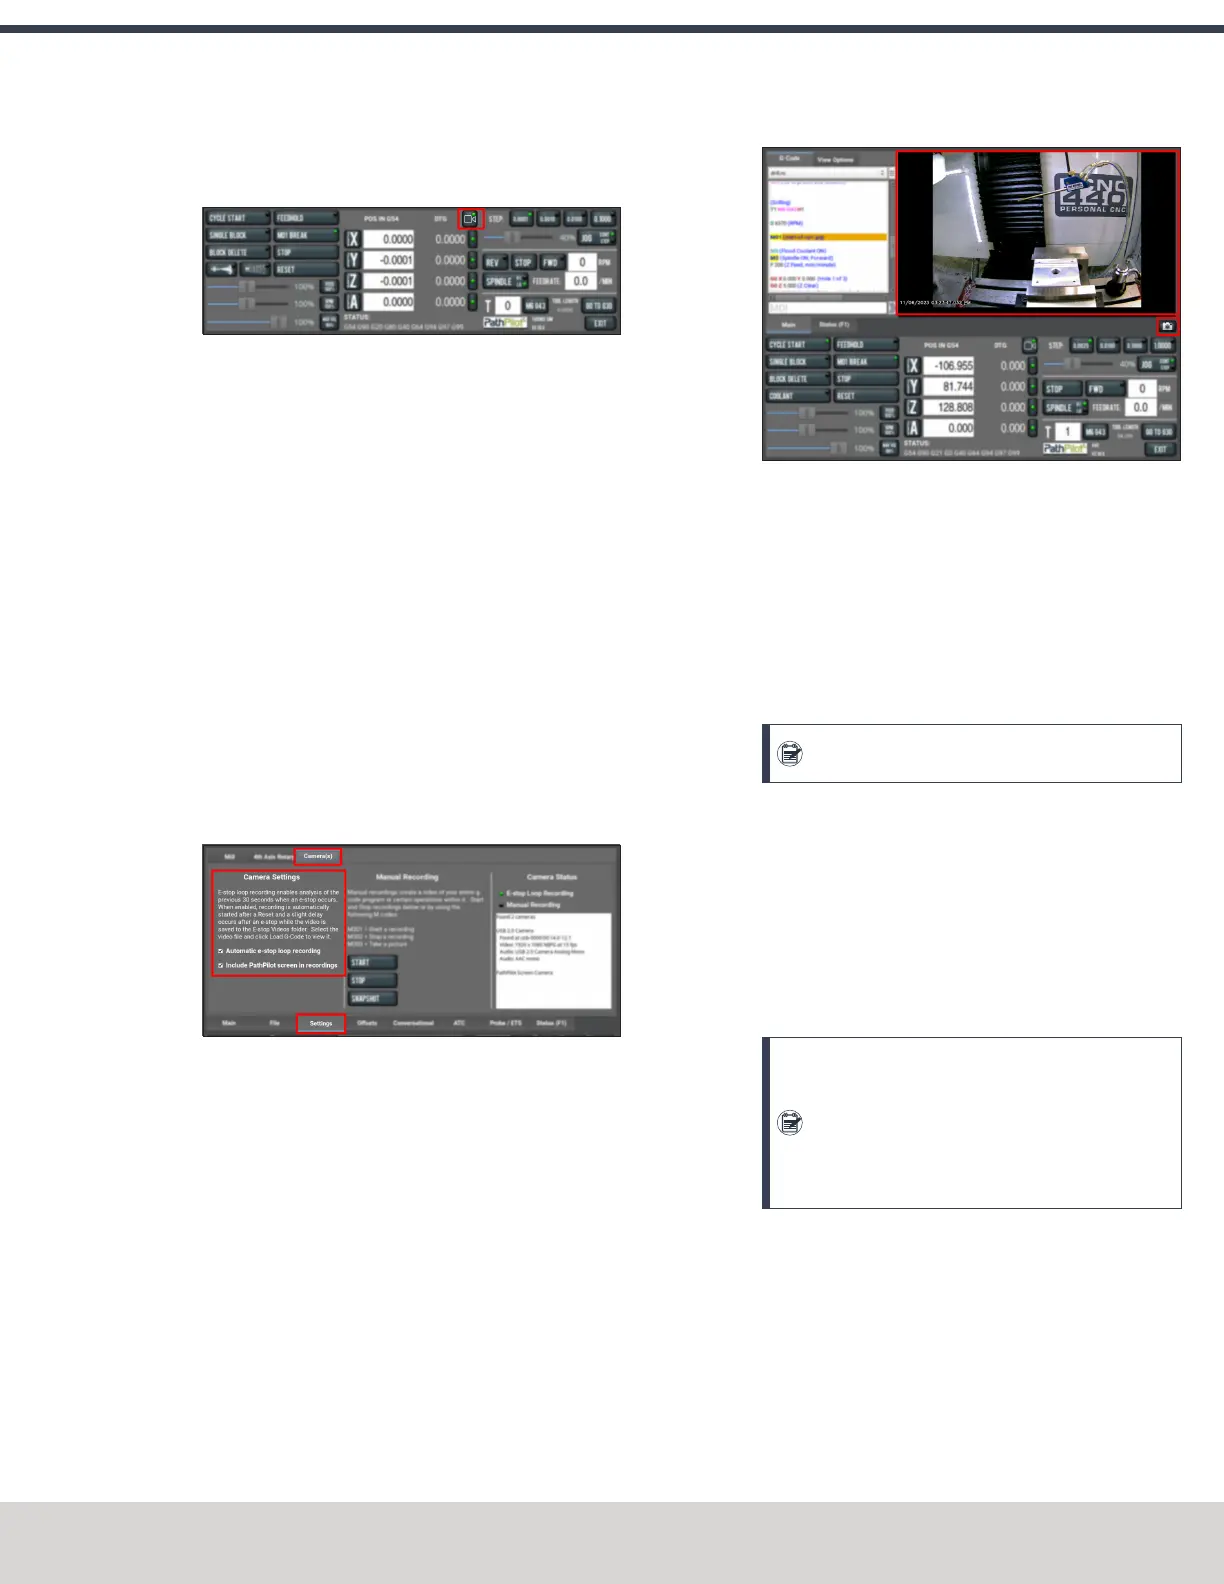
To take a picture (using all of the USB cameras at once):
1. Select Snapshot in the Manual Recording area of the
Camera(s) tab.
The Main tab displays.
2. Review the camera images, which display on top of the
ToolPath area. The camera images refresh every 0.5
seconds.
3. Align the cameras or adjust lighting to your preference,
and then select the Shutter button.
Figure 7-57: Example of taking a photo.
Automatic E-Stop Loop Recording ("Dashcam")
E-stop loop recording enables analysis of the previous 30
seconds after an E-stop. When enabled, recording is
automatically started after reset.
To enable or disable the recording of emergency stops:
1. Toggle the Automatic e-stop loop recording checkbox in
the Camera Settings area of the Camera(s) tab.
Note: This feature is enabled by default.
Automatic E-stop loop recording starts when the Reset
button is selected. If you selected Video Camera
Recording to abort a previous E-stop loop recording,
select Reset to start it again.
To view E-stop videos:
1. A slight delay occurs after an E-stop while the video is
saved to the E-stop Videos folder. Select the video file,
and then select Load G-Code to view it.
Note: The E-Stop Videos folder is automatically
monitored for internal drive space use. If the
folder size grows beyond 5 GB, the oldest video
files are automatically deleted until the folder
size becomes less than 5 GB.
Review Video and Image Files
1. On the File tab, select the video or image file and select
Load G-Code.
A video player application starts or the image preview is
displayed.
Alternatively, you could transfer the video or image files
to a Windows or macOS computer for review.
©Tormach® 2023
Specifications subject to change without notice.
Page 149 Tormach 1100M® Operator's Manual (Version 1223A)
For the most recent version, see tormach.com/support