4: INSTALLATION
8. Tighten the three pivot bolts on the monitor bracket with
an 8 mm hex wrench and a 16 mm wrench.
Figure 4-23: Tightening the monitor bracket in place.
Tip! This makes it easier to install the monitor,
which you'll do later in this installation
procedure.
9. Tap the end plug into the square tube arm with a dead-
blow hammer (or similar).
10. Secure the keyboard table to the monitor bracket with
four M5 socket head cap screws, four M5 flat washers,
four M5 split lock washers, and a 4 mm hex wrench.
11. Attach four wire tie mounts to the monitor post with
four 4 mm flat head machine screws and a Phillips
screwdriver.
Install the Monitor
1. Remove the four screws on the existing monitor
mounting plate with a Phillips screwdriver. Set aside the
screws, and discard the existing monitor mounting plate.
Figure 4-24: Existing monitor mounting plate.
2. Mount the VESA mount plate to the Controller Arm with
the four screws that you set aside in Step 1.
3. Align the monitor with the VESA mount plate.
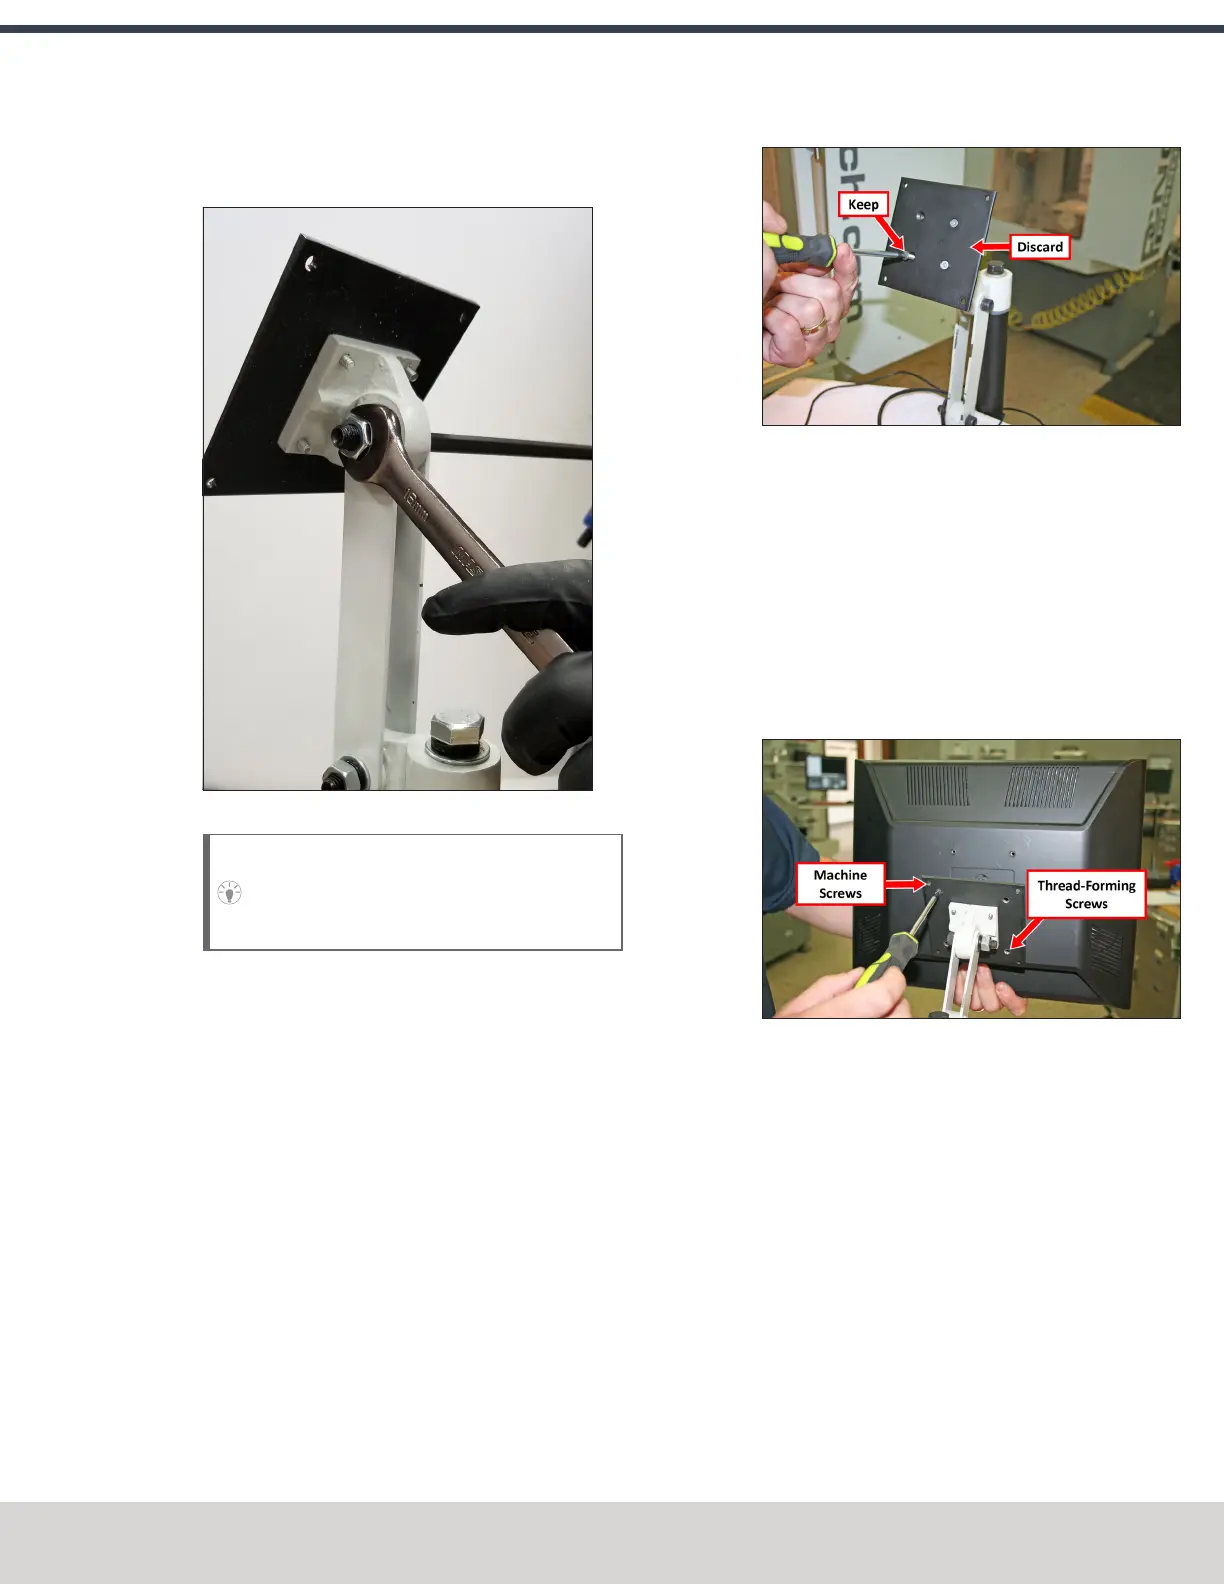
4. Attach the top of the monitor to the VESA mount plate
with a Phillips screwdriver and two M4 × 10 mm
machine screws.
5. Attach the bottom of the monitor to the VESA mount
plate with a Phillips screwdriver and two M4 × 10 mm
thread-forming screws.
Figure 4-25: Monitor installed on the VESAmount
plate.
Make Monitor Connections
1. Connect the monitor's cables.
2. Route all of the cables' loose ends down the Controller
Arm.
3. Secure the cables to the wire tie mounts that you
installed on the round monitor post with four 4 in. cable
ties.
4. Route the loose ends of all the cables through the slots
in the square tube arm.
©Tormach® 2023
Specifications subject to change without notice.
Page 49 Tormach 1100M® Operator's Manual (Version 1223A)
For the most recent version, see tormach.com/support