7. Using the dead-blow hammer, gently tap the highest
indicated spot towards the center and repeat the 360
degree sweep. Continue adjusting the high spot towards
the center of rotation and sweeping until you reach your
desired runout.
8. Tighten the 16 M3 mounting screws by hand to 1.1 Nm.
9. Reinstall the chuck or ER-40 collet holder.
Verify the Installation
1. Make sure that all wires on the motor driver and the DC-
BUSboard are completely connected.
2. Replace the wire trough covers.
3. Connect the rotary table to the A-Axis Encoder connector
on the side of the electrical cabinet.
4. Power on the machine and the PathPilot controller.
a. Turn the Main Disconnect switch to ONon the side of
the electrical cabinet.
b. Twist out the machine's red Emergency Stop button,
which enables movement to the machine axes and
the spindle.
c. Press the Reset button.
d. Bring the machine out of reset and reference it.
5. From the PathPilot interface, test the movement of the
rotary table:
l Press COMMA on the keyboard to jog the rotary table
in the -A direction.
l Press PERIOD on the keyboard to jog the rotary table
in the +A direction.
4.8.6 Install the Chip Pans
CAUTION! Sharp Objects Hazard: Before opening the
shipping crate, you must put on work gloves and
safety eyewear that meets ANSI Z87+. If you don't,
the shipping crate and steel straps could cut you,
causing serious injury.
1. Put on work gloves and eye protection.
2. Cut and remove the steel straps on the shipping crate
with snips.
3. Disassemble the shipping crate with a hammer and pry
bar. Start with removing the top, followed by the four
sides.
4. Clean the surfaces of the chip pans and the Machine
Stand with a mild degreaser (like Simple Green®) to
make sure that the butyl tape bonds to the chip pans.
5. Find the roll of butyl tape that you set aside in
"Assemble the Machine Stand" (page39).
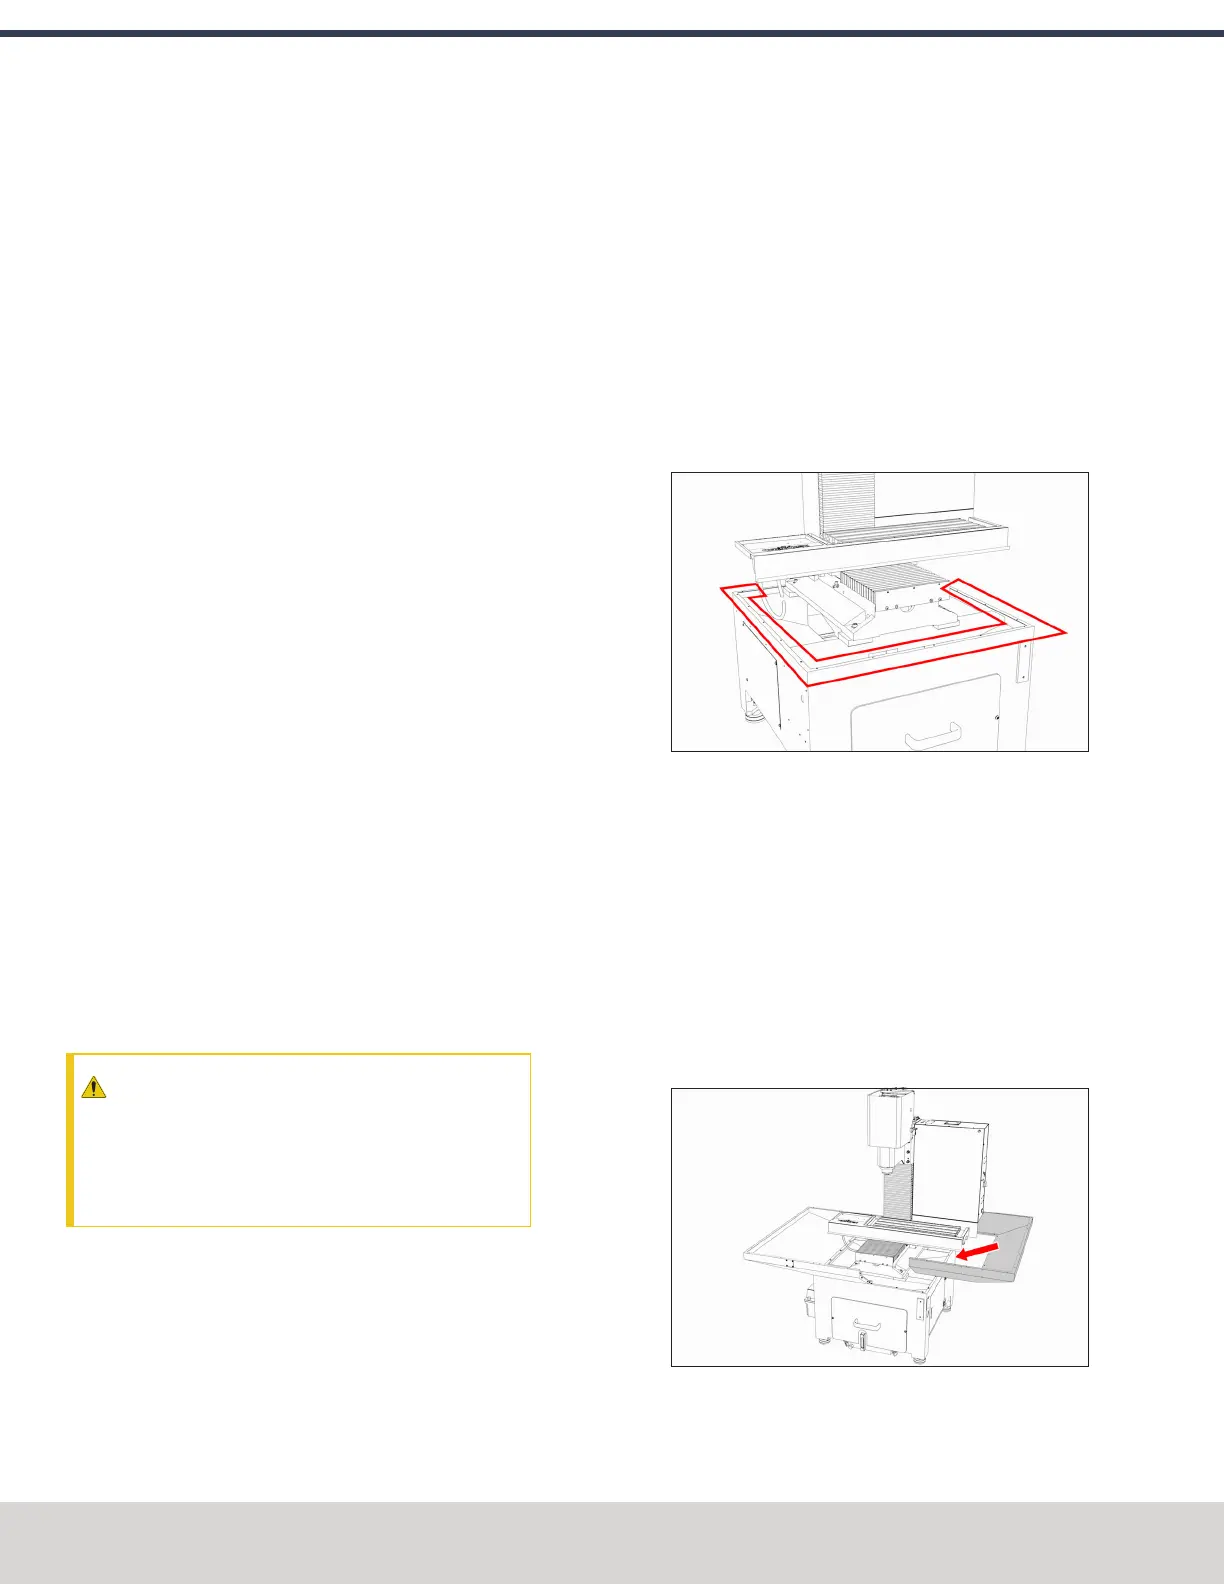
6. Remove the cover paper, and then put one strip of butyl
tape along each edge on the top of the Machine Stand.
Make sure that the butyl tape completely covers the
space in the corners or between joints — the butyl tape
should make a seal between the Machine Stand and the
chip pans to help prevent leaks.
Figure 4-110: Example of the locations to put butyl
tape.
7. Break the butyl tape on each screw hole on the top edge
of the Machine Stand with a small hex wrench (or
similar).
8. Remove the remaining cover paper from the butyl tape
strips.
9. Align the right-hand chip pan with the Machine Stand.
10. Loosely attach the right-hand chip pan to the Machine
Stand with a 4 mm hex wrench and seven M6 × 1.0 - 12
button head flange screws.
Figure 4-111: Right-hand chip pan aligned with the
Machine Stand.
©Tormach® 2023
Specifications subject to change without notice.
Page 84 Tormach 1100M® Operator's Manual (Version 1223A)
For the most recent version, see tormach.com/support
4: INSTALLATION