2. Attach the short linear rail assembly to the outside of
both the right front panel and the front lower panel with
two sets of two M6 × 1.0 - 12 screws.
Figure 4-137: Right lower linear assembly attached to
the outside of the enclosure's lower right side.
3. Repeat Steps 1 to 2 for the remaining three linear rails,
with the linear rail mount's clamping screws face in the
following directions:
l Up on the lower linear assemblies
l Down on the upper linear assemblies
Figure 4-138: Four linear assemblies attached to the
enclosure.
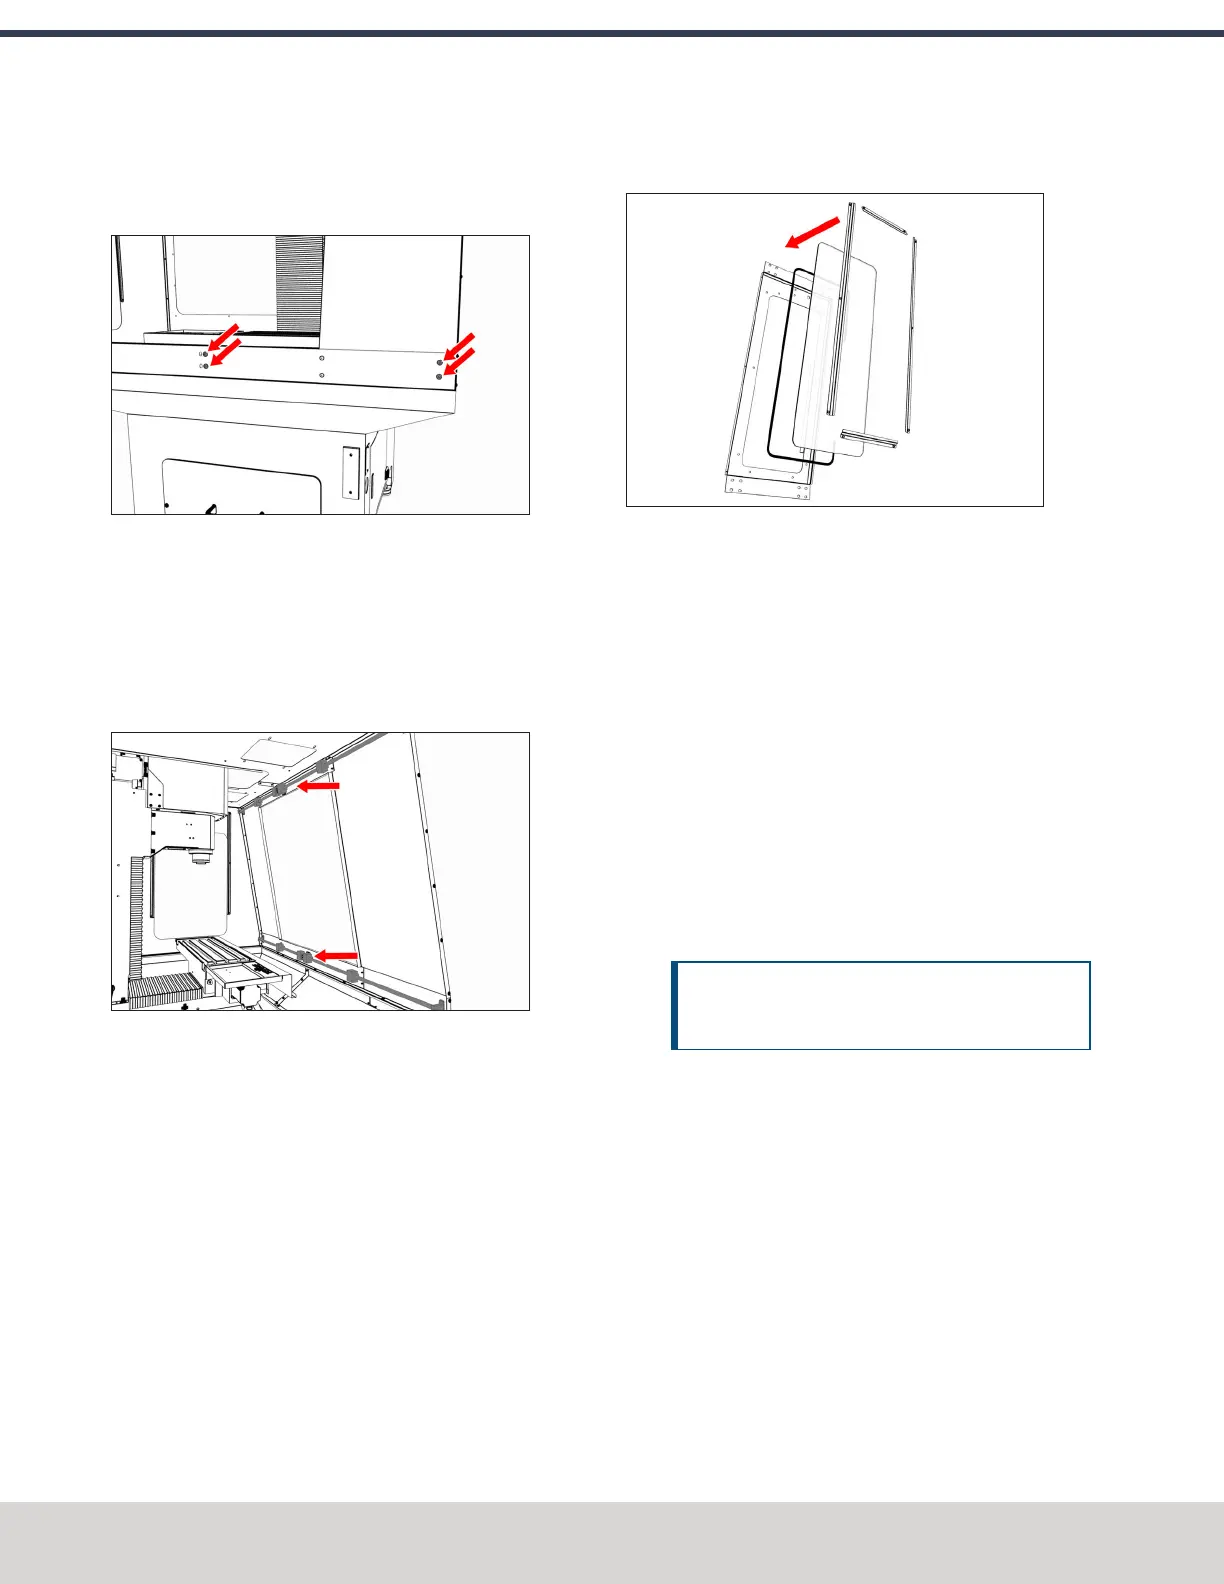
Assemble the Front Doors
Figure 4-139: Rubber trim, window, and window retainers
layered to assemble the front door.
1. Push a strip of rubber trim onto the edge of the window
opening on each front door. Make sure that the trim
starts at one end of the door handle mount, continues
around the perimeter of the window, and ends at the
opposite side of the door handle mount. When finished,
use shears or a knife to cut the excess trim.
2. Remove and discard the protective plastic film from
each window.
3. On the inside of one front door, put one window on top
of the rubber trim.
4. Attach one dark gray, vertical window retainer to both
sides of the front door's window opening with two sets
of three M5 × 0.8 - 10 screws.
NOTICE! To prevent window damage from over-
tightening, use your fingers to tighten the screws.
©Tormach® 2023
Specifications subject to change without notice.
Page 92 Tormach 1100M® Operator's Manual (Version 1223A)
For the most recent version, see tormach.com/support
4: INSTALLATION