11. Reconnect the shop's air supply to the Power Drawbar
button.
12. Examine the space between the hex head screw on the
Power Drawbar cylinder’s rod and the top of the
drawbar.
13. Verify that the gap is between 3/64 in. and 1/8 in. (1
mm and 3 mm). Depending on the size of the gap, do
one of the following:
l
Between 3/64 in. and 1/8 in. (1 mm and 3 mm)
You have completed adjusting the initial setup.
l
Less Than 1/8 in. (1 mm) Go to Step 14.
14. Find the three provided M14 flat washers.
15. Put one M14 flat washer under each mounting post on
the Power Drawbar cylinder.
4.8.3 Install the Flood Coolant Kit
Complete the following steps in the order listed:
Adjust the Coolant Pump Motor Strapping 66
Set Up the Flood Coolant Kit 66
Adjust the Coolant Pump Motor Strapping
Because the coolant pump is dual voltage, you may need to
adjust the motor strapping.
1. Identify the jumper configuration diagram. The coolant
pump motor strapping varies by machine:
l
1100 (All Models) 220 Vac (high volt)
l
770 (All Models) 120 Vac (low volt)
Figure 4-72: Coolant pump motor jumper
configuration diagram.
2. Remove the access cover on the coolant pump.
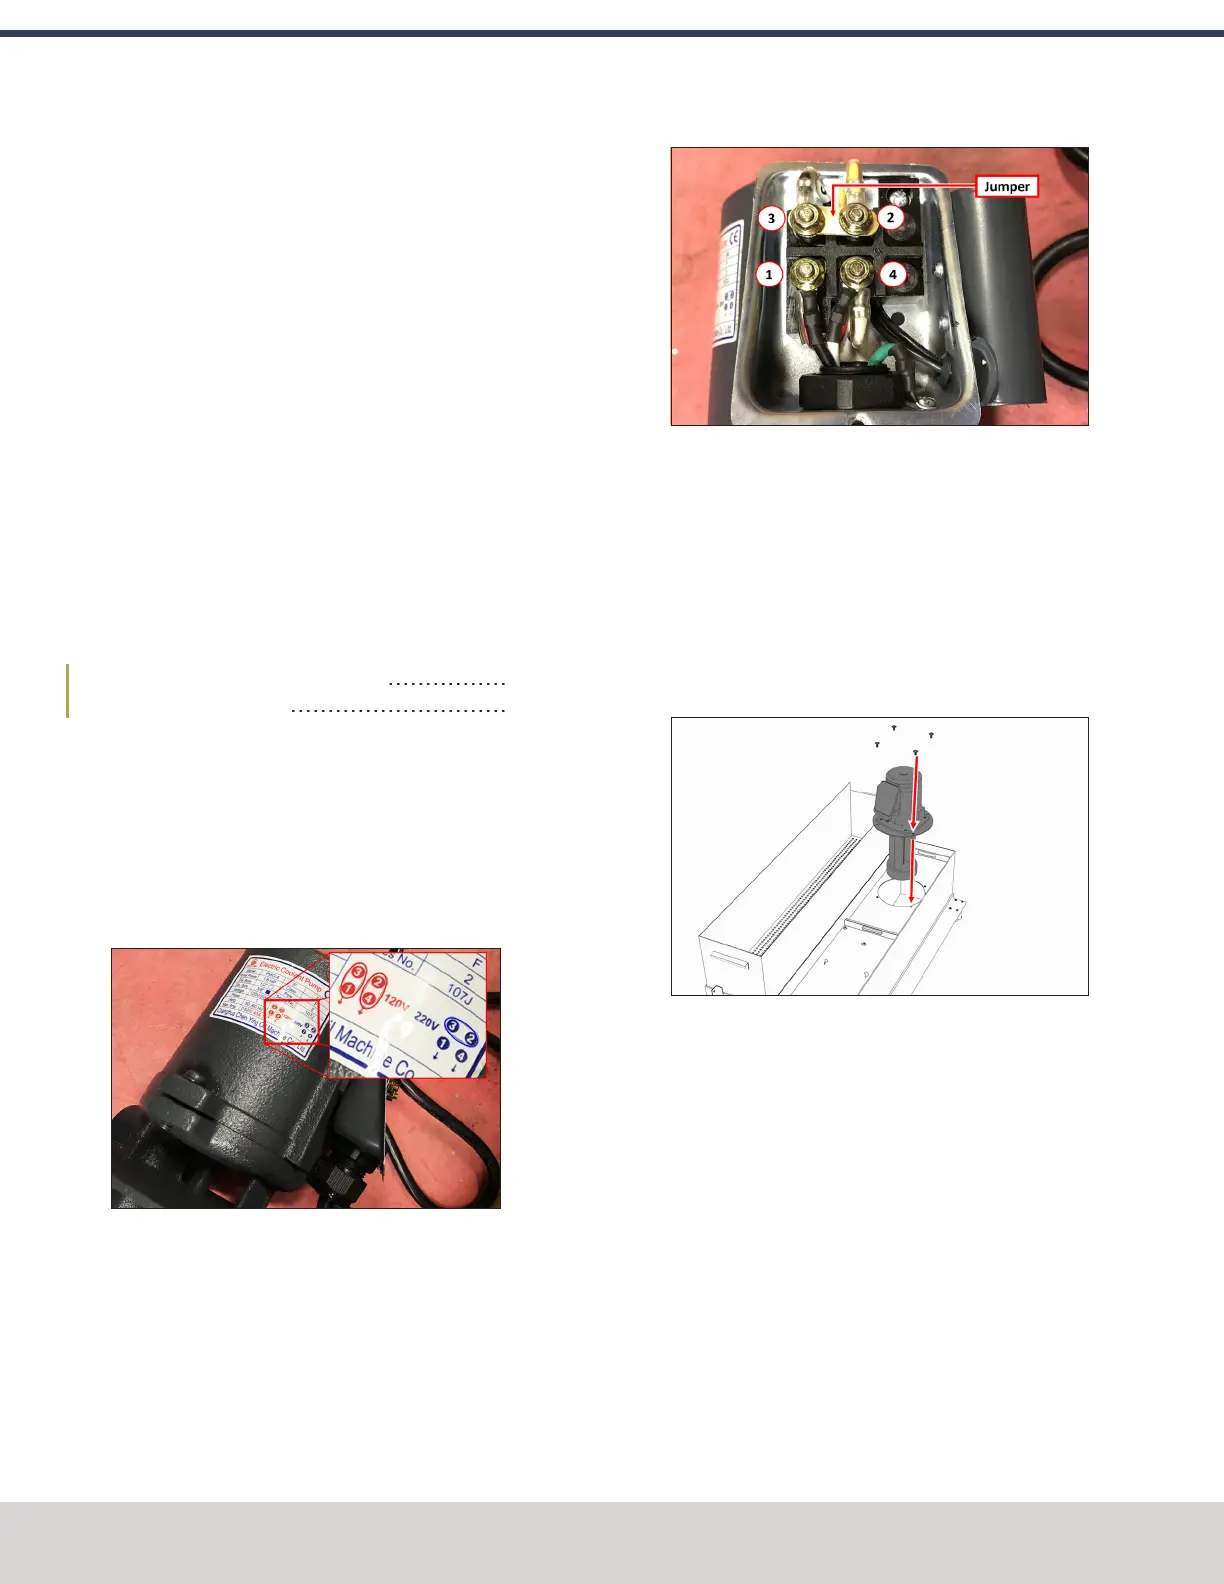
3. Reference the configuration diagram and move the
jumper to the 220 Vac (high volt) position. Don't change
the position of any wires – just the jumper that connects
the terminals.
Figure 4-73: Coolant pump motor strapping adjusted
for 220 Vac.
4. Reinstall the access cover on the coolant pump.
Set Up the Flood Coolant Kit
1. Attach the threaded elbow into the pump with a 22 mm
open-ended wrench. Twist the elbow so that it’s pointing
up.
2. Attach the coolant pump to the coolant tank with the
four M6 × 1 - 22 screws provided.
Figure 4-74: Coolant pump and its hardware moving
into the coolant tank.
©Tormach® 2023
Specifications subject to change without notice.
Page 66 Tormach 1100M® Operator's Manual (Version 1223A)
For the most recent version, see tormach.com/support
4: INSTALLATION

 Loading...

