4: INSTALLATION
5. Attach one dark gray, horizontal window retainer to the
top and bottom of the front door's window opening with
two sets of two M5 × 0.8 - 10 screws.
NOTICE! To prevent window damage from over-
tightening, use your fingers to tighten the screws.
Figure 4-140: Window retainers attached to the front
door.
6. Repeat Steps 1 through 5 to assemble the remaining
front door.
Install the Front Door Assemblies
Each front door is attached to the enclosure by securing it to
the linear bearings: the wider door is mounted on the left side
of the enclosure, and the narrower door is mounted on the
right side of the enclosure.
To install the front doors:
1. Starting with the top linear assembly, attach the narrow
door to the two upper linear bearings with two sets of
four M5 × 0.8 - 10 screws.
Figure 4-141: Narrow door attached to the top linear
assembly.
2. Move the bottom of the narrow door into alignment with
the bottom linear assembly. Then, attach the narrow
door to the two bottom linear bearings with two sets of
four M5 × 0.8 - 10 screws.
3. Repeat Steps 1 to 2 to attach the wide door to the top
and bottom linear rail assemblies on the remaining side
of the enclosure.
Figure 4-142: Both front doors attached to the
enclosure.
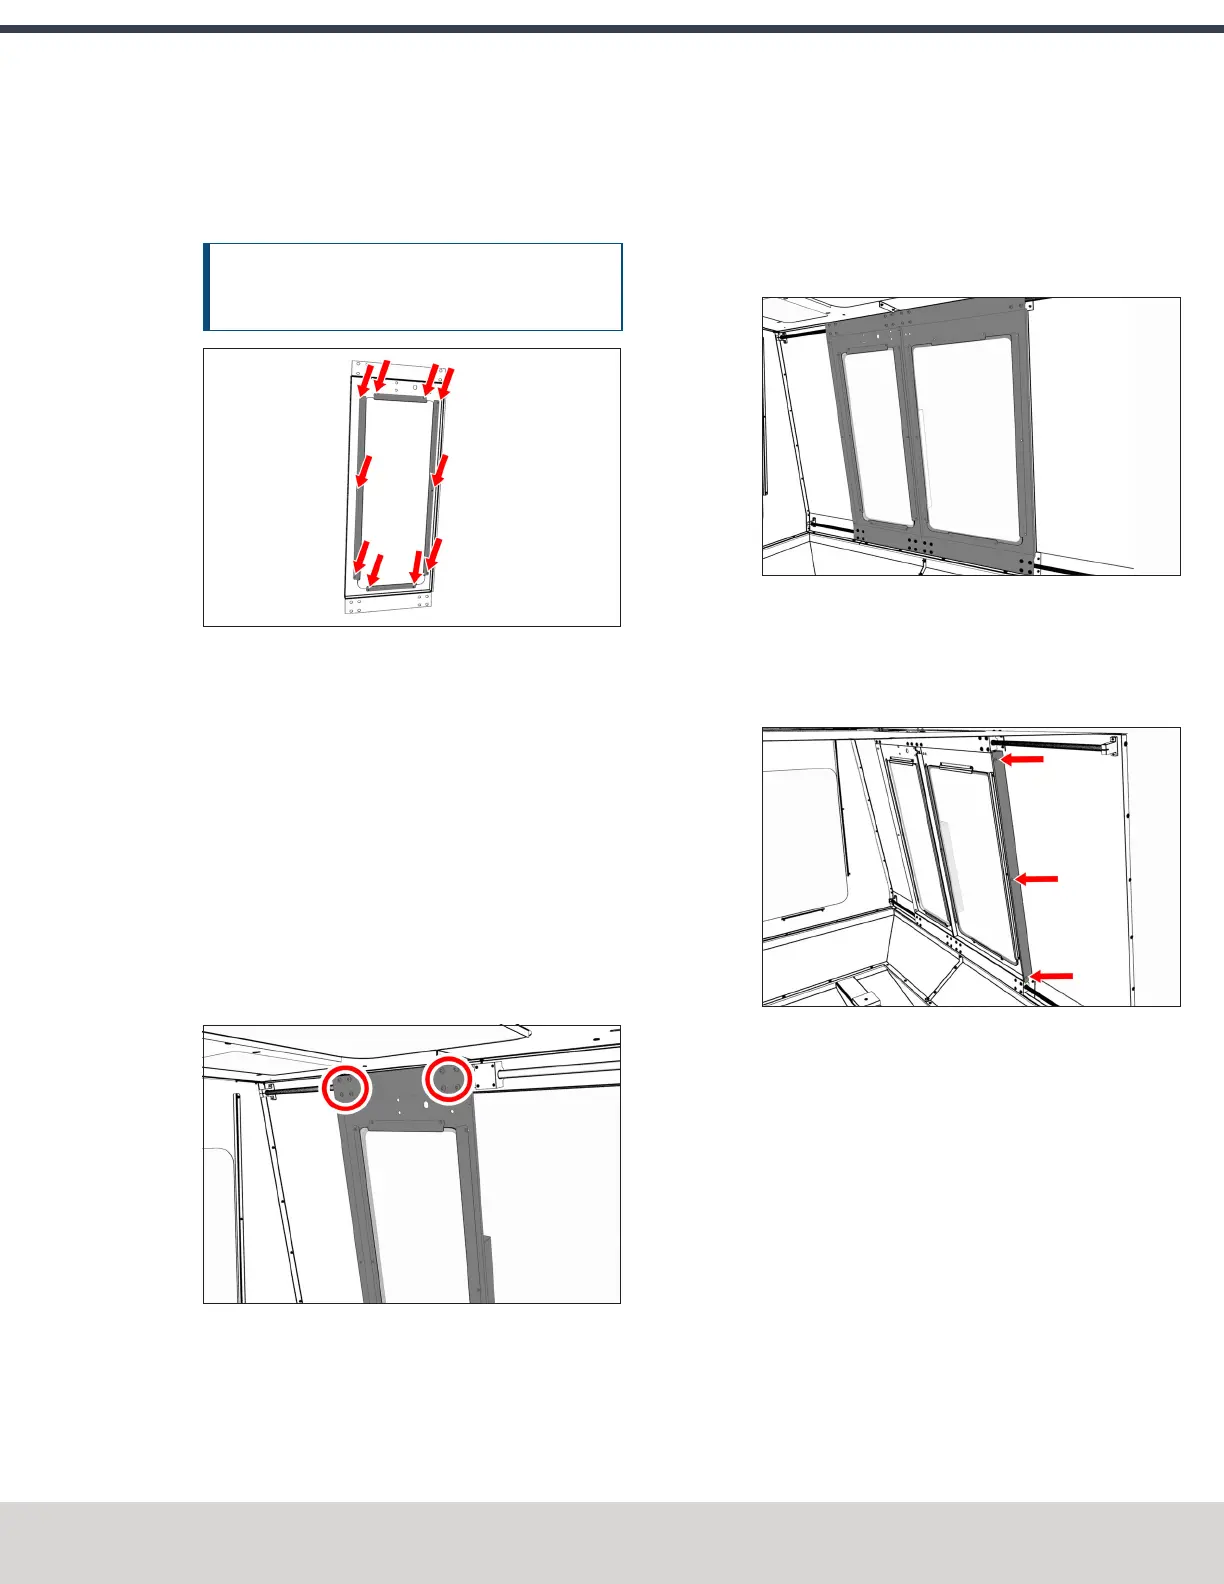
4. To the edge of the front door that's closest to the left
side of the enclosure, attach one door seal with three
M5 × 0.8 - 10 screws.
Figure 4-143: Door seal attached to the edge of the
front door.
5. Repeat Step 4 for the remaining front door.
©Tormach® 2023
Specifications subject to change without notice.
Page 93 Tormach 1100M® Operator's Manual (Version 1223A)
For the most recent version, see tormach.com/support