4: INSTALLATION
Replace the Windows
When required, replace the windows with the following parts:
l Window, 1100, Side (PN 37648)
l Window, 1100, Left Door (PN 37649)
l Window, 1100, Right Door (PN 37650)
4.8.9 Set up the Door Lock Switch Kit (Optional)
The Door Lock Switch Kit (PN38283) is an optional accessory
that reduces risk by allowing you to lock enclosure doors during
potentially hazardous machining operations.
Complete the following steps in the order listed:
Install the Door Lock Switch Kit 97
Update PathPilot 99
Enable the Door Lock Switch Kit 100
Install the Door Lock Switch Kit
1. Power off the machine and the PathPilot controller.
a. Push in the machine's red Emergency Stop button,
which removes power to motion control.
b. From the PathPilot interface, select Exit.
c. Turn the Main Disconnect switch to OFF on the side
of the electrical cabinet.
2. Attach the door switch to the door switch installation
plate on the right enclosure door with a 3 mm hex
wrench and four M5 × 0.8-50 button head screws.
Figure 4-156: Attaching the door switch assembly to
the right side of the enclosure.
Figure 4-157: Door switch assembly attached.
(Viewed from inside the enclosure.)
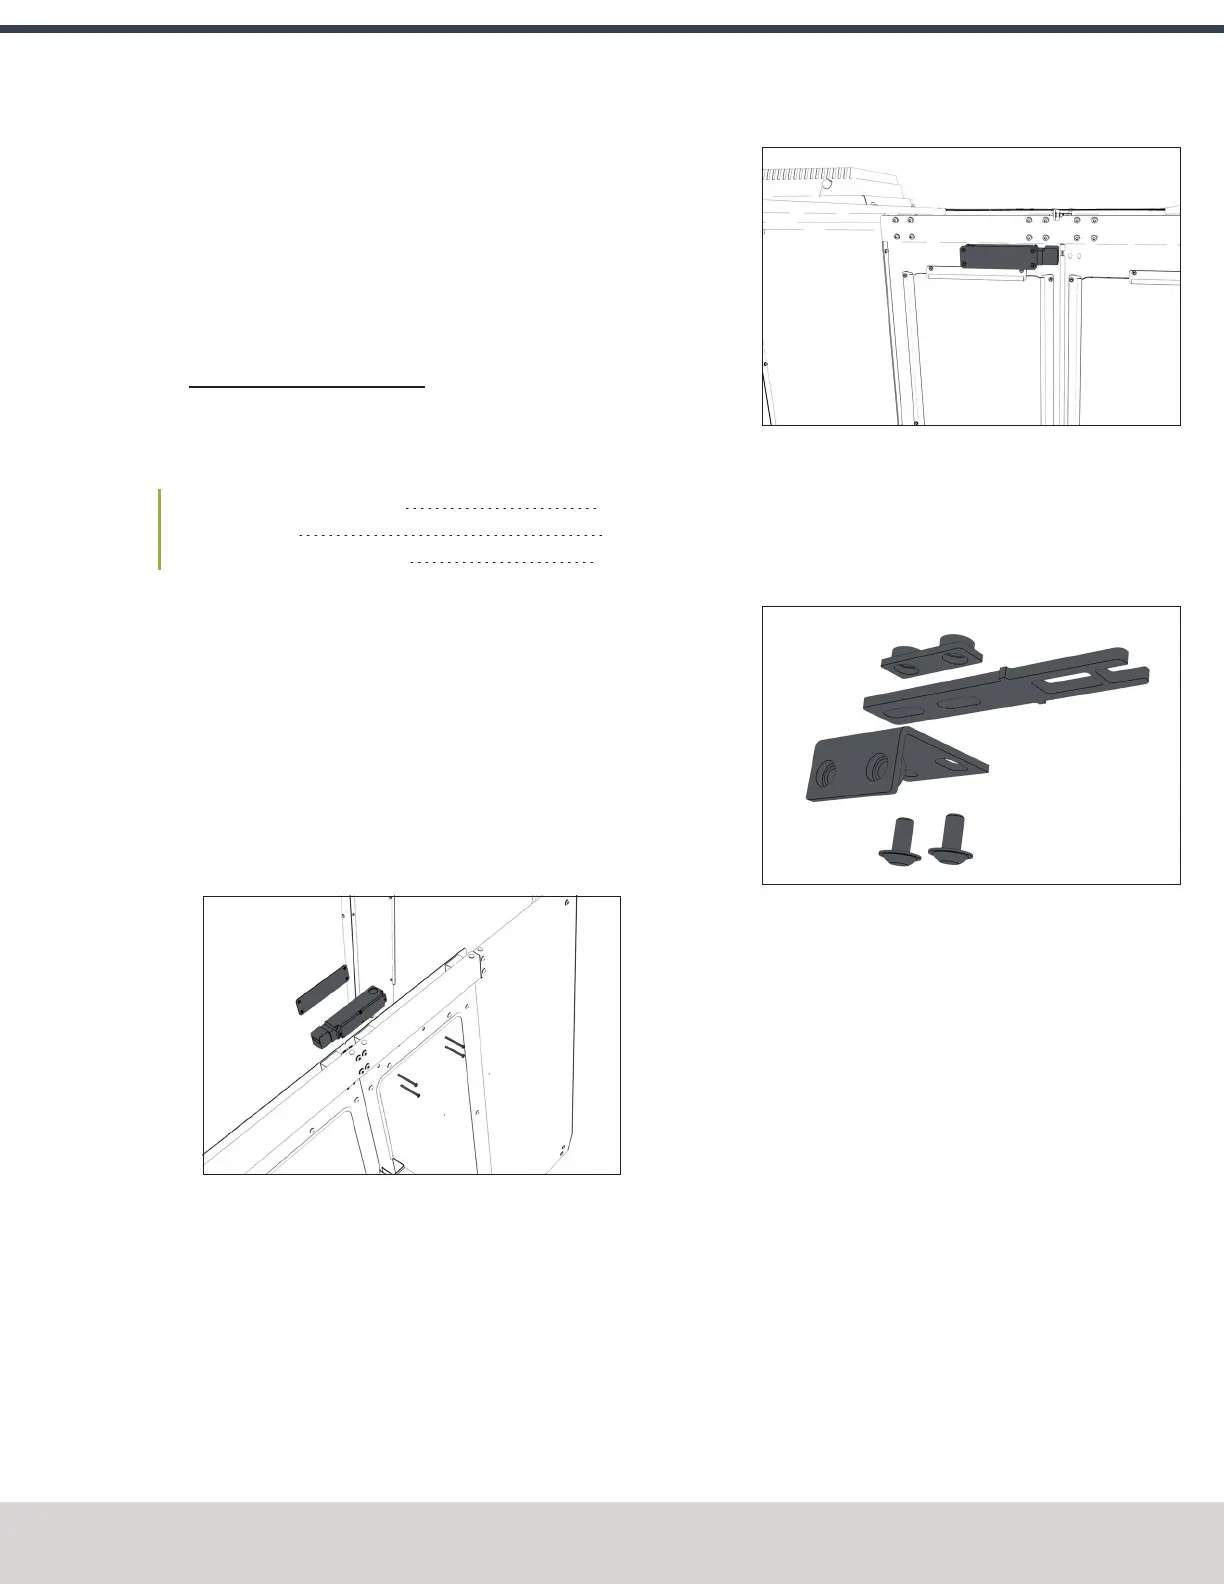
3. Loosely attach the lock key and the lock key nut to the
lock key bracket with a 3 mm hex wrench and two M5 ×
0.8-10 flanged button head screws. You'll make further
adjustments later in this procedure.
Figure 4-158: Attaching the components of the lock
key bracket assembly.
©Tormach® 2023
Specifications subject to change without notice.
Page 97 Tormach 1100M® Operator's Manual (Version 1223A)
For the most recent version, see tormach.com/support