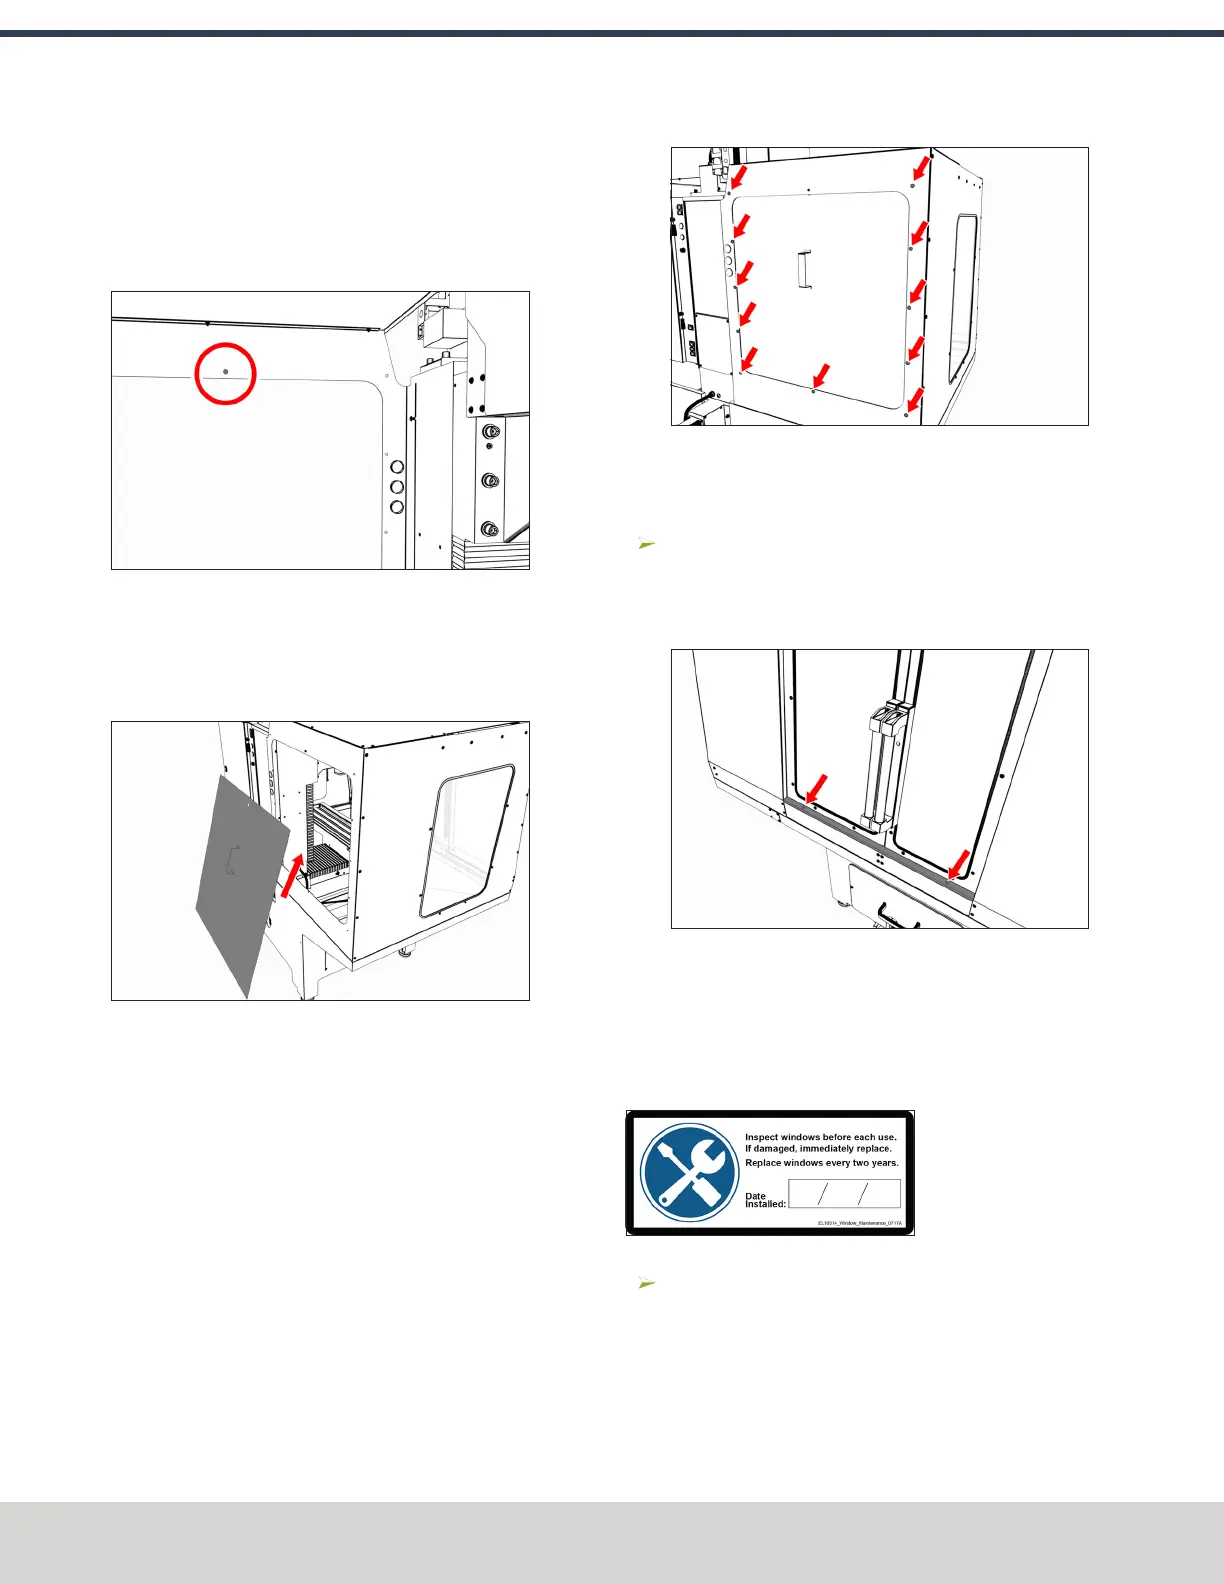
3. Find the threaded hole toward the top center of the left
rear panel. Then, loosely install one M5 × 0.8 - 10 screw
from the inside of the enclosure.
This screw supports the access panel while you install
the remaining fasteners.
Figure 4-151: Supporting screw inside the left rear
panel.
4. Tilt the access panel and put it through the opening on
the left rear panel. Then, hang it inside the enclosure on
the installed M5 × 0.8 - 10 screw.
Figure 4-152: Access panel moving inside the
enclosure.
5. Attach the access panel to the left rear panel from the
outside of the enclosure with 11 M5 × 0.8 - 10 screws.
Figure 4-153: Access panel attached to the left rear
panel.
Install the Stainless Steel Wear Guard
Find the stainless steel wear guard that you set aside
earlier.
Attach it to the lower front panel with two M5 × 0.8 - 10
screws.
Figure 4-154: Stainless steel wear guard attached to
the lower front panel.
Use the Maintenance Labels
Write the Date on the Maintenance Labels
The machine has one maintenance label on each window.
Figure 4-155: Window maintenance label.
Write down today's date on each label with a permanent
marker.
You have completed assembling and installing the
1100M Enclosure.
©Tormach® 2023
Specifications subject to change without notice.
Page 96 Tormach 1100M® Operator's Manual (Version 1223A)
For the most recent version, see tormach.com/support
4: INSTALLATION