l
If you have a PathPilot Operator Console Go to "Set
Up the PathPilot Operator Console" (page50).
Note: The PathPilot operator console is
mounted to the enclosure, but we don't
recommend completely installing it (or the
enclosure) until after you've installed all other
major accessories.
Install the Controller Arm
Tools and Items Required
l 4 mm hex wrench
l 6 mm hex wrench
l 8 mm hex wrench
l 17 mm hex wrench
l 17 mm socket wrench
l 21 mm wrench
l Dead-blow hammer (or similar)
l Phillips screwdriver
l Pry bar
CAUTION! Sharp Objects Hazard: Before opening the
shipping crate, you must put on work gloves and
safety eyewear that meets ANSI Z87+. If you don't,
the shipping crate and steel straps could cut you,
causing serious injury.
1. Put on work gloves and eye protection.
2. Open the Controller Arm crate with a pry bar.
3. Find the mounting pad on the machine stand.
Figure 4-20: Controller Arm mounting pad.
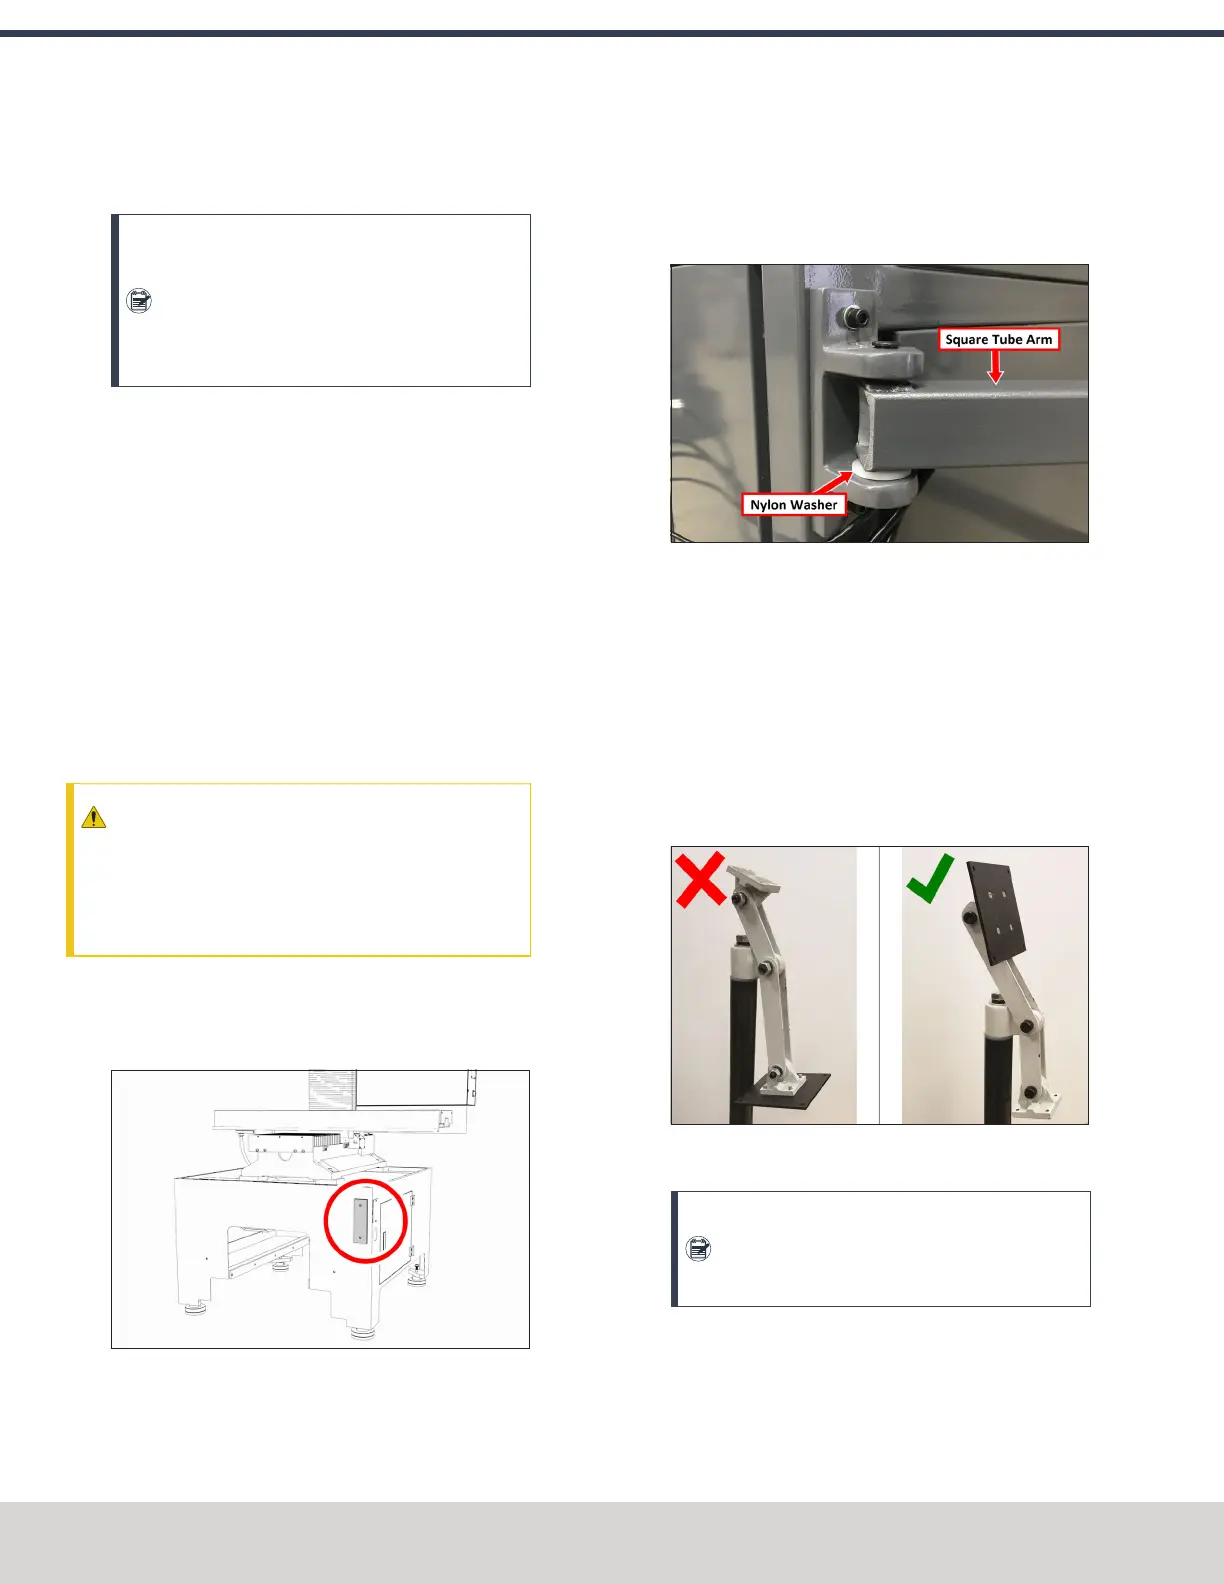
4. Secure the square tube arm to the machine stand with
two M8 socket head cap screws, two M8 flat washers,
two M8 lock washers, and a 6 mm hex wrench. Verify
that the white nylon washer is located toward the
bottom of the mounting pad.
Figure 4-21: White nylon washer on the square tube
arm.
5. Put the monitor post into the square tube arm. Verify
that the monitor bracket is toward the top, and that the
threaded holes face the holes in the square tube arm.
6. Tighten the cross bolt on the square tube arm with a 17
mm socket wrench and a 17 mm hex wrench.
7. With a 21 mm wrench, remove the monitor bracket from
the Controller Arm, and rotate it so that the largest
mounting plate is facing up.
Figure 4-22: Incorrect and correct orientations of the
monitor bracket on the Controller Arm.
Note: The largest mounting plate is for the
monitor, and the smallest mounting plate is for
the keyboard tray.
©Tormach® 2023
Specifications subject to change without notice.
Page 48 Tormach 1100M® Operator's Manual (Version 1223A)
For the most recent version, see tormach.com/support
4: INSTALLATION