4: INSTALLATION
4.7.2 Install the Axis Motors
The X-, Y-, and Z-axis motors are shipped disconnected from
the machine and secured to the pallet and the machine. You
must install them before removing the machine from the
pallet.
Note: Previously, only the Y-axis motor was shipped
disconnected from the machine and secured to the
pallet. If your machine has the X- and Z-axis pre-
installed, install the Y-axis motor, and then go to Lift
and Move the Machine.
Figure 4-8: Axis motors secured to the pallet.
NOTICE! The axis motor wires can't support the weight of
the motor. To avoid property damage, carefully move the
motors.
Y-Axis Motor
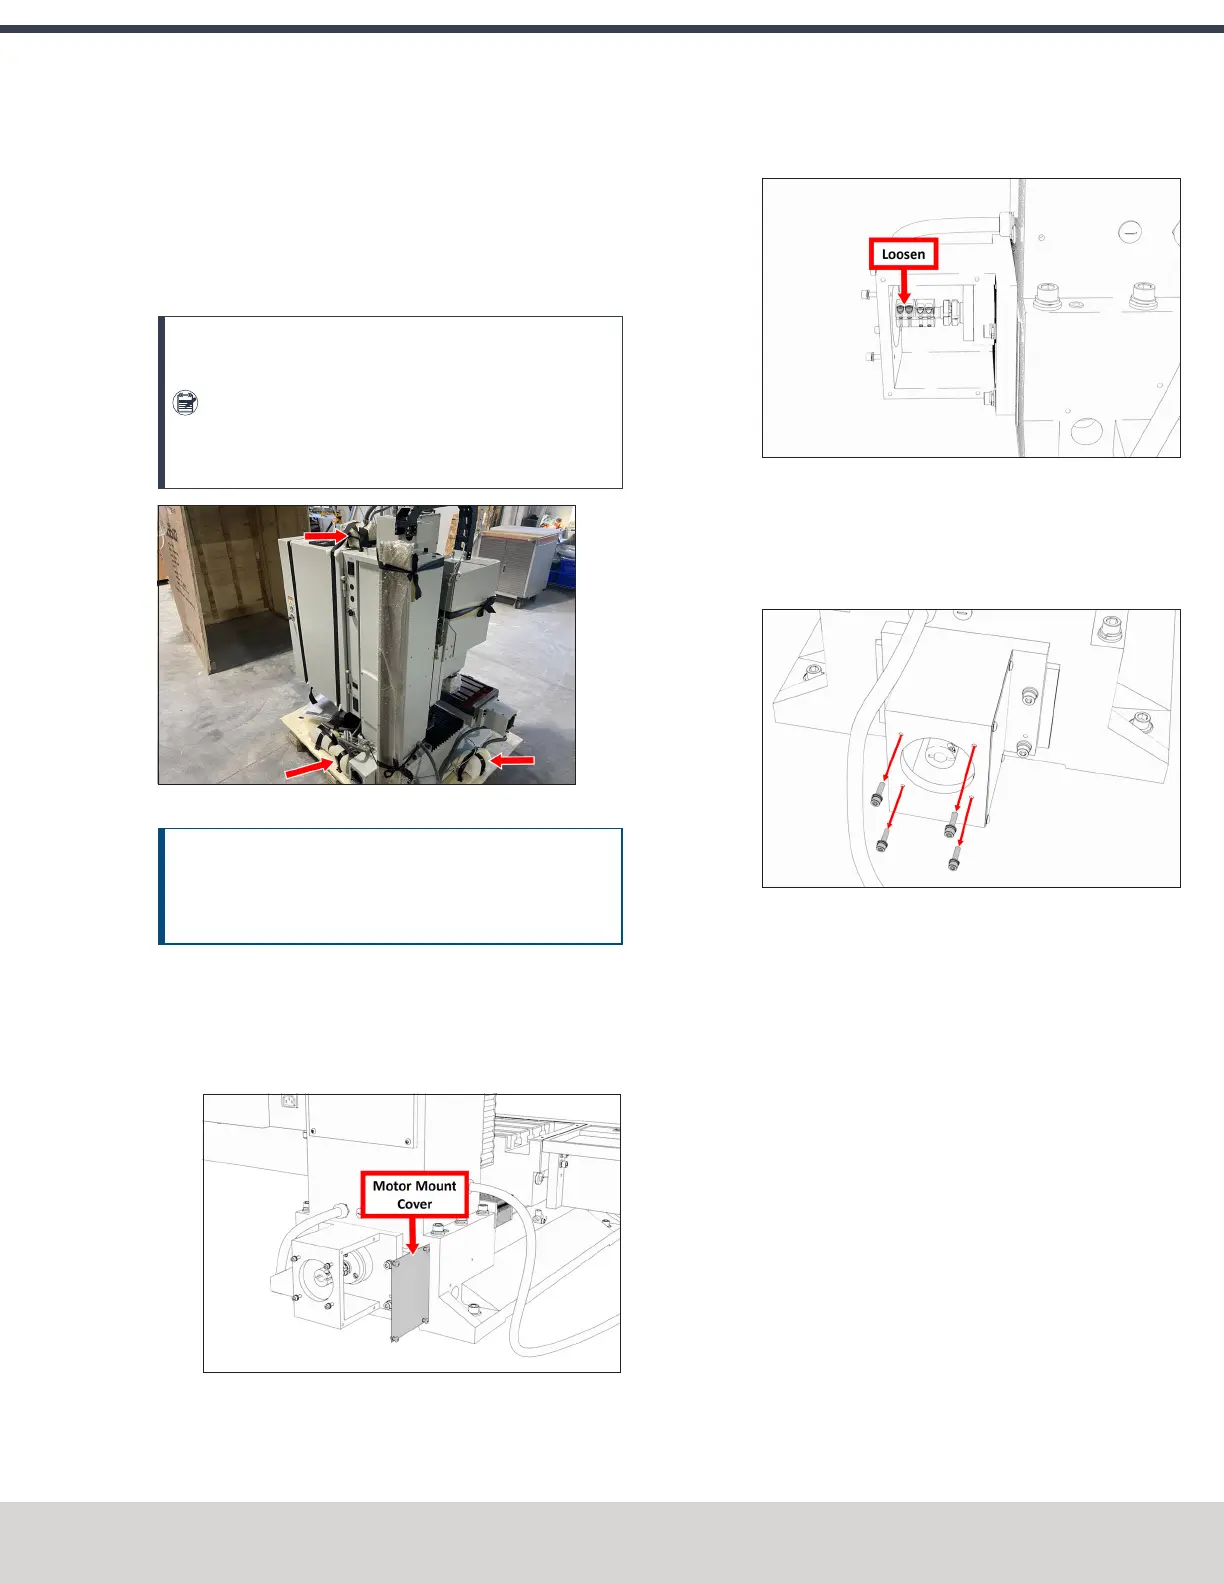
1. Remove the screws securing the motor mount cover
with a 3 mm hex wrench. Set the screws and cover
aside.
Figure 4-9: Motor mount cover.
2. Loosen the two motor shaft coupling screws with a 3
mm hex wrench.
Figure 4-10: Two motor shaft coupling screws to
loosen.
3. Remove the four M5 cap head screws, lock washers, and
washers from the motor mount with a 4 mm hex
wrench. Set all aside.
Figure 4-11: Motor mounting hardware removed from
the motor mount.
4. Remove any paint bleed from the face and bore of the
motor mount with a mild abrasive.
5. Remove the Y-axis motor from the pallet and/or the
machine, and discard the shipping materials.
©Tormach® 2023
Specifications subject to change without notice.
Page 43 Tormach 1100M® Operator's Manual (Version 1223A)
For the most recent version, see tormach.com/support
 Loading...


