4: INSTALLATION
10. Power off the machine and the PathPilot controller.
a. Push in the machine's red Emergency Stop button,
which removes power to motion control.
b. From the PathPilot interface, select Exit.
c. Turn the Main Disconnect switch to OFF on the side
of the electrical cabinet.
Make Air Connections
1. Cut the cable tie that secures the ATC cables and plastic
tubes together with snips.
2. Route the loose ends of the two 1/4 in. plastic tubes
connected to the ATC main assembly through the
enclosure knockout, up the energy chain, and toward the
Power Drawbar.
WARNING! Crush Hazard: If the ATC isn't
completely retracted, it could move once the
air is reconnected. When you reconnect the air,
you must keep your hands away from the ATC.
3. Connect the loose ends of the 1/4 in. plastic tubes in the
following order:
a. Connect the Retract (PDBBottom) airline to the
bottom push-to-connect elbow on the Power
Drawbar.
b. Connect the Advance (PDBTop) airline to the top
push-to-connect elbow on the Power Drawbar
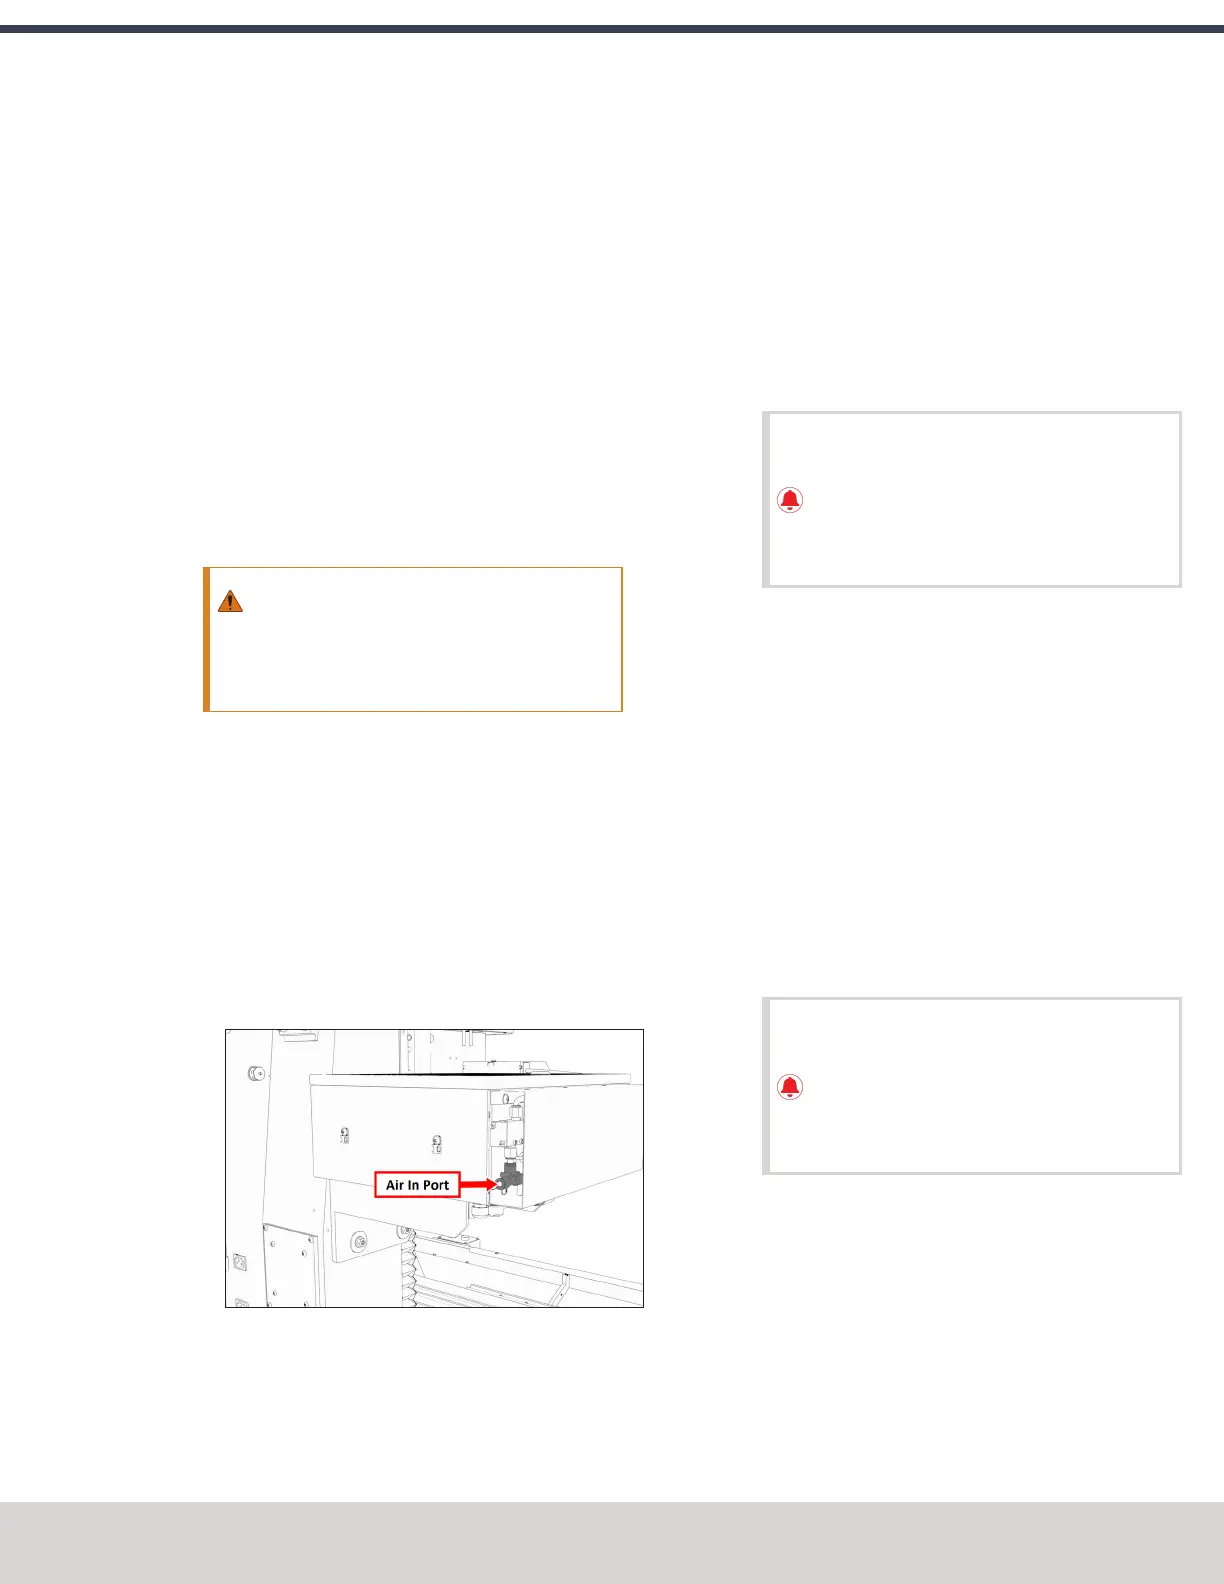
c. Connect the air supply line from the FRL to the air in
port in the ATC main assembly, as shown in the
following image.
Figure 4-89: Air in port in the ATC main assembly.
d. If you haven't already done so, connect your shop's air
supply to the FRL.
Make Electrical Connections
1. Route the ATC power cable and the USB cable toward
the rear of the machine and out of one of the enclosure
knockouts.
2. Put the USB cable in the access hole in the rear of the
stand toward the controller.
3. Put the USB cable into an open USB port on the PathPilot
controller.
IMPORTANT! Do not connect the ATC USB
cable to a USB hub. Make the connection
directly to the PathPilot controller itself. If you
don't have any free USB ports on the controller,
connect a different accessory to a USBhub.
4. Connect the ATC power cable to the ATC Power
connector on the side of the electrical cabinet (below the
Enclosure Lights Power connectors).
Verify the Installation
1. Power on the machine and the PathPilot controller.
a. Turn the Main Disconnect switch to ONon the side of
the electrical cabinet.
b. Twist out the machine's red Emergency Stop button,
which enables movement to the machine axes and
the spindle.
c. Press the Reset button.
d. Bring the machine out of reset and reference it.
IMPORTANT! You must update your controller
to the latest version of PathPilot before
operating the Automatic Tool Changer. If you
don't, there's a risk that the ATC could become
inoperable.
2. If you have not yet done so, you must make sure that the
PathPilot controller is updated to the latest version of
PathPilot:From the Status tab, select Update. Then,
follow the on-screen instructions.
©Tormach® 2023
Specifications subject to change without notice.
Page 73 Tormach 1100M® Operator's Manual (Version 1223A)
For the most recent version, see tormach.com/support