February, 2008
4-70
WorkCentre 5225, 5230
REP 11.5.1
Launch Version
Repairs and Adjustments
2. Remove the following parts:
• Platen Glass (REP 11.3.1)
• Control Panel (REP 11.1.2)
• DADF Assembly (REP 15.1.1)
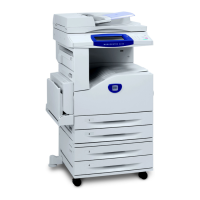
3. Remove the Left Side Plate. (Figure 2)
1. Remove the screws (x2).
2. Remove the Support Glass on both sides.
3. Remove the Left Side Platen.
Figure 2 Removing the Left Side Platen (j0st41139)
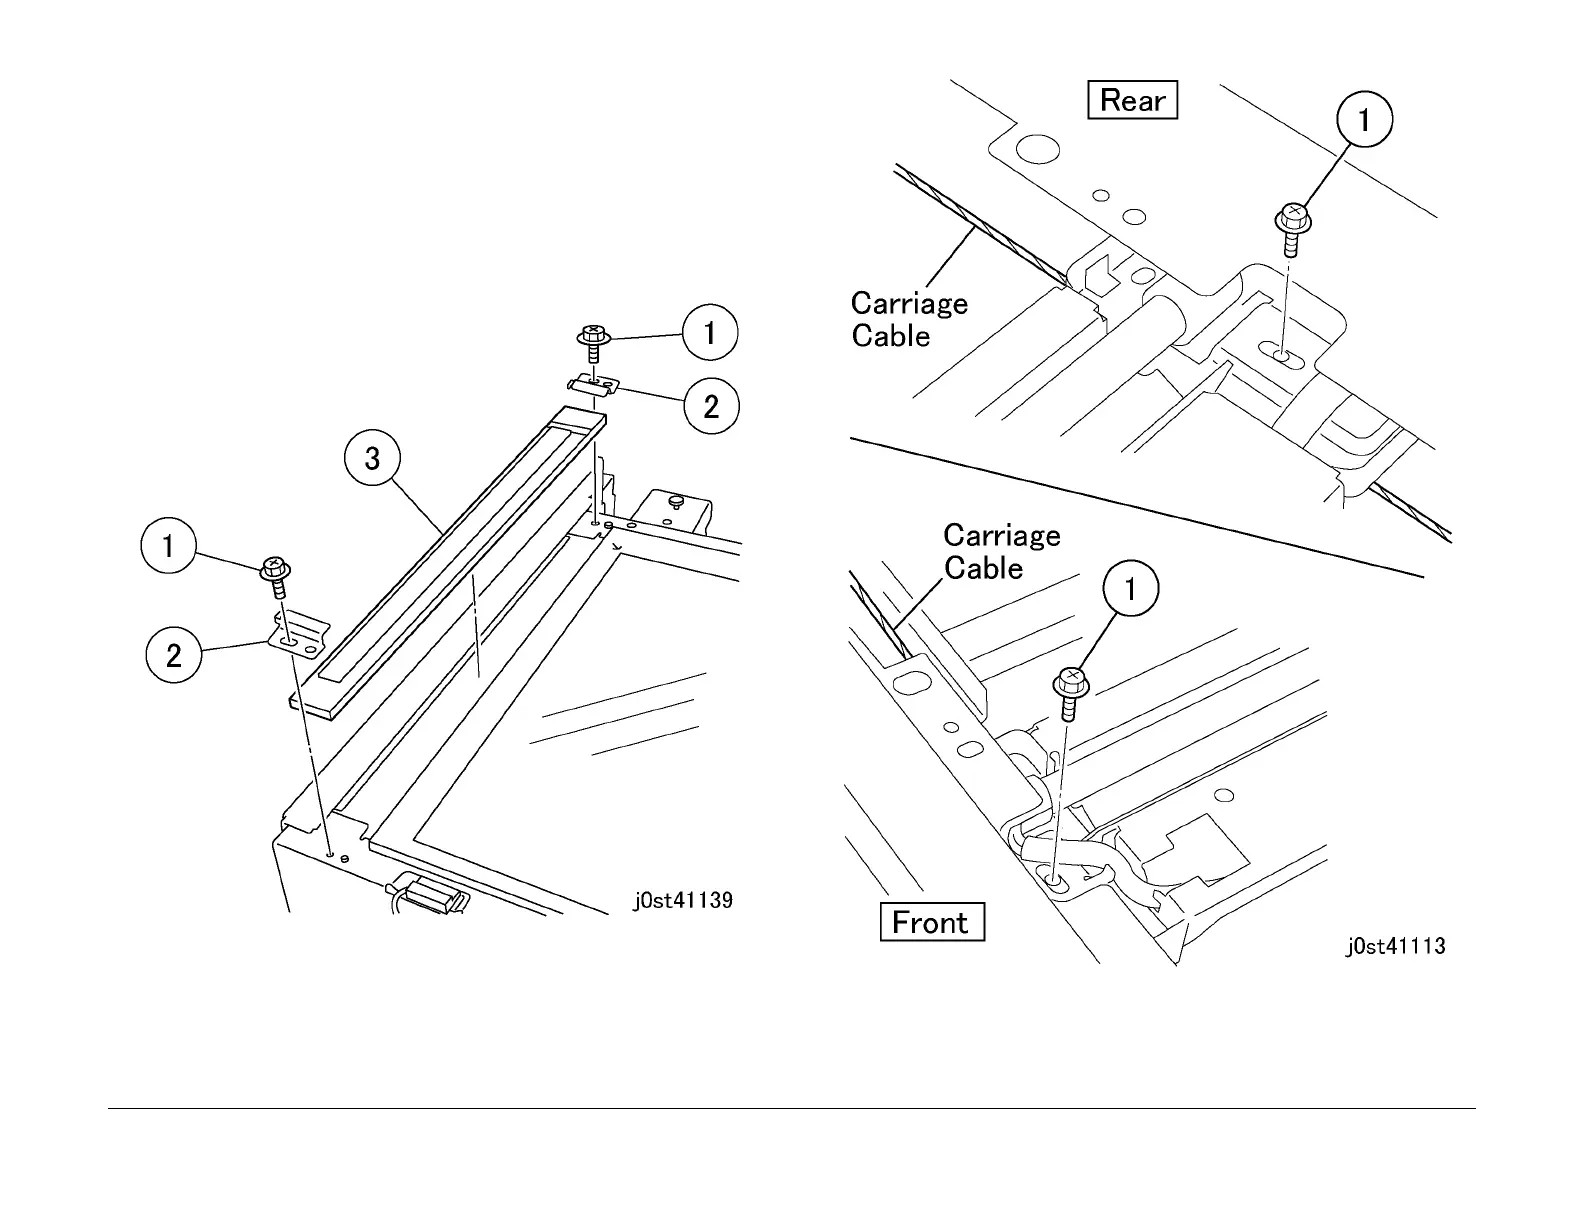
4. Unfasten the Full Rate Carriage from the Carriage Cable. (Figure 3)
1. Remove the screws (x2).
Figure 3 Unfastening the Full Rate Carriage (j0st41113)
5. Remove the Carriage Cable. (Figure 4)
1. Remove the spring from the frame.
2. Detach the cable from the spring.

 Loading...