Note: All data on the USB drive will be erased!
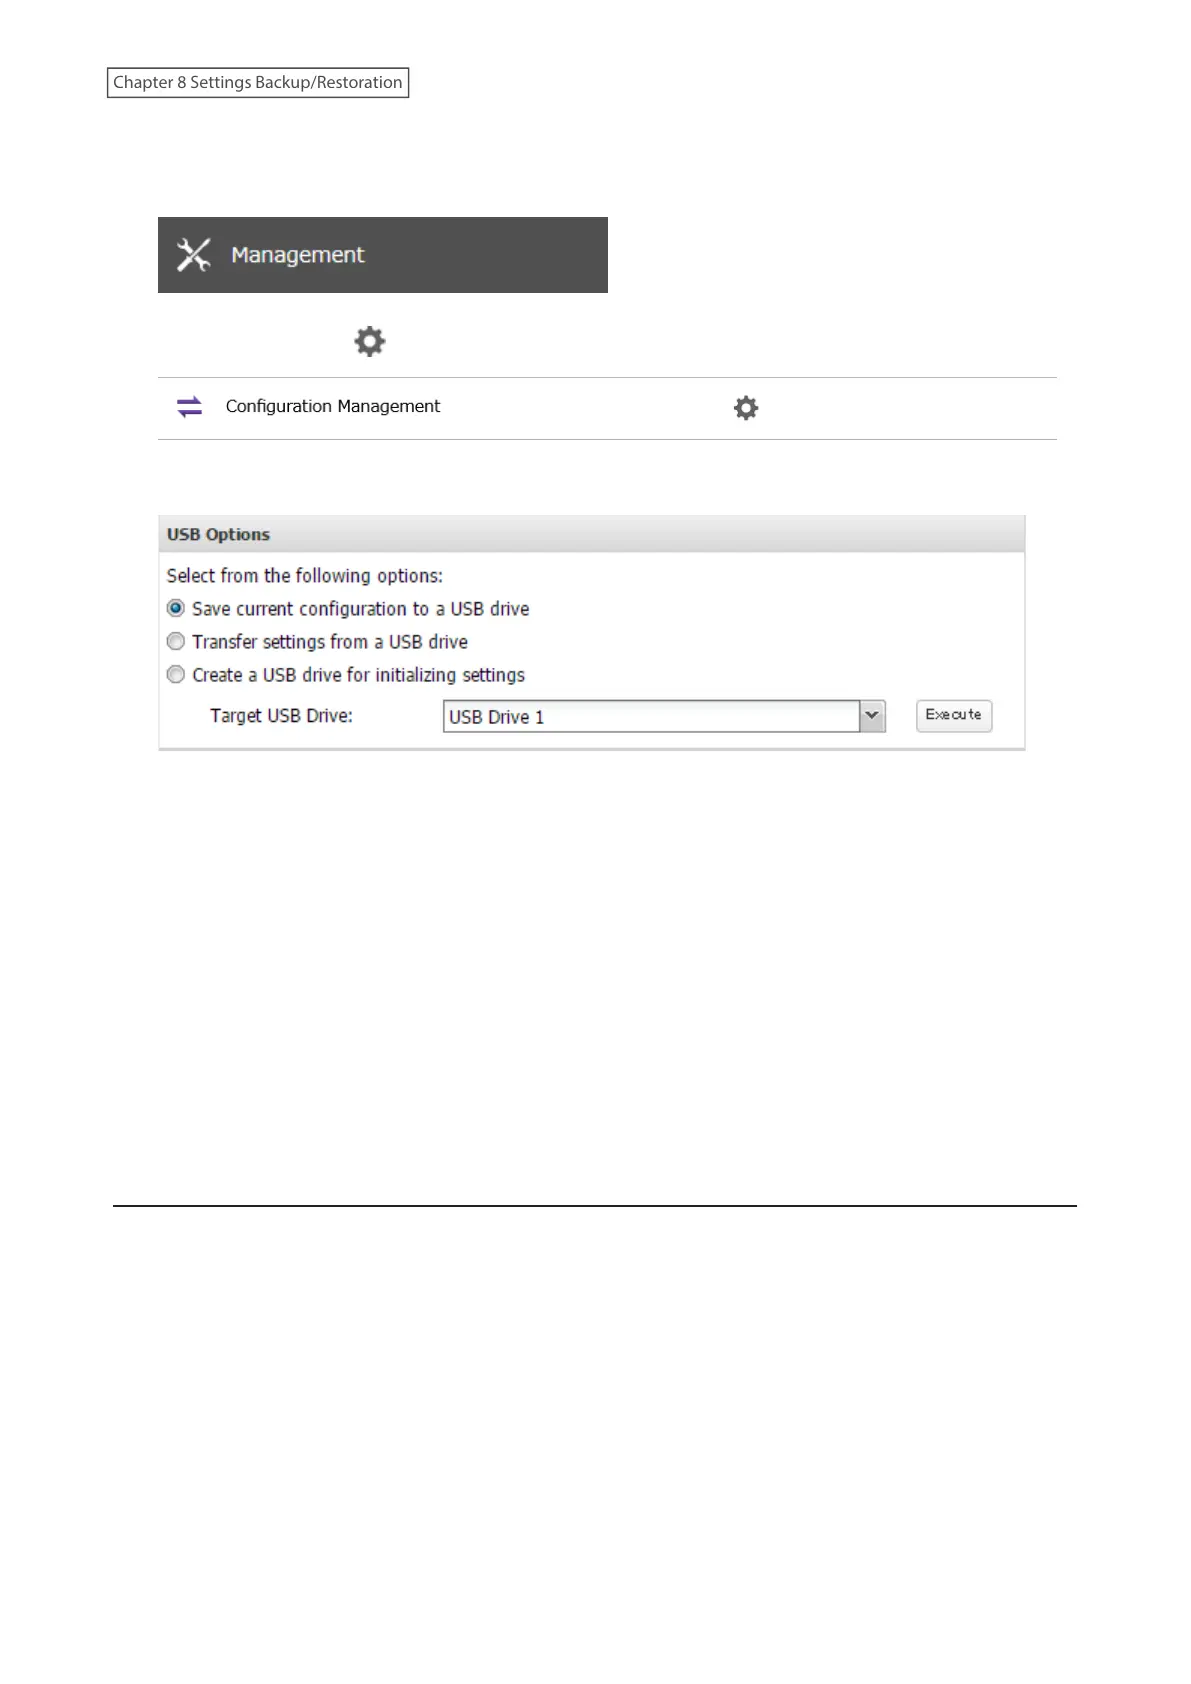
2 From Settings, click Management.
3 Click the settings icon ( ) to the right of “Configuration Management”.
4 Select “Save current configuration to a USB drive”.
5 From “Target USB Drive”, select the USB drive that is connected to the USB port on the TeraStation, then click
Execute.
6 The “Confirm Operation” screen will open. Enter the confirmation number, then click OK.
7 The process is complete once you close the confirmation window that appears.
Troubleshooting:
If the settings are not saved to the USB drive successfully, you may receive an error message such as “The specified
operation cannot be executed.”. Verify:
• The USB drive has a capacity of 1 GB or more.
• The USB drive is not write-protected.
• Failover is configured on the TeraStation.
Applying Settings
The saved settings can be applied to a different Buffalo NAS device of the same series. If applying settings to
another Buffalo NAS device, the unit’s current firmware version will be changed to the version used to save the
settings.
Notes:
• The saved settings on the TS3010 series TeraStations cannot be applied to the TS3020 series TeraStations and vice
versa.
• For TS3010 series TeraStations, saved settings created on another TS3010 unit running firmware version 4.32 or
earlier cannot be applied to a TS3010 unit running firmware version 4.34 and later. For TS3020 series TeraStations,
saved settings created on another TS3020 unit running firmware version 5.18 or earlier cannot be applied to a
TS3020 unit running firmware version 5.20 and later. To apply saved settings to TS3010 or TS3020 units running
later firmware versions, create the settings restoration USB drive again using respective TeraStation units with
later firmware versions.
• Do not apply settings while boot authentication is configured.
212
Chapter 8 Settings Backup/Restoration