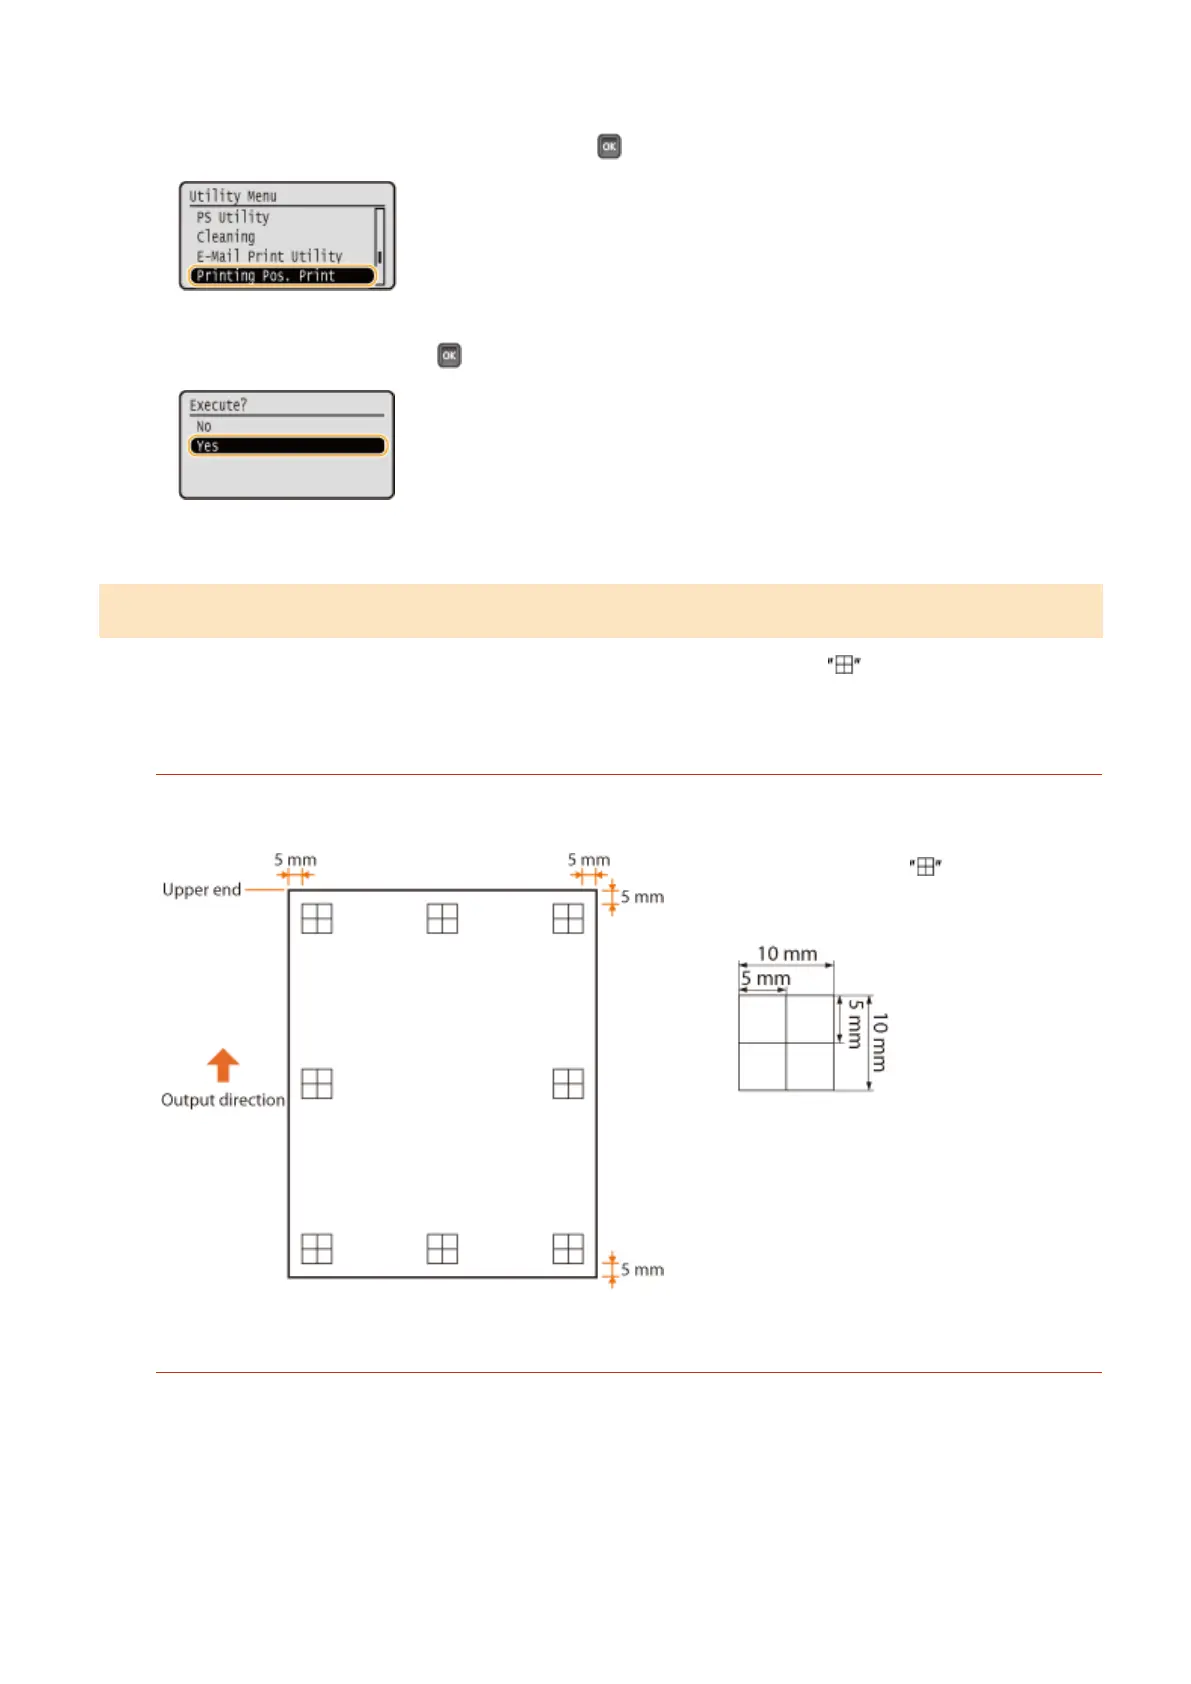
6
Select <Printing Pos. Print>, and press .
7
Select <Yes>, and press .
➠ A printing position adjustment printout is output.
Step 2: Checking the Direction and Distance to Adjust
When Printing Position Adjustment Print is performed, the print position check marks are printed. Determine the
direction and distance to adjust based on those marks. When the print position is normal, all the marks are printed at
a position 5 mm from the nearest edge of the paper.
How to Check Printing Position Adjustment Printouts
The edge of paper that comes out rst when the paper is output is the top of a Printing Position Adjustment
Print. When you check the print position, make sure which edge of the paper is the top.
● The size of the mark for checking the
print position is as shown in the illustration
below.
When the Print Position Is Off-Center
When the print position check marks are printed off the correct position, you need to adjust the print position.
When you adjust the print position, specify the direction using "+" and "-" and the distance using "mm". Use "-"
to shift the print position upward and "+" to shift it downward (vertical position correction). Use "-" to shift the
print position leftward and "+" to shift it rightward (horizontal position correction).
Vertical direction (<Offset Y>)
Horizontal direction (<Offset X>)
Maintenance
533