SECTION 58 - ATTACHMENTS / HEADERS - CHAPTER 3
58-9
7. Clean and degrease the mating surfaces of the
gearbox housing and cover to provide proper
sealant adhesion. Apply a thin bead of silicone
sealant to the mating surface of the gearbox
housing; the silicone bead should be continuous
and inside the bolt pattern.
NOTE: Do not apply an excessive amount of silicone
sealant.
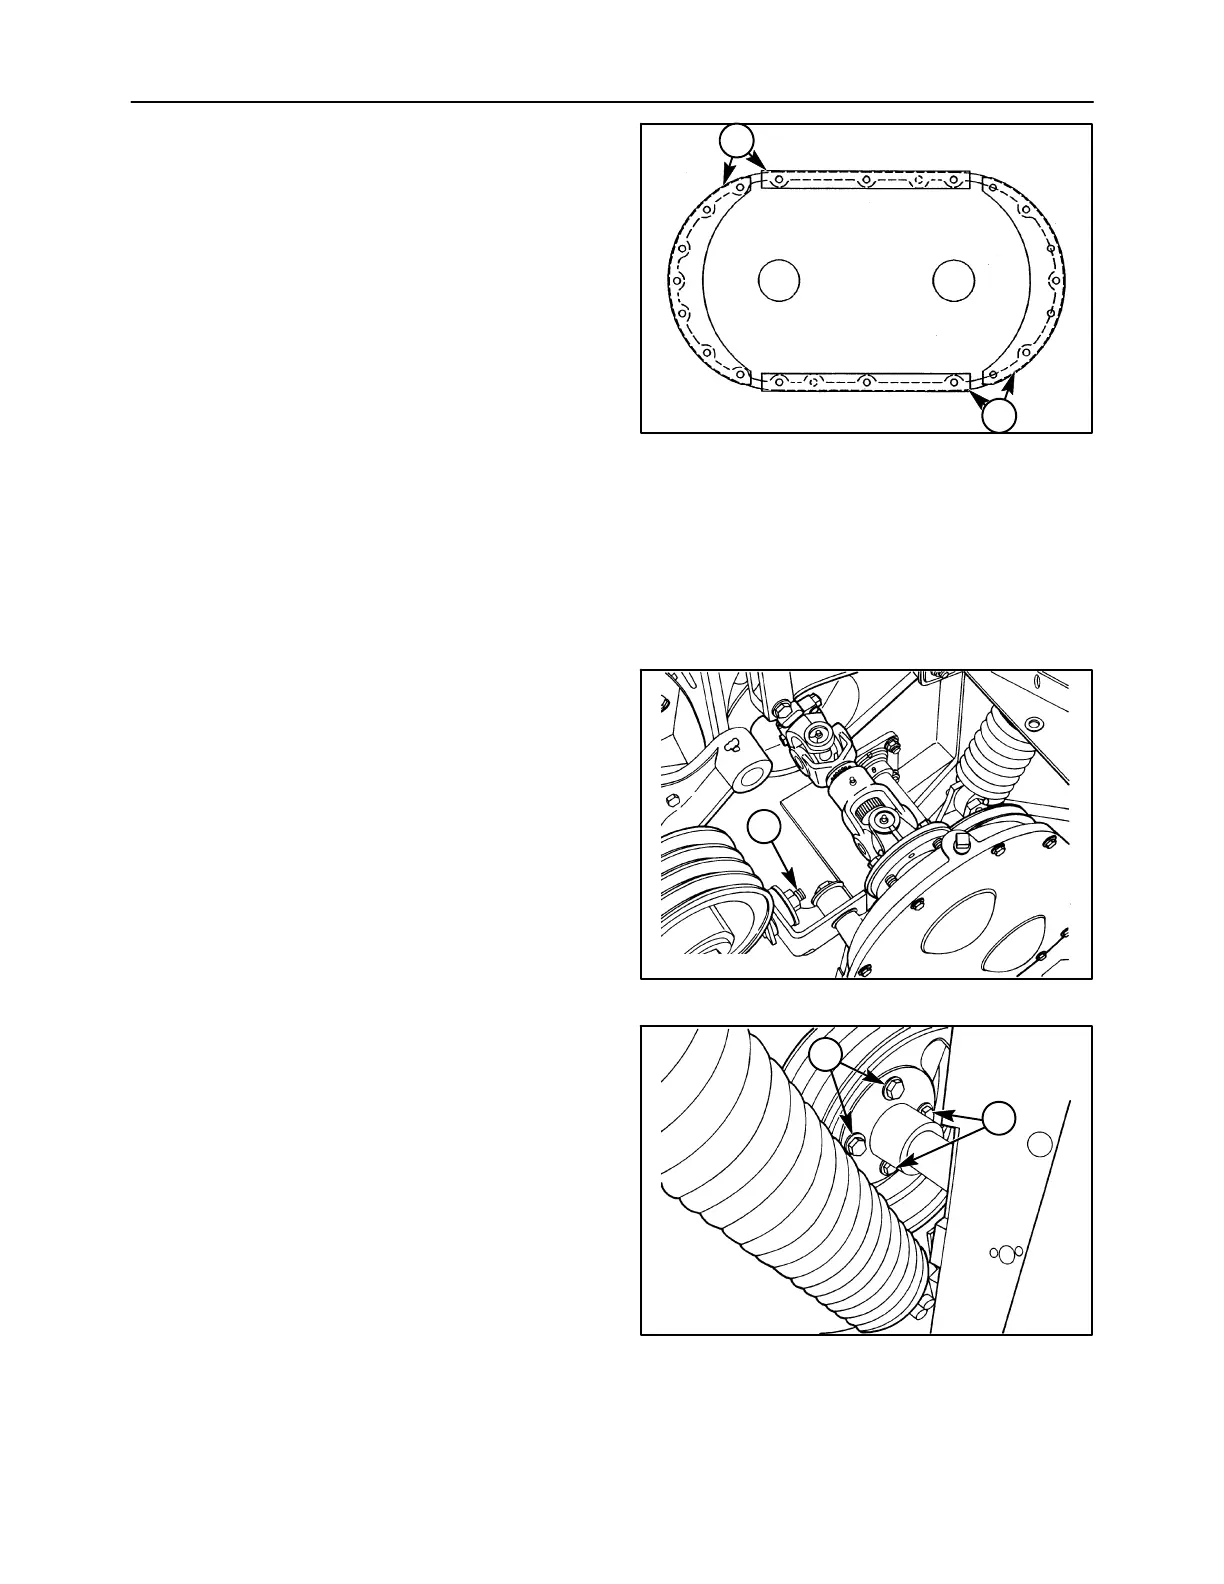
8. Install cover onto gearbox. Position the four
supports, 1, as shown, and install the sixteen cap
screws and washers. Torque cap screws to 25
N⋅m (18 ft-lb). Wipe off any excess silicone
sealant.
1
1
18
CONDITIONER ROLL GEARBOX -
INSTALLATION
The conditioner roll gearbox is easier to install if one
person holds the gearbox up to the side of the unit,
while the second person installs the retaining
hardware.
1. Lift the assembled conditioner roll gearbox up to
the side of the unit, and rest the lower shaft flange
inside the lower roll sheave.
IMPORTANT: The conditioner roll gearbox is heavy
and awkward; use caution not to drop the gearbox as
personal injury or damage to the gearbox may result.
2. Slip the cap screw, 1, through the upper gearbox
mount to support the gearbox.
A3662-1
1
19
Rotate the lower roll until the holes in the sheave
line up with the holes in the lower shaft flange on
the gearbox, and reinstall the four cap screws, 1,
and washers. Remove the upper mount cap
screw, and reinstall it through a washer, the
gearbox mount, washer, frame mount, washer
and lock nut. Torque the lower retaining bolts to
113 N⋅m (83 ft-lb). Tighten the upper mount cap
screw to remove play in the mount; do not tighten
excessively.
A3662-4
1
1
20