SECTION 31 - IMPLEMENT POWER TAKE-OFF (PTO) - CHAPTER 1
31-20
U-Joints -- Disassembly
1. Remove the PTO shaft from the unit, and remove
the shielding, as previously described.
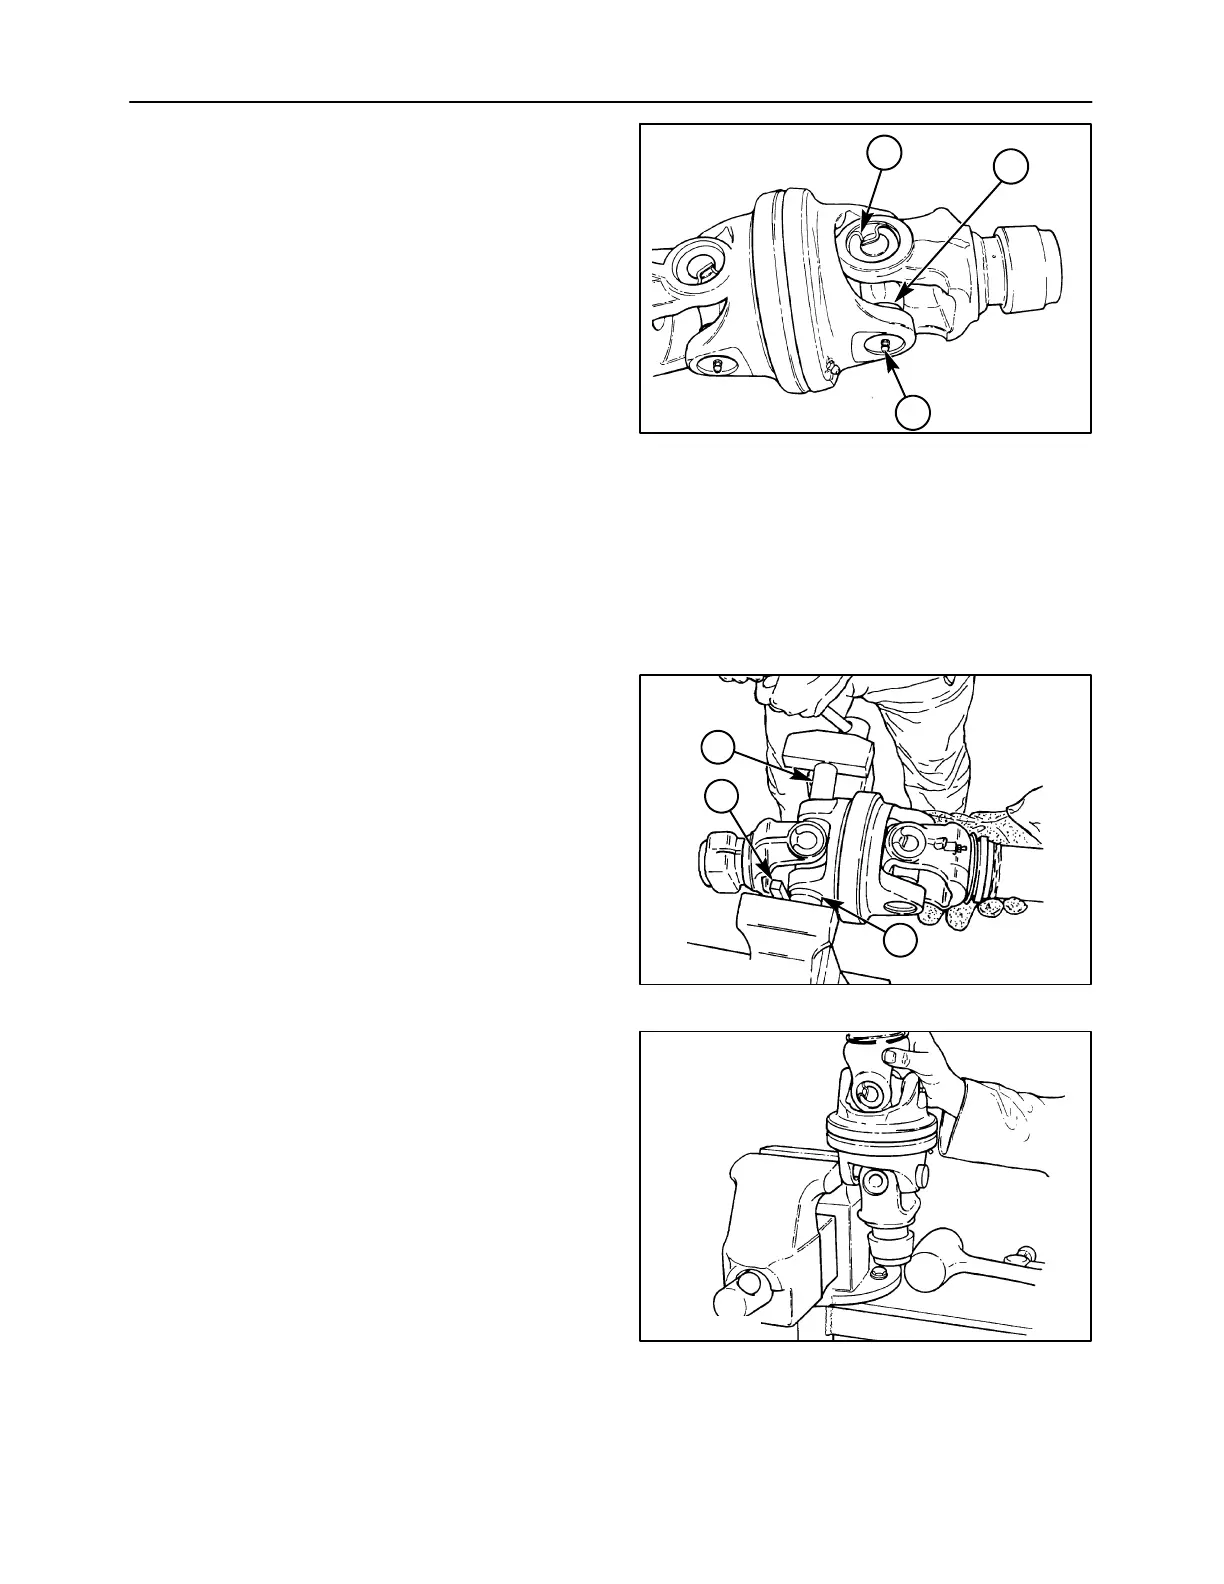
2. To disassemble a Weasler universal joint, the
first step is to remove the snap rings. Use pliers
or a spring pick to remove internal snap rings, 1.
External snap rings, 2, may be removed by using
two flat blade screwdrivers; use a screwdriver to
hold one end of the snap ring, while prying the
other end out of the groove with the other
screwdriver.
50° CV U-joints, Secondary shaft
- snap rings are internal
80° CV U-joints, Primary shaft, shown in Figure 23
- outer yokes use internal snap rings
- CV yokes use external snap rings
Standard U-joint, rear of Primary shaft
- snap rings are external
Remove the grease zerk, 3, from the bearing cup
on the U-joint to be disassembled.
1411/3-5
3
1
2
51
3. A hydraulic or arbor press, or a large bench vise
should be used to press the bearing cups out of
the Weasler yokes; the bearing cups are a very
tight fit in the yokes, and are not easily
disassembled by conventional methods using a
hammer.
Position the joint in a press, or vise as shown,
using a piece of keystock, 1, to support one yoke
ear. Using a socket or bushing driver, 2,
positioned against the opposite bearing, press
the bearing cup, 3, out of the yoke. The bearing
may be pushed out approximately 10 mm (3/8 in)
before the cross will bottom out on the yoke.
1411/3-17
1
2
3
52
4. Grip the loosened bearing in vise, and drive the
yoke off the bearing by striking yoke ear with a
soft-faced hammer or mallet.
5. This same procedure should be followed to
remove the bearing directly opposite the one just
removed, after which the yoke itself may be
removed.
6. Remove the remaining two bearing cups from the
yoke using the same process described in steps
3 and 4.
1411/3-7
53