SECTION 31 - IMPLEMENT POWER TAKE-OFF (PTO) - CHAPTER 1
31-22
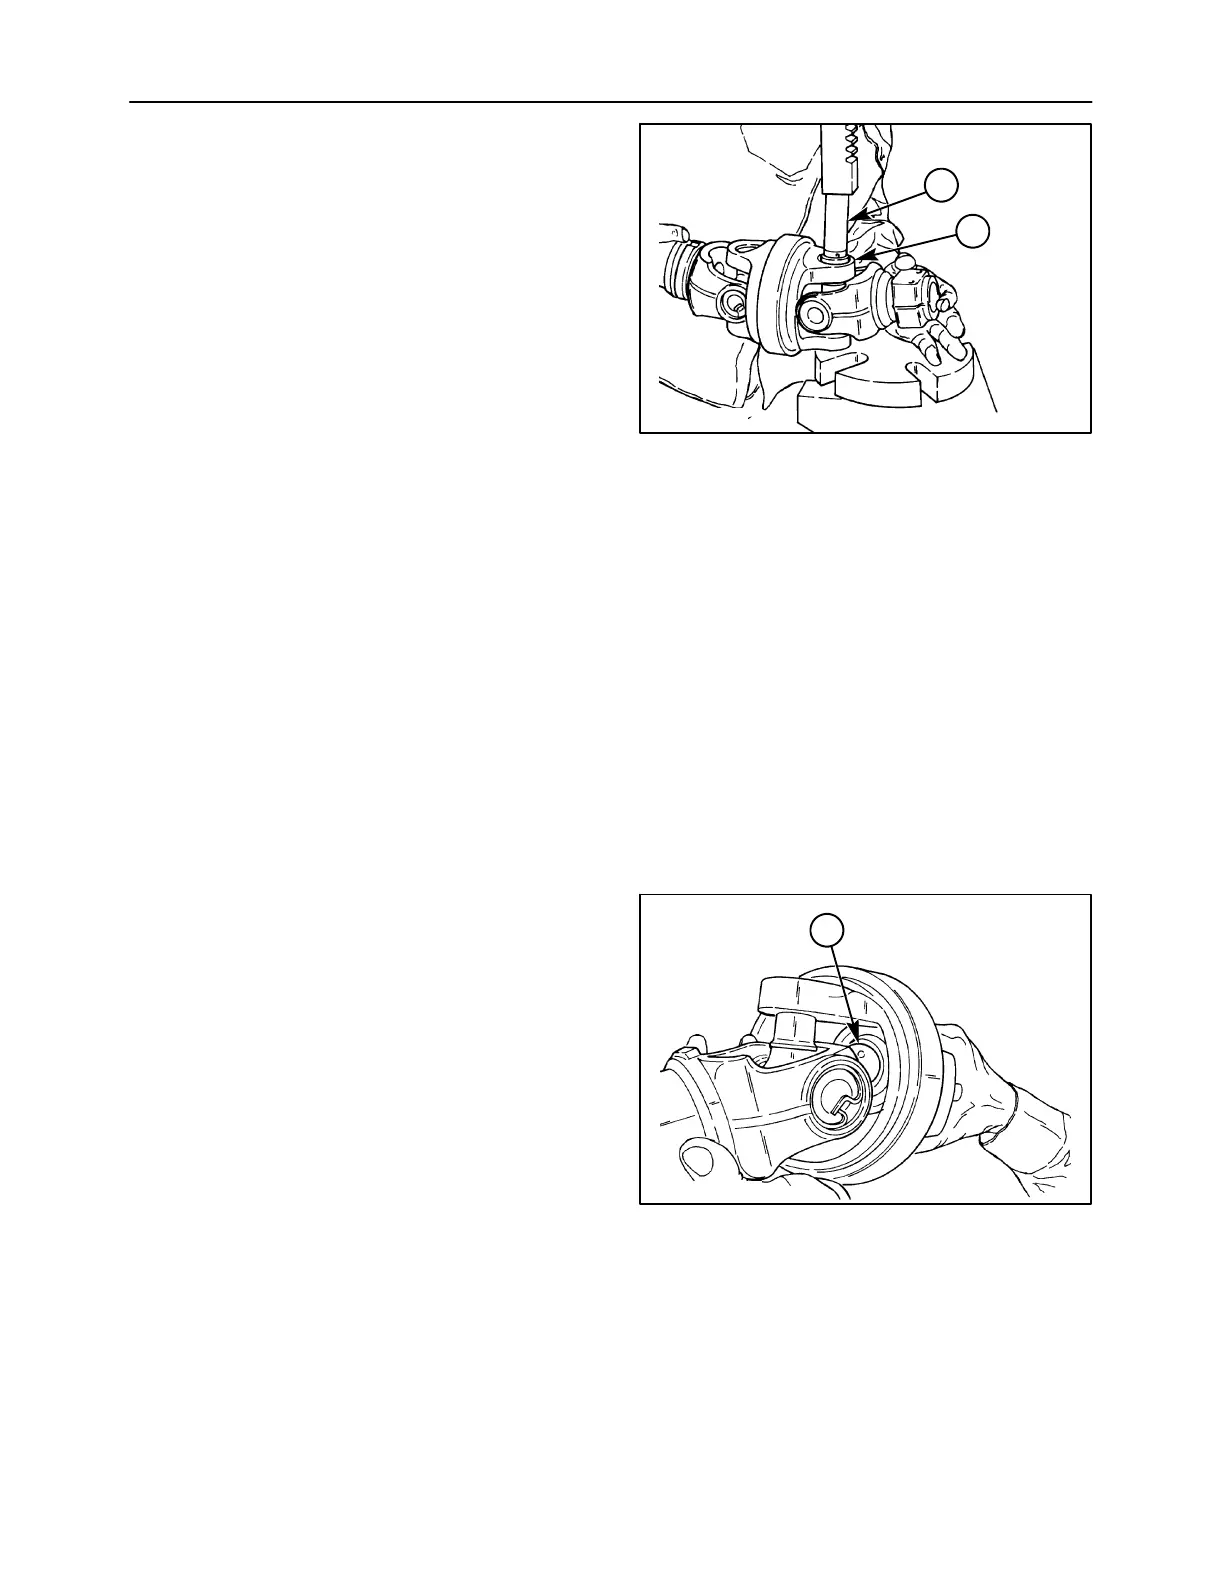
U-Joints -- Assembly
1. To reassemble the U-joint, start one bearing cup
into the yoke ear, and position the center cross
through the yoke.
NOTE: When assembling a CV U-joint, install the
cross into the outer yoke first, and then assemble the
yoke and cross assembly into the intermediate
housing.
Position the yoke in a vise or press, and use a
bushing driver or socket, 1, to press the bearing
cup into the yoke, 2, until the snap ring may be
installed. Remove the yoke from the vise, and
start the second bearing cup into the opposite
yoke ear. Reposition the assembly in the vise or
press, and press the second bearing cup in until
it seats. Install the snap ring to retain it.
NOTE: It may be difficult to rotate the cross after
seating the second bearing. This condition will be
corrected after complete assembly of the U-joint.
2. Position the yoke and cross assembly into the
shaft and yoke assembly to assemble the second
part of the joint. On the CV joints, it is also
necessary to connect the yoke to the opposing
yoke or intermediate plate.
On the 80° CV joint, slide the conical bushing in
the end yoke over the pin on the intermediate
plate to establish the proper connection.
1411/3-19
2
1
56
On the 50° CV joint, slide the ball end, 1, of the
end yoke into the socket end on the opposing
yoke (or vice versa), as shown, to establish the
proper connection.
Install the remaining bearing cups using the
same process described in step 1.
3. After complete assembly of the U-joint, strike the
forged surfaces of all yoke ears with a sharp blow
from a hammer. This will ensure proper seating
of the bearing cups, and eliminate any tightness
to ensure a free flexing joint.
IMPORTANT: Use caution not to strike the bearing
bore area of the yoke, as this will damage the bore
and may cause premature cross bearing failure.
4. Reinstall the shielding as previously described.
1
1411/3-20
57