SMP Gateway User Manual • 111
communications with the PC application. This suspension is illustrated using a red “X” in Figure
12.
SMP Connect terminates the passthrough connection if a problem arises or if there is no data
exchanged during a specified timeout period.
14.2 Setting up Passthrough Connections
Setting up a passthrough connection involves a number of steps.
Using SMP Config, you identify the devices that will be accessed through passthrough
connections. For each device, you provide information such as the SMP Gateway port to be
used for the passthrough connection, and the timeout after which the passthrough connection
is to be terminated after the last data exchange.
In SMP Connect, you identify each application that will communicate with a device via a
passthrough connection. For each of these applications, you specify the type of loopback
connection to be established between SMP Connect and the application, and you define the
communications settings of the loopback connection.
14.2.1 Defining SMP Gateway Passthrough Settings
Using SMP Config, define the SMP Gateway passthrough settings for each device that will be
using a passthrough connection:
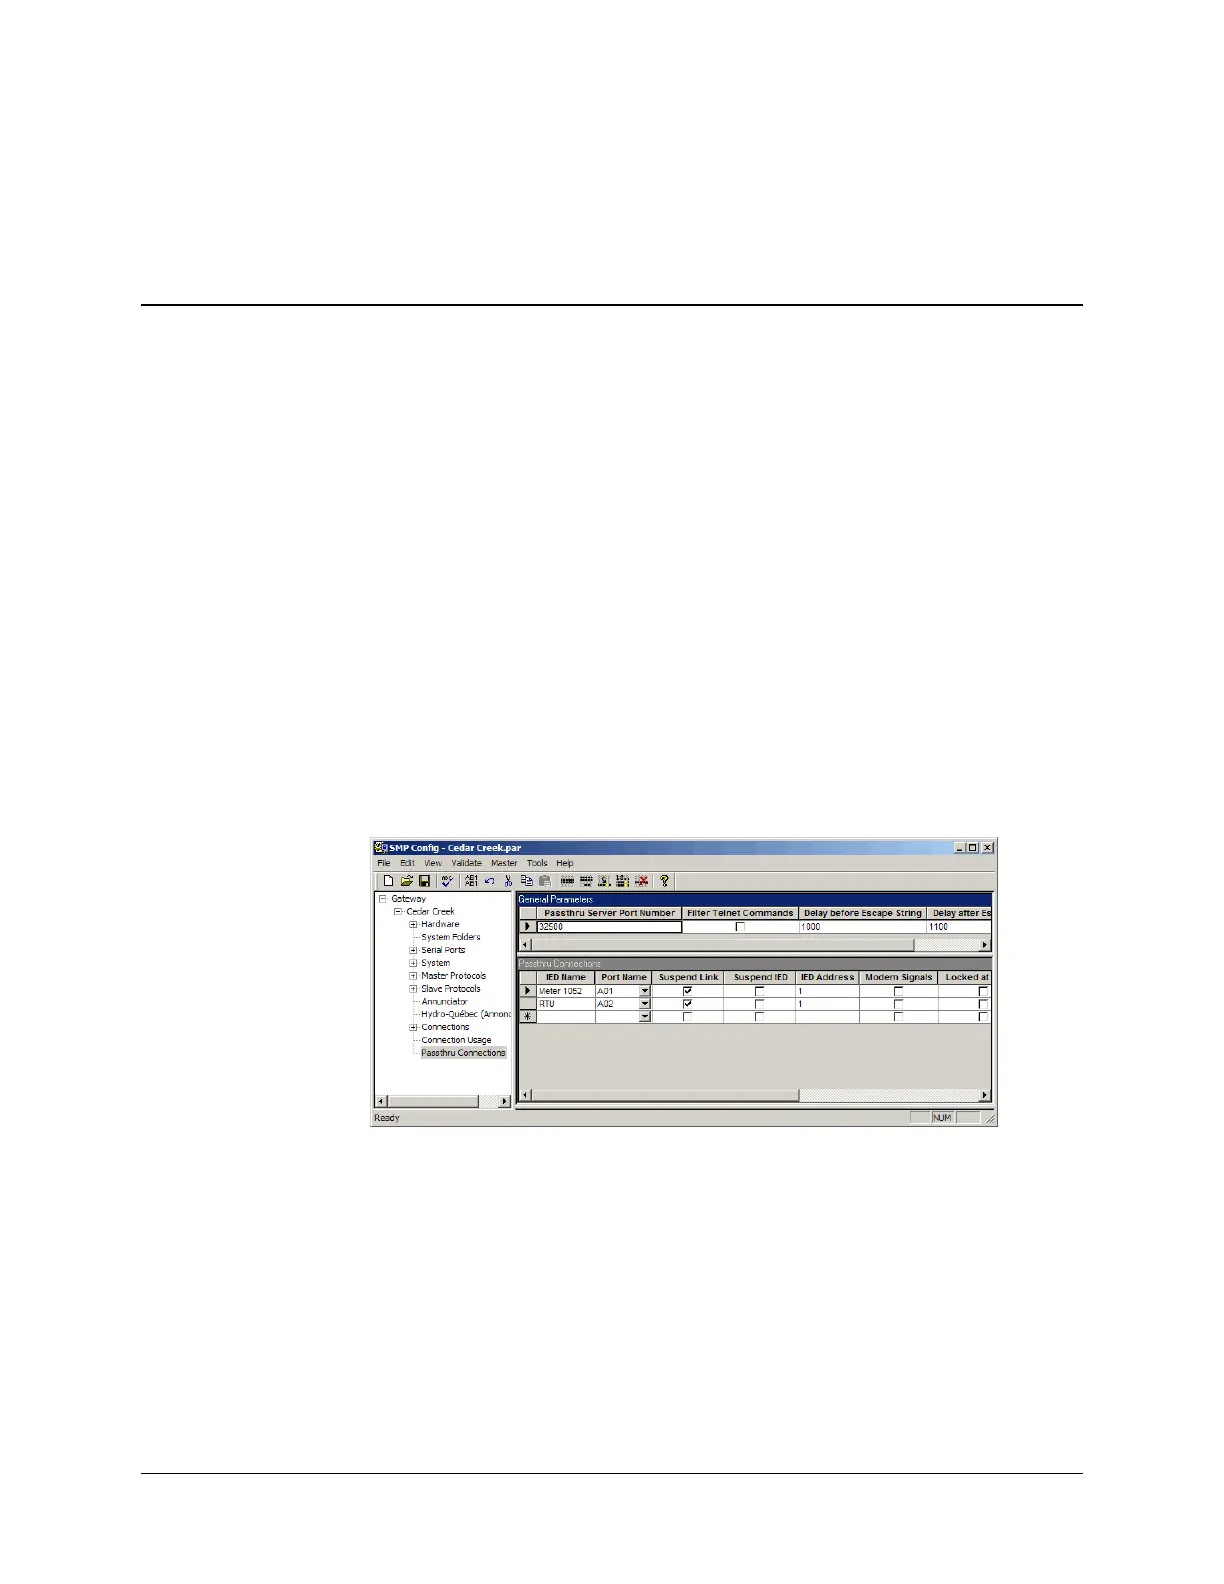
In the left pane, click Passthru Connections.
Create a new connection by entering the following information in the empty row:
IED Name.
This name will be used to identify the device in the SMP Connect program. You should
use the same name that you assigned to the device when configuring the master protocol
component that it communicates with.
Port Name.
Choose the serial port or the TCP/IP connection that links the SMP Gateway to the
configuration port of the device. Some devices use separate configuration and data ports.
If it is the case, you must use two separate cables to connect the device to the