90 Setup AccuVision
®
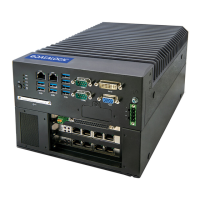
AV6010 Long-Range Camera System Manual
Accu-Sort Systems, Inc. 05-AV6010_Setup_R10.doc
Top Camera Mounting Settings for Dimensioning
1. Select Setup > Mounting > Top from the menu tree.
The Camera Mounting (Top) window is displayed.
2. Set the Camera Pitch Angle to 8.0 degrees.
NOTE: The top-read camera’s mirror must be set for an angle of
8-degrees (± 1). If it is not set for an 8-degree angle, perform the mirror
alignment procedure and then re-run the install wizard before continuing
with the dimensioning setup.
3. Click Update.
Symbologies Settings for Dimensioning
1. Select Setup > Symbologies from the menu tree.
The Symbologies window is displayed.
2. Select ASI Diagnostics from the Code Type drop-down list.
ASI_Diagnostics will appear as a Symbology under Enable Symbologies.
3. Enter a name in the Name field for ASI Diagnostics (e.g., ASIDIAG).
4. Click Add.
5. Select Dimensions from the Code Type drop-down list.
Dimensions will appear as a Symbology under Enable Symbologies.
6. Enter a name in the Name field for Dimensions (e.g., ASIDIM).
7. Click Add.
8. Click Update.
Top Camera Imaging Settings for Dimensioning
1. Select Setup > Advanced > Imaging > Top from the menu tree.
The Imaging (Top) window is displayed.
2. Set the LPI to the same value as the DPI of the top-read camera at the
far reading distance.
3. Enable the Digital Zoom Mode (check in checkbox).
4. Click Update.
 Loading...