144
FUEL SYSTEM
FUEL COMPONENT SERVICING
Installation
Place fue l pump in po sition on crankcase. Apply
Nut Lock to mounting screws. Tighten screws to a
torque of 24 to 36 in. lbs. (2.8 to 4.0 N·m).
Connect the fuel lift pump pulse hose to the crank-
case. Secure with tie strap.
Connect the fuel hoses to the fuel filter. Secure
with Oetiker clamps.
Squeeze primer bulb to prime fuel system. Ho ld
pressure on bulb and check for fuel leaks.
Connect battery cables.
Run outboard and check for fuel leaks.
Vapor Separator Service
Removal
Disconnect the battery cables at the battery.
Relieve fuel system pressure. Refer to Relieving
Fuel System Pressure on p. 142.
Disconnect circulation pump electrical connector.
Remove clamp and fuel supply manifold from top
of circulation pump. Remo ve clamp and va por
vent hose from separator cover.
Remove clamp s and vap or separator cooling
water hoses.
Remove clamps and fuel return manifold and fuel
supply hose from bottom of vapor separator.
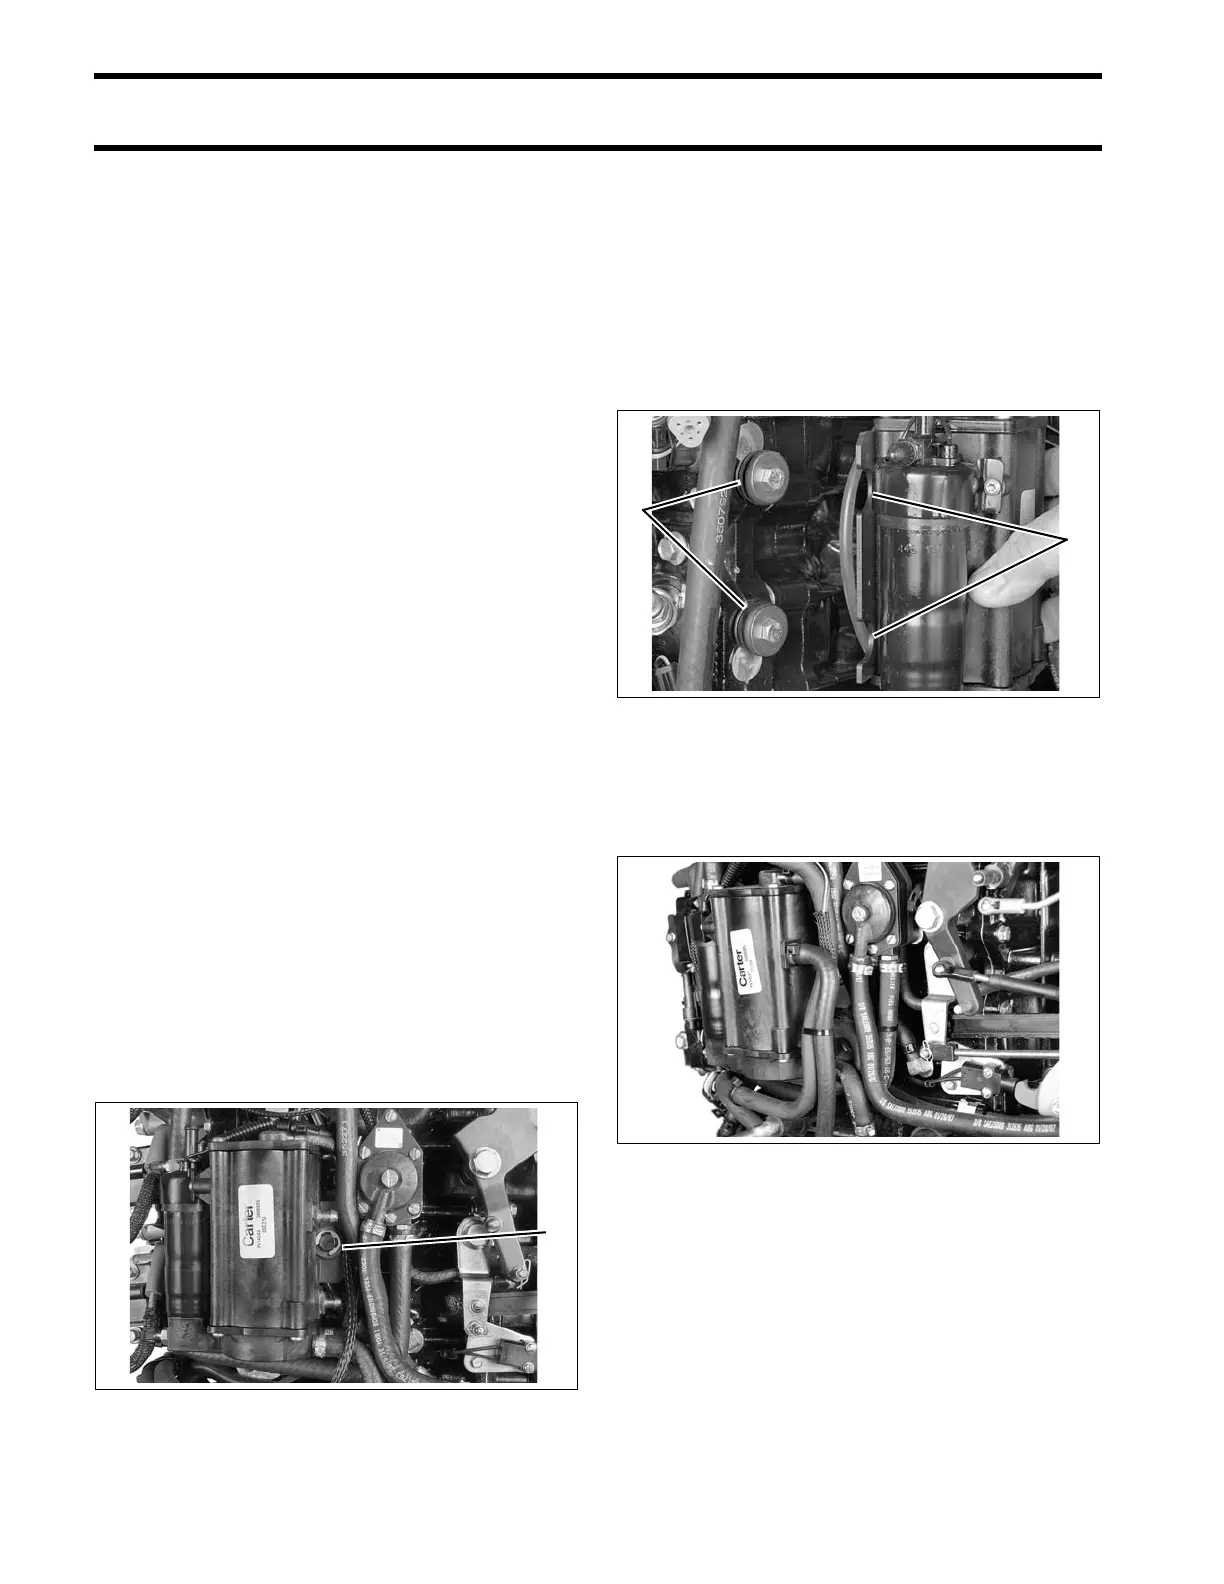
Remove the vapor separator housing retainer clip.
Remove vapor sep arator/fuel pump from t he
mounting stud and slide va por separator housing
from the grooves of the isolator mounts.
Installation
Slide the vap or sep arator b racket no tches in to
grooves of the isolator mounts. Install forward iso-
lator of va por sep arator on mounting st ud a nd
secure with retainer clip.
Install all hoses and manifolds in original locations
and secure with appropriate clamps. Route hoses
and secure with tie straps as shown.
Squeeze primer bulb to prime fuel system. Hold
pressure on bulb and observe for fuel leaks.
Connect battery cables.
Run outboard and check for fuel leaks.
1. Retainer clip 005013
1. Notches
2. Isolator mounts
007859
007860