165
OILING SYSTEM
OIL CONTROL SETTINGS
8
Install decals in a highly visib le location, such a s
one of the following:
• Dashboard/deck of boat, next to key switch
• Deck of boat, next to the remote oil fill
• Deck of boat, next to oil tank assembly
• Oil tank cover
• Cover of oil tank compartment
• Attach to oil tank or oil fill cap.
IMPORTANT: Make sure the engine labe l and
boat decals match EMM programming.
Break-In Oiling
IMPORTANT: DO NOT add oil in the fuel t ank
on Evinrude E-TEC models.
The EMM automatically sup plies extra oil to the
engine as follows:
• 40 – 90 HP: First two hours above 2000 RPM
Follow these steps for outboard set-up:
• Use Evinrude Diagnostics sof tware to m ake
sure the break-in program has been started on
a new outboard.
• Use the diag nostics sof tware to st art break-in
oiling after a powerhead rebuild.
The operator must monitor the oil
tank level to confirm oil consumption. This
may require several hours of operation above
idle.
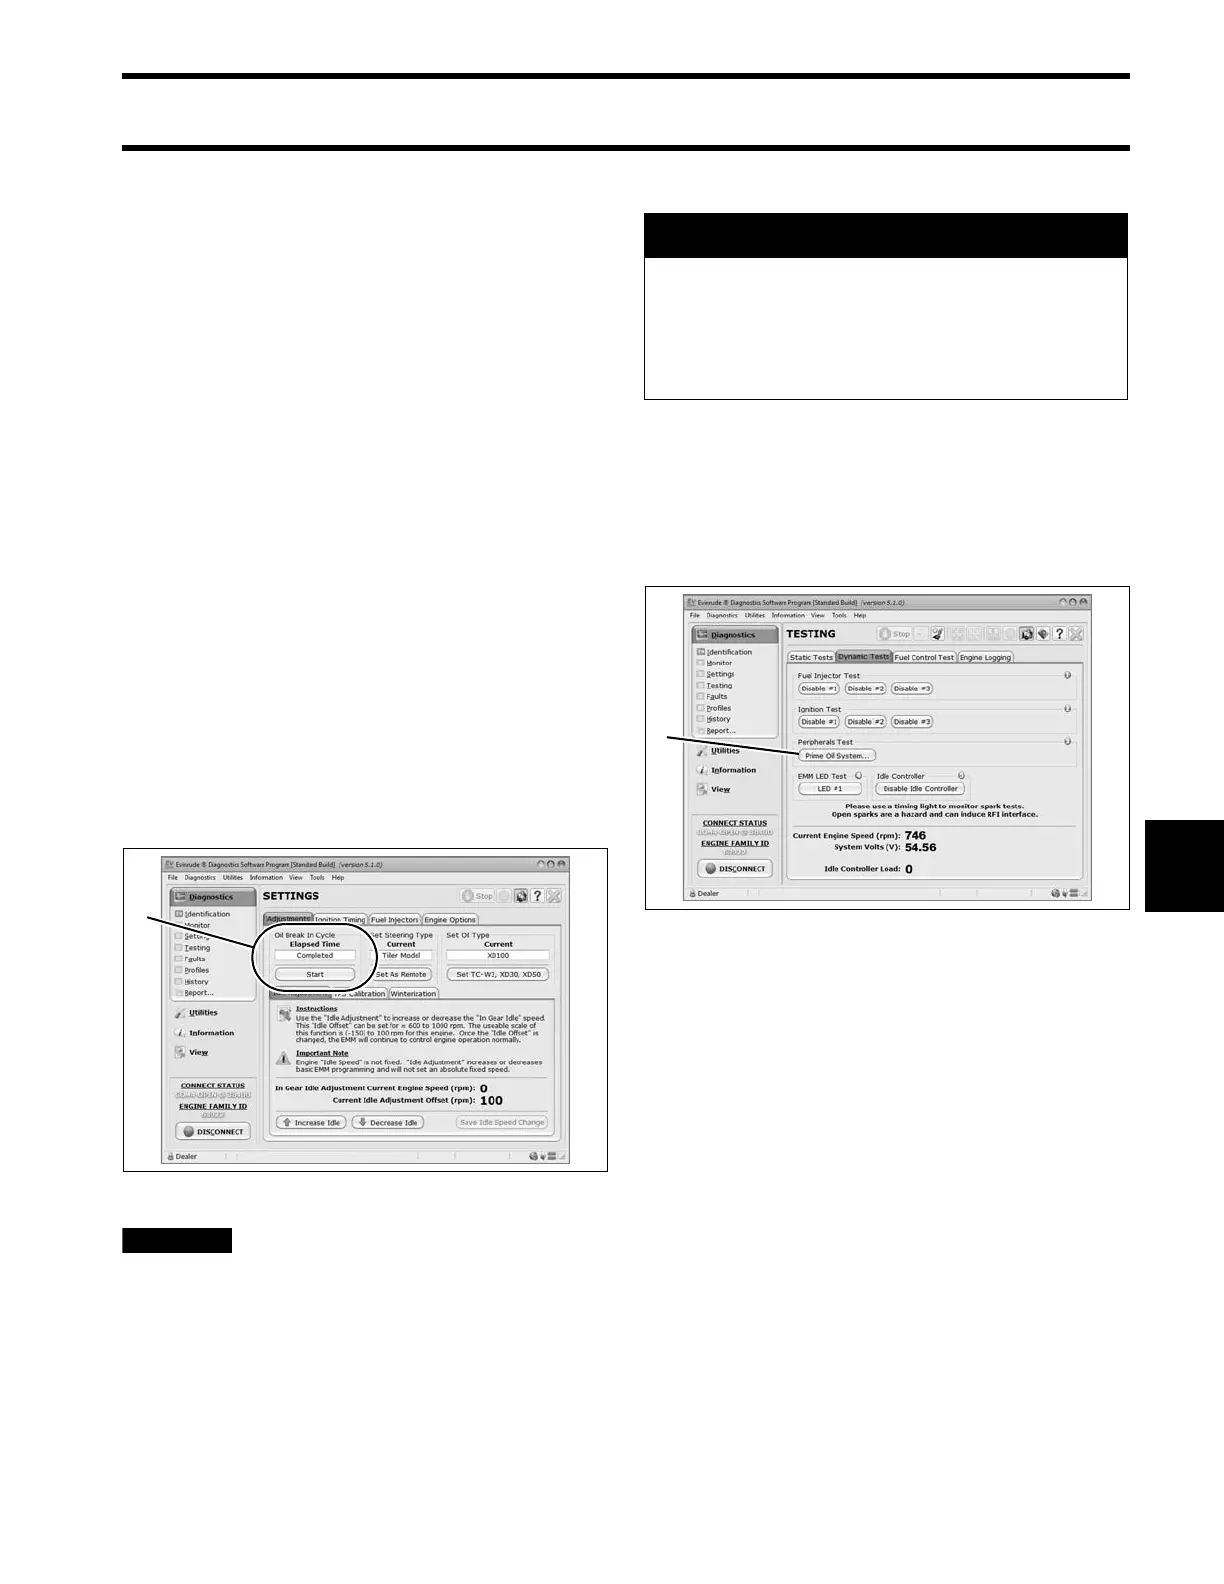
Oil Supply Priming
Start the outboard. Use the oil priming function in
the software to m ake sure t he sy stem is com -
pletely primed.
Use the Prime Oil System button of the Dynamic
Test screen to prime the oil pump.
1. Break-in oil setting 008580
A WARNING
Always use caution while working around
machinery with moving parts. The follow-
ing set-up procedures require running
tests that are performed with the out-
board’s motor cover removed.
Dynamic Test Screen
1. Prime Oil System button
008570A